How to Create Your First Board in Pronnel for CRM, Sales, Projects & Task Management

Learn how to create your first workflow board in Pronnel for task management, CRM, complaint tracking, sales pipelines, project management, and team collaboration. Step-by-step guide with workflows, custom fields, tags, and Kanban boards.
Pronnel helps businesses create custom workflow boards for task management, CRM, complaint management, project tracking, sales pipelines, HR workflows, and team collaboration. In this guide, you will learn how to create your first board in Pronnel, build workflows, add users, configure custom fields, manage tasks, and organize business operations using a flexible Kanban-style system.
Let’s take an example. Suppose you have a short task list with the following stages:
- To Do
- Doing
- Done
Normally, you would have just used an Excel Sheet or a Google Sheet (if you want to read more about How Pronnel is a Better Alternative to Excel Sheets or Google Sheets recommend you refer this blog) to track progress. Typically, your Excel Sheet would have looked something like shown below.
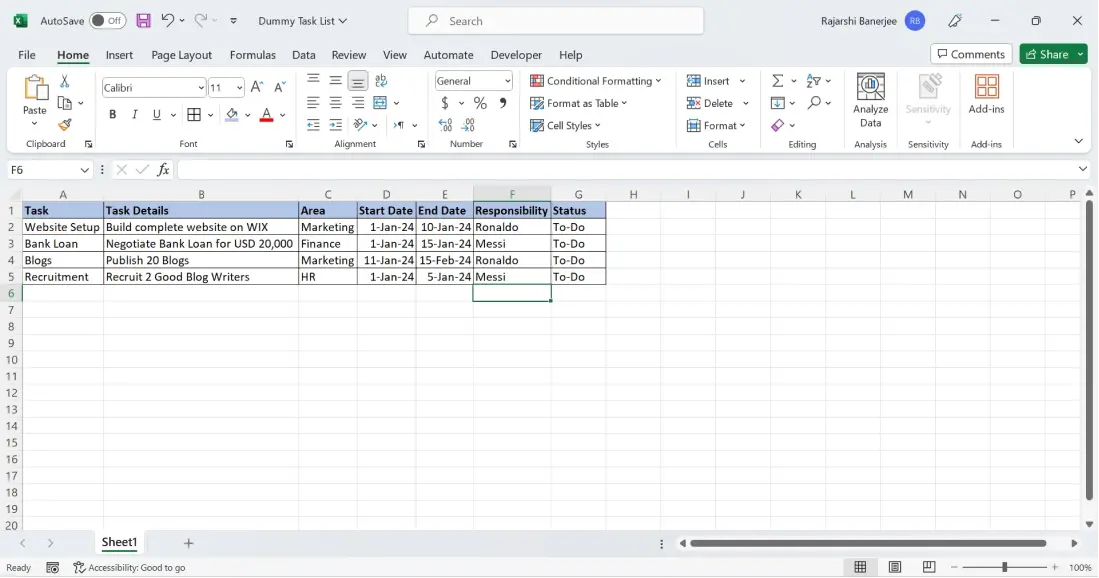
So, here’s how we go about it. We will first create a new board; design the workflow as To Do → Doing → Done; invite other Users; create the Item Fields; Create Tags to separate and classify different Items (in our case we will use the Area Field as Tags) and finally upload data. (If you want to try it out yourself, you can download the data file from here and save it on your PC).
Creating A New Board (Time 2 minutes):
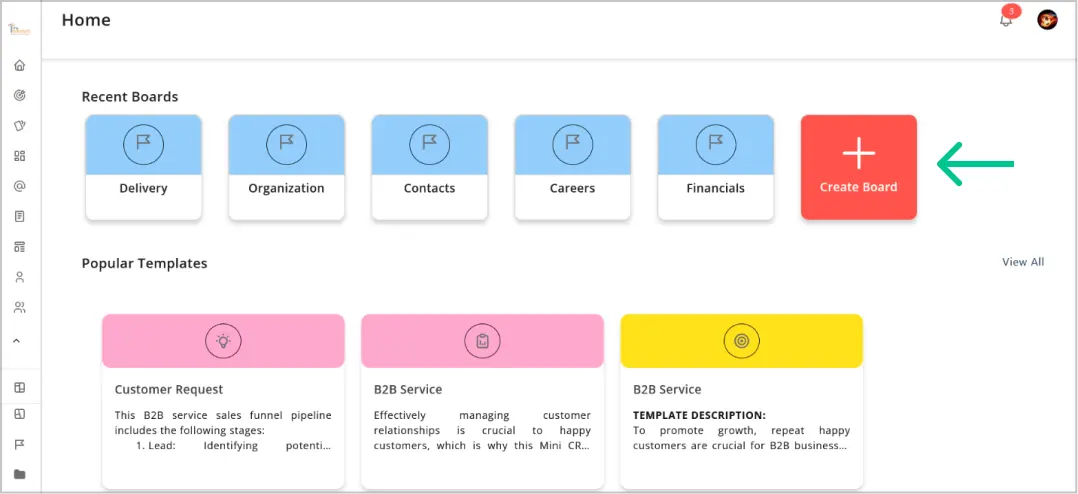
Log on to Pronnel. Beside Workfolder on hover you can see + Icon Click on it. Yow will see 3 options
- Blank Workfolder
- AI Generated
- Import Template
1. Blank Workfolder
The Blank Workfolder option allows you to create a workfolder from scratch and organize your teams, projects, workflows, or business operations exactly the way you want.
When you click on Blank Workfolder, a popup window will open where you can enter the name of your workfolder, such as Frontend Team, Backend Team, Sales Operations, or HR Management.
You can also choose the privacy settings for your workfolder:
- Private: Visible only to members added to the board.
- Anyone: Accessible to everyone in the organization.
Once you click on the Create button, your new workfolder will be created and displayed in the left navigation bar. From there, you can start creating boards, workflows, CRM pipelines, project management systems, complaint management processes, and more.
To learn more about creating boards and workflows, visit our Tutorials page .

2. AI Generated Workfolder
The AI Generated Workfolder option helps you automatically create a complete workflow board based on your business requirements.
Simply describe what you want to manage, such as Insurance Claims, Sales CRM, Project Management, Complaint Tracking, or HR Recruitment.
You can specify details like:
- Workflow stages or buckets
- Required custom fields
- Tags and categories
- Board views such as Kanban, Table, Calendar, or List View
- User roles and permissions
- Task management or CRM requirements
Based on your input, Pronnel AI automatically generates a ready-to-use workflow board with predefined stages, custom fields, tags, and views — helping you save setup time and start managing work instantly.
This is ideal for businesses looking to quickly create CRM workflows, project management boards, sales pipelines, support systems, or operational processes without manual configuration.

3. Import Template
The Import Template option helps you quickly set up a ready-made workflow board for your specific business requirements without creating everything manually.
Simply search for the type of workflow or business process you want to manage, such as Sales CRM, HR Management, Project Management, Customer Support, Team Collaboration, Complaint Management, and more.
Based on your search, Pronnel displays multiple pre-built workflow templates designed for different industries and operational needs.
- Browse and explore available templates
- Preview workflow structure and board views
- Click on Use Template to import the workflow
- Rename the workfolder based on your requirement
- Enable or disable sample data during import
Once the import process is completed, you will receive an email notification confirming that your workflow board is ready to use.
Each template already includes predefined workflow stages, buckets, custom fields, tags, permissions, and views such as Kanban, Table, Calendar, or List View — helping teams start managing work immediately.
You can further customize the imported template by modifying workflows, adding custom attributes, changing tags, updating stages, or configuring views according to your business process.
This option is ideal for businesses looking for a fast and scalable way to implement CRM workflows, sales pipelines, HR operations, task management systems, and project tracking processes.
Build a Custom Workflow for CRM, Tasks & Project Management
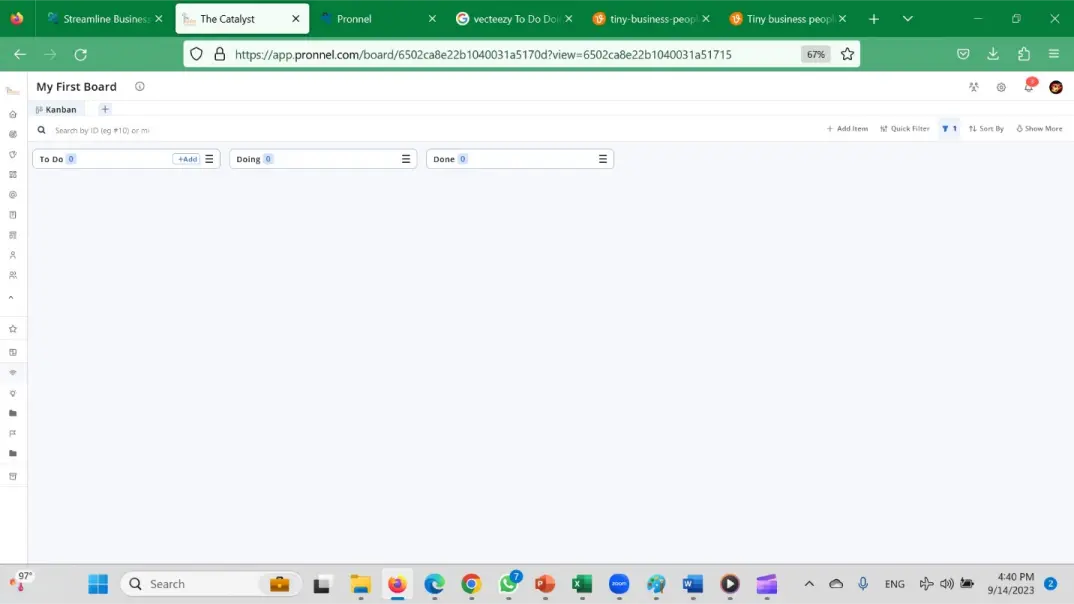
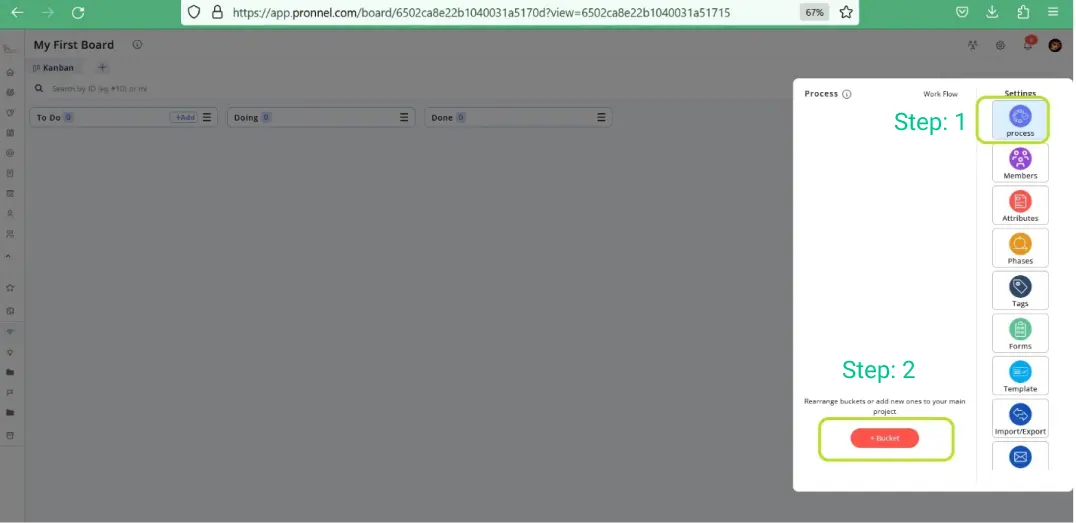
Let’s build a simple workflow with the following stages: To Do, Doing and Done. Click on the Settings Button at the top of your Board.
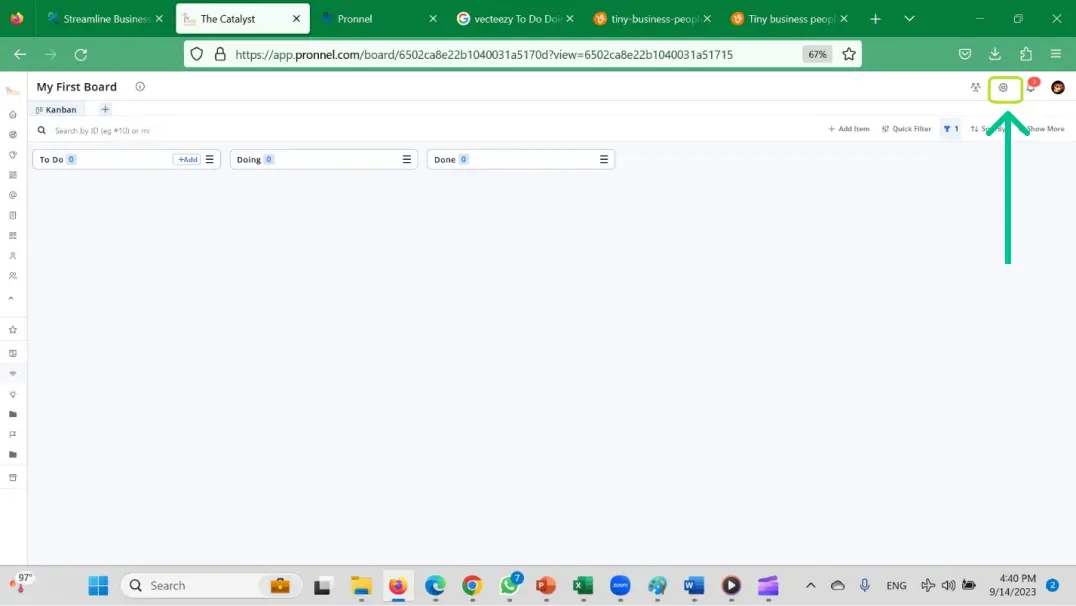
It opens a Menu. Select Process and add new Buckets.
Once you have created the Buckets, click on Workflow to set up the directions in which items move. Unless you are very specific, you could omit this stage.
Once inside the Workflow screen you can drag and drop connectors, decide which stages tickets can be created in and lots more.
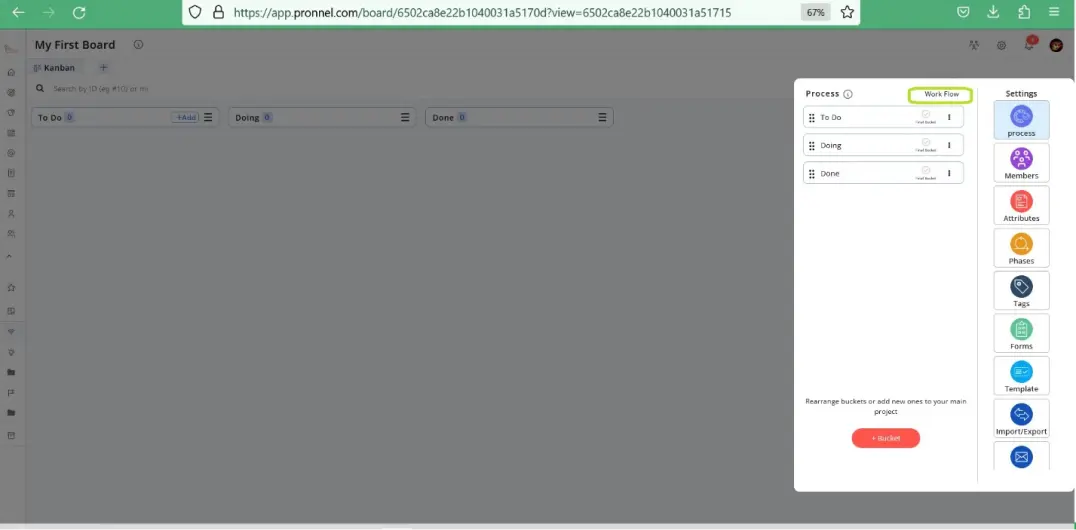
That’s it. Your Board now has a working process.
Adding Users (Time: 1 minutes)
If it’s not a personal Board, you will want to share it with your teammates. Let’s do that.
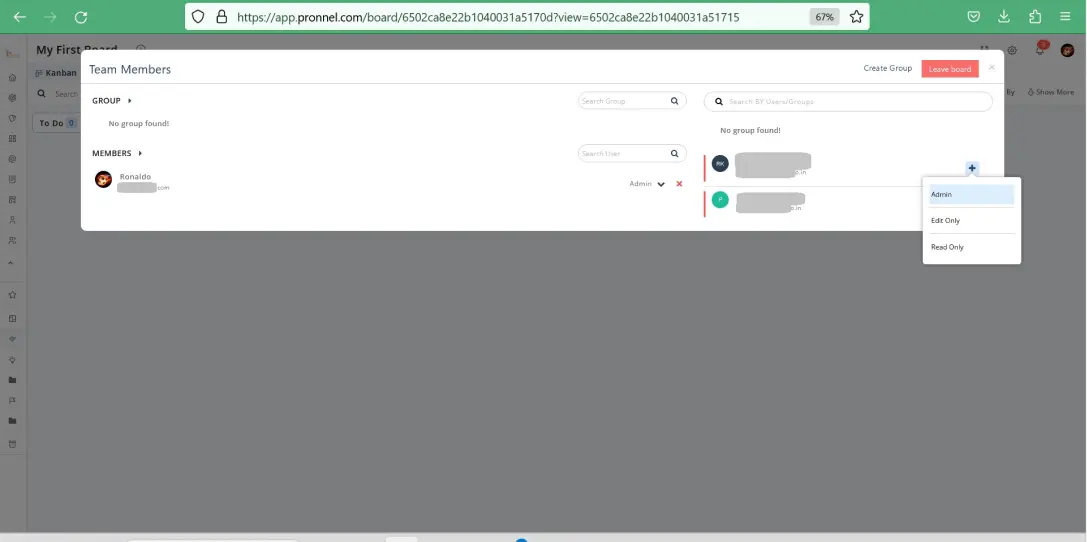
Click on Settings, and then Click on Users.
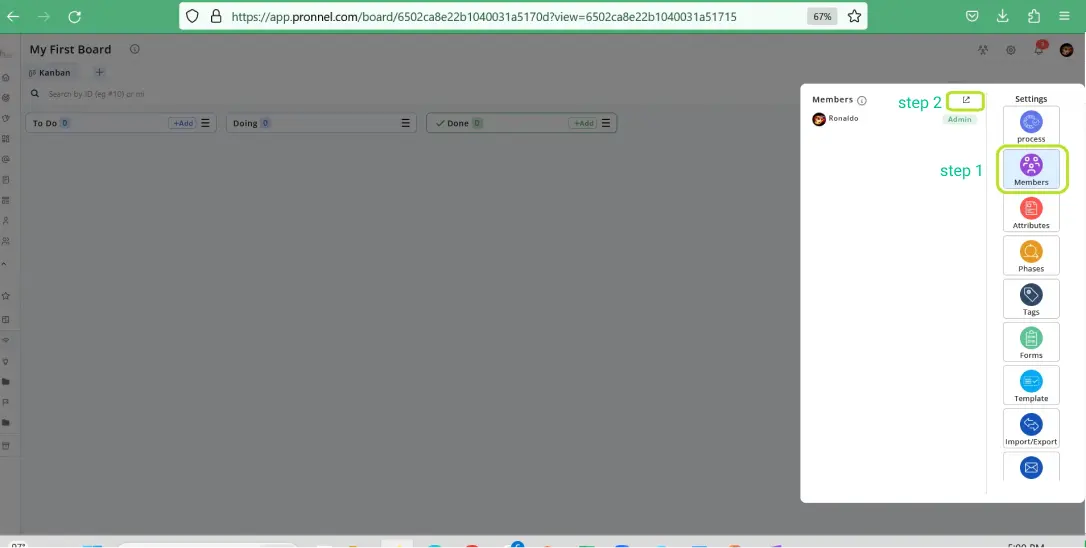
Now you can add members from your organization to the Board as Admin, Edit-Only or Read-Only.
Great, now that we have created a Board, built a workflow, and added Users, let’s decide which Fields will be included.
Create Custom Fields for Your CRM and Workflow Board
Of the fields in the Excel sheet, we will map them as following:
- Task to Title in Pronnel
- Task Details to Task Description in Pronnel
- Start Date to Start Date in Pronnel
- End Date to End Date in Pronnel
- Responsibility to Assignee in Pronnel
- Stage to Bucket in Pronnel
Of these, all the above fields are built in fields except Task Description. Let’s add this Custom Field to the Board.
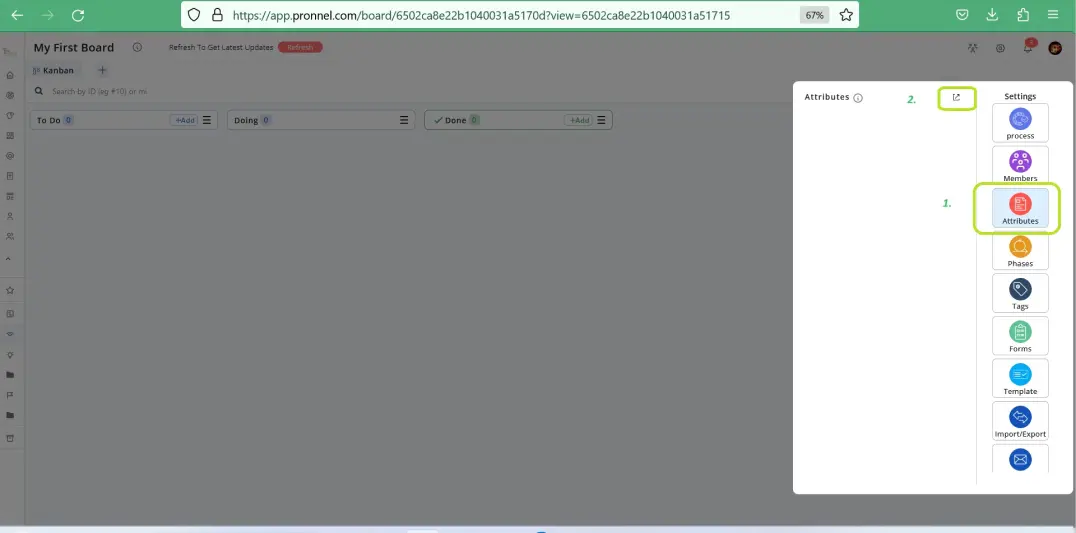
Along with this field let’s add another field- Related Documents where you can upload the related files associated with the Task for easier access later. Open Settings, click on Attributes.
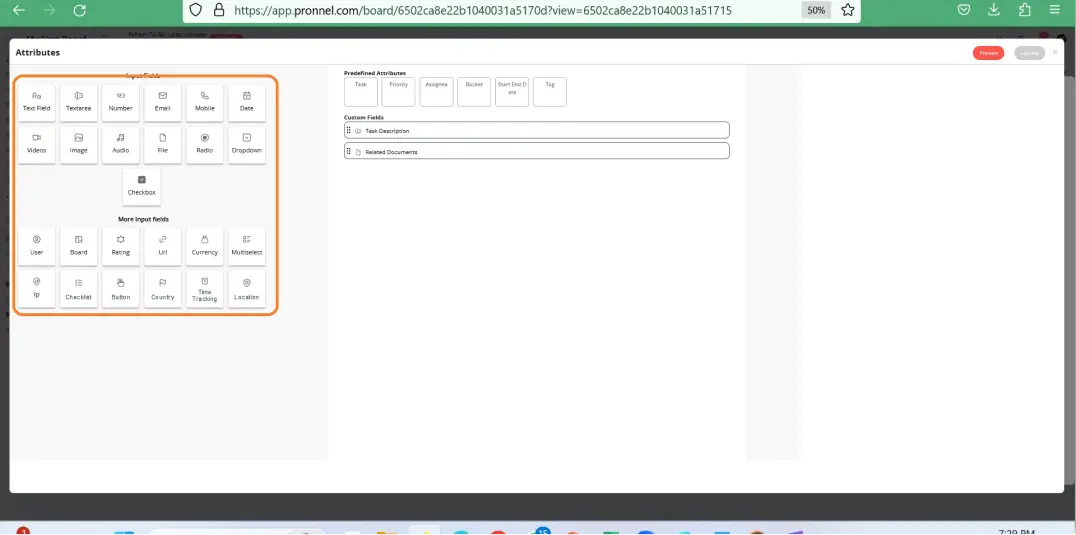
Now, create new attributes. In Pronnel you can create Custom Fields of the following 25 types:
You can access Predefined fields also such as title,tag,assignee etc.
You can access workfolder attribute to the board where its setiing will remain same as a workfolder you can access in your board aswell.
| Text Field | Date | Radio | Rating | Checklist |
|---|---|---|---|---|
| Text Area | Video | Dropdown | URL | Button |
| Number | Image | Checkbox | Currency | Country |
| Audio | User | Multiselect | Time Tracking | |
| Mobile | File | Board | IP | Location |
Go ahead and now create the two fields. Don’t worry about the missing field on Area. We will show you another nifty feature which can be used in Pronnel- Tags.
Create Tags to Organize Tasks, Leads and Projects
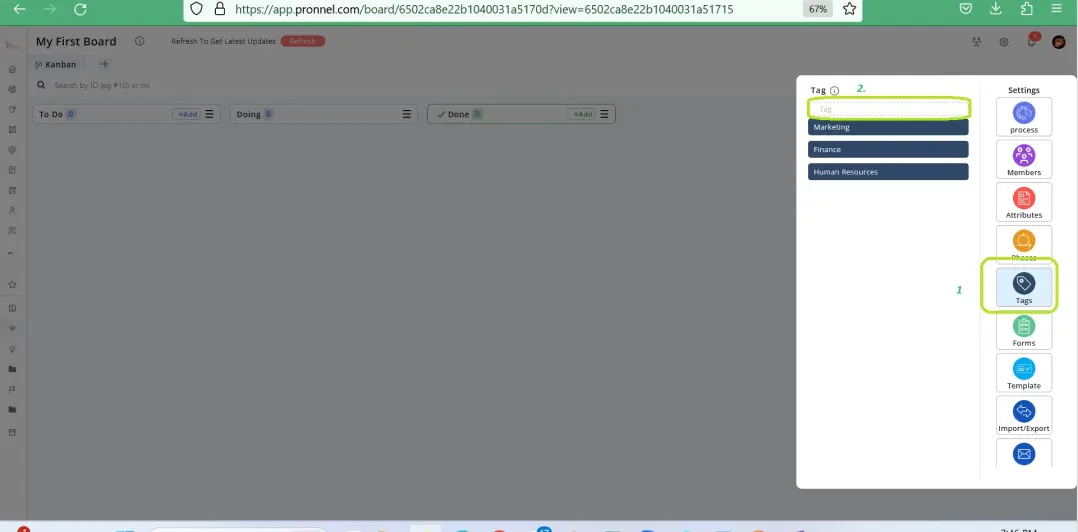
Go to Settings, Click on Attributes then toggle to Predefined Attributes and create the Tags – Marketing, Finance, Human Resources.
Adding Data to You Board.
There are two ways of doing this. If there are few tickets, you can individually create tickets and update into Pronnel. Just click on Add Items.
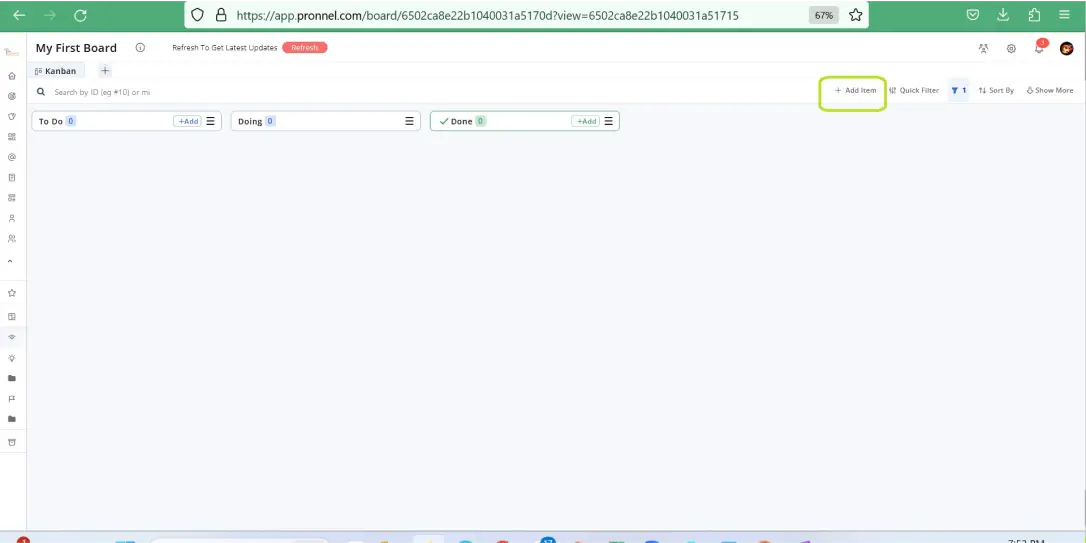
A new screen opens where you can add new tickets.
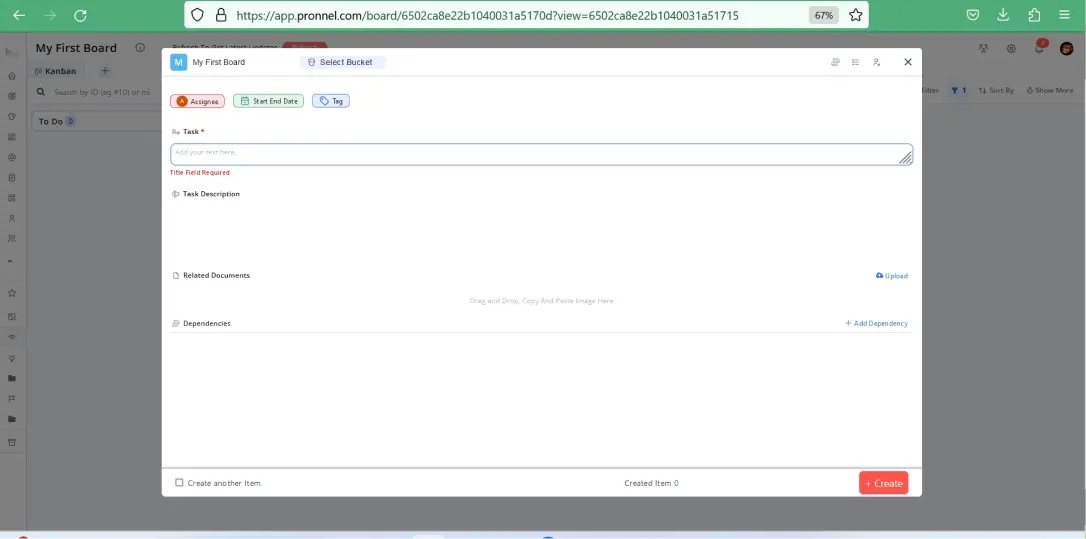
The other way is to Import tickets from a Spreadsheet. For sake of brevity, we will omit that step here. But if you are interested you can explore further in our video.
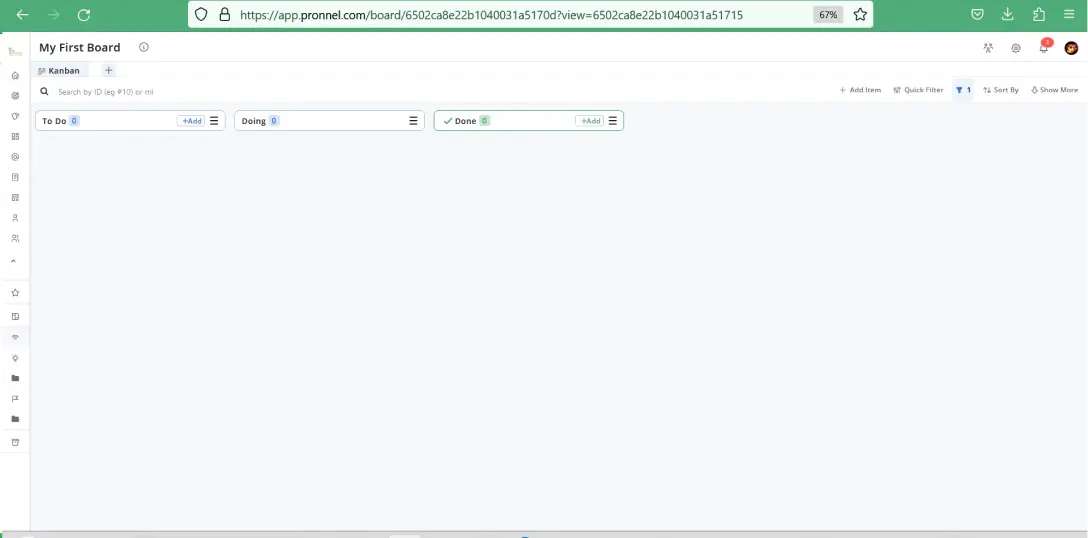
That’s it. You are set. At the end of the process your Board should look something like this.
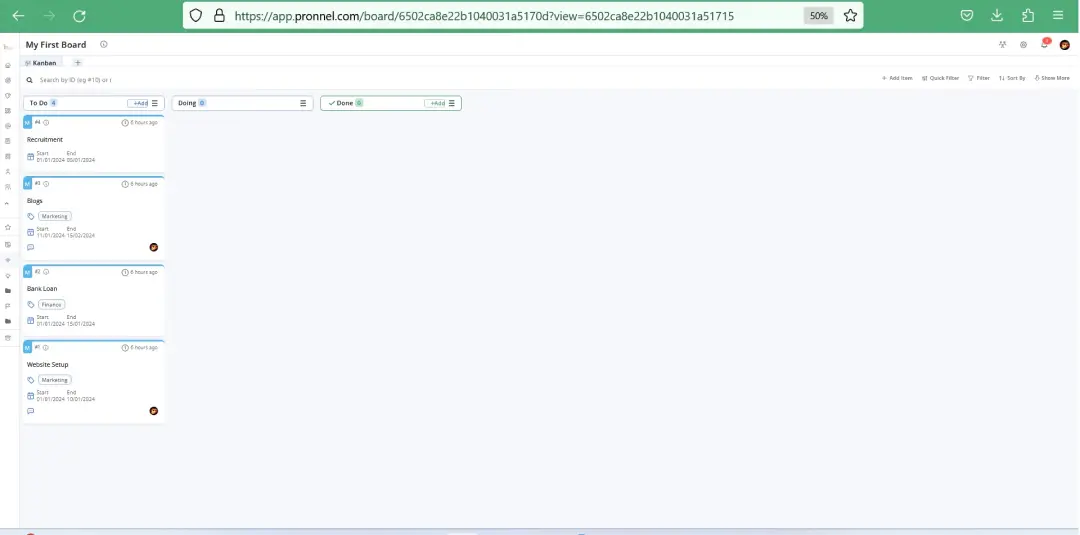
If you are interested in trying it out yourself, you can download the Excel file given here and replicate the steps yourself.
Frequently Asked Questions About Frequently Asked Questions About Creating Board
What is a workflow board in Pronnel?
A workflow board in Pronnel helps businesses manage tasks, CRM pipelines, complaint tracking, project workflows, and team collaboration using customizable stages and Kanban views.
Can I use Pronnel for CRM and sales pipeline management?
Yes. Pronnel can be used for CRM, sales tracking, lead management, customer support, complaint management, and project workflows.
Does Pronnel support custom fields?
Pronnel supports multiple custom field types including text fields, dropdowns, files, checklists, users, dates, images, ratings, and more.
Can I import Excel data into Pronnel?
Yes. You can import tasks, leads, projects, and workflow data from Excel Sheets or Google Sheets into Pronnel boards.
Conclusion
Pronnel helps businesses simplify workflow management, CRM operations, task tracking, complaint handling, project management, and sales pipeline management using customizable boards and Kanban workflows. Whether you are managing teams, projects, leads, or customer operations, Pronnel provides a flexible workflow platform for growing businesses.
Subscribe To Pronnel Blogs
Get the latest updates on AI CRM software, WhatsApp automation, business productivity, customer engagement, and workflow automation directly to your inbox.