A Step-by-Step Guide to Importing Excel Data into Pronnel Boards
Managing data efficiently is crucial for any organization, and Pronnel provides a seamless solution to transform Excel spreadsheet data into organized Pronnel boards. This step-by-step guide walks you through the process, ensuring a smooth transition from Excel to Pronnel.
Understanding the Setup:
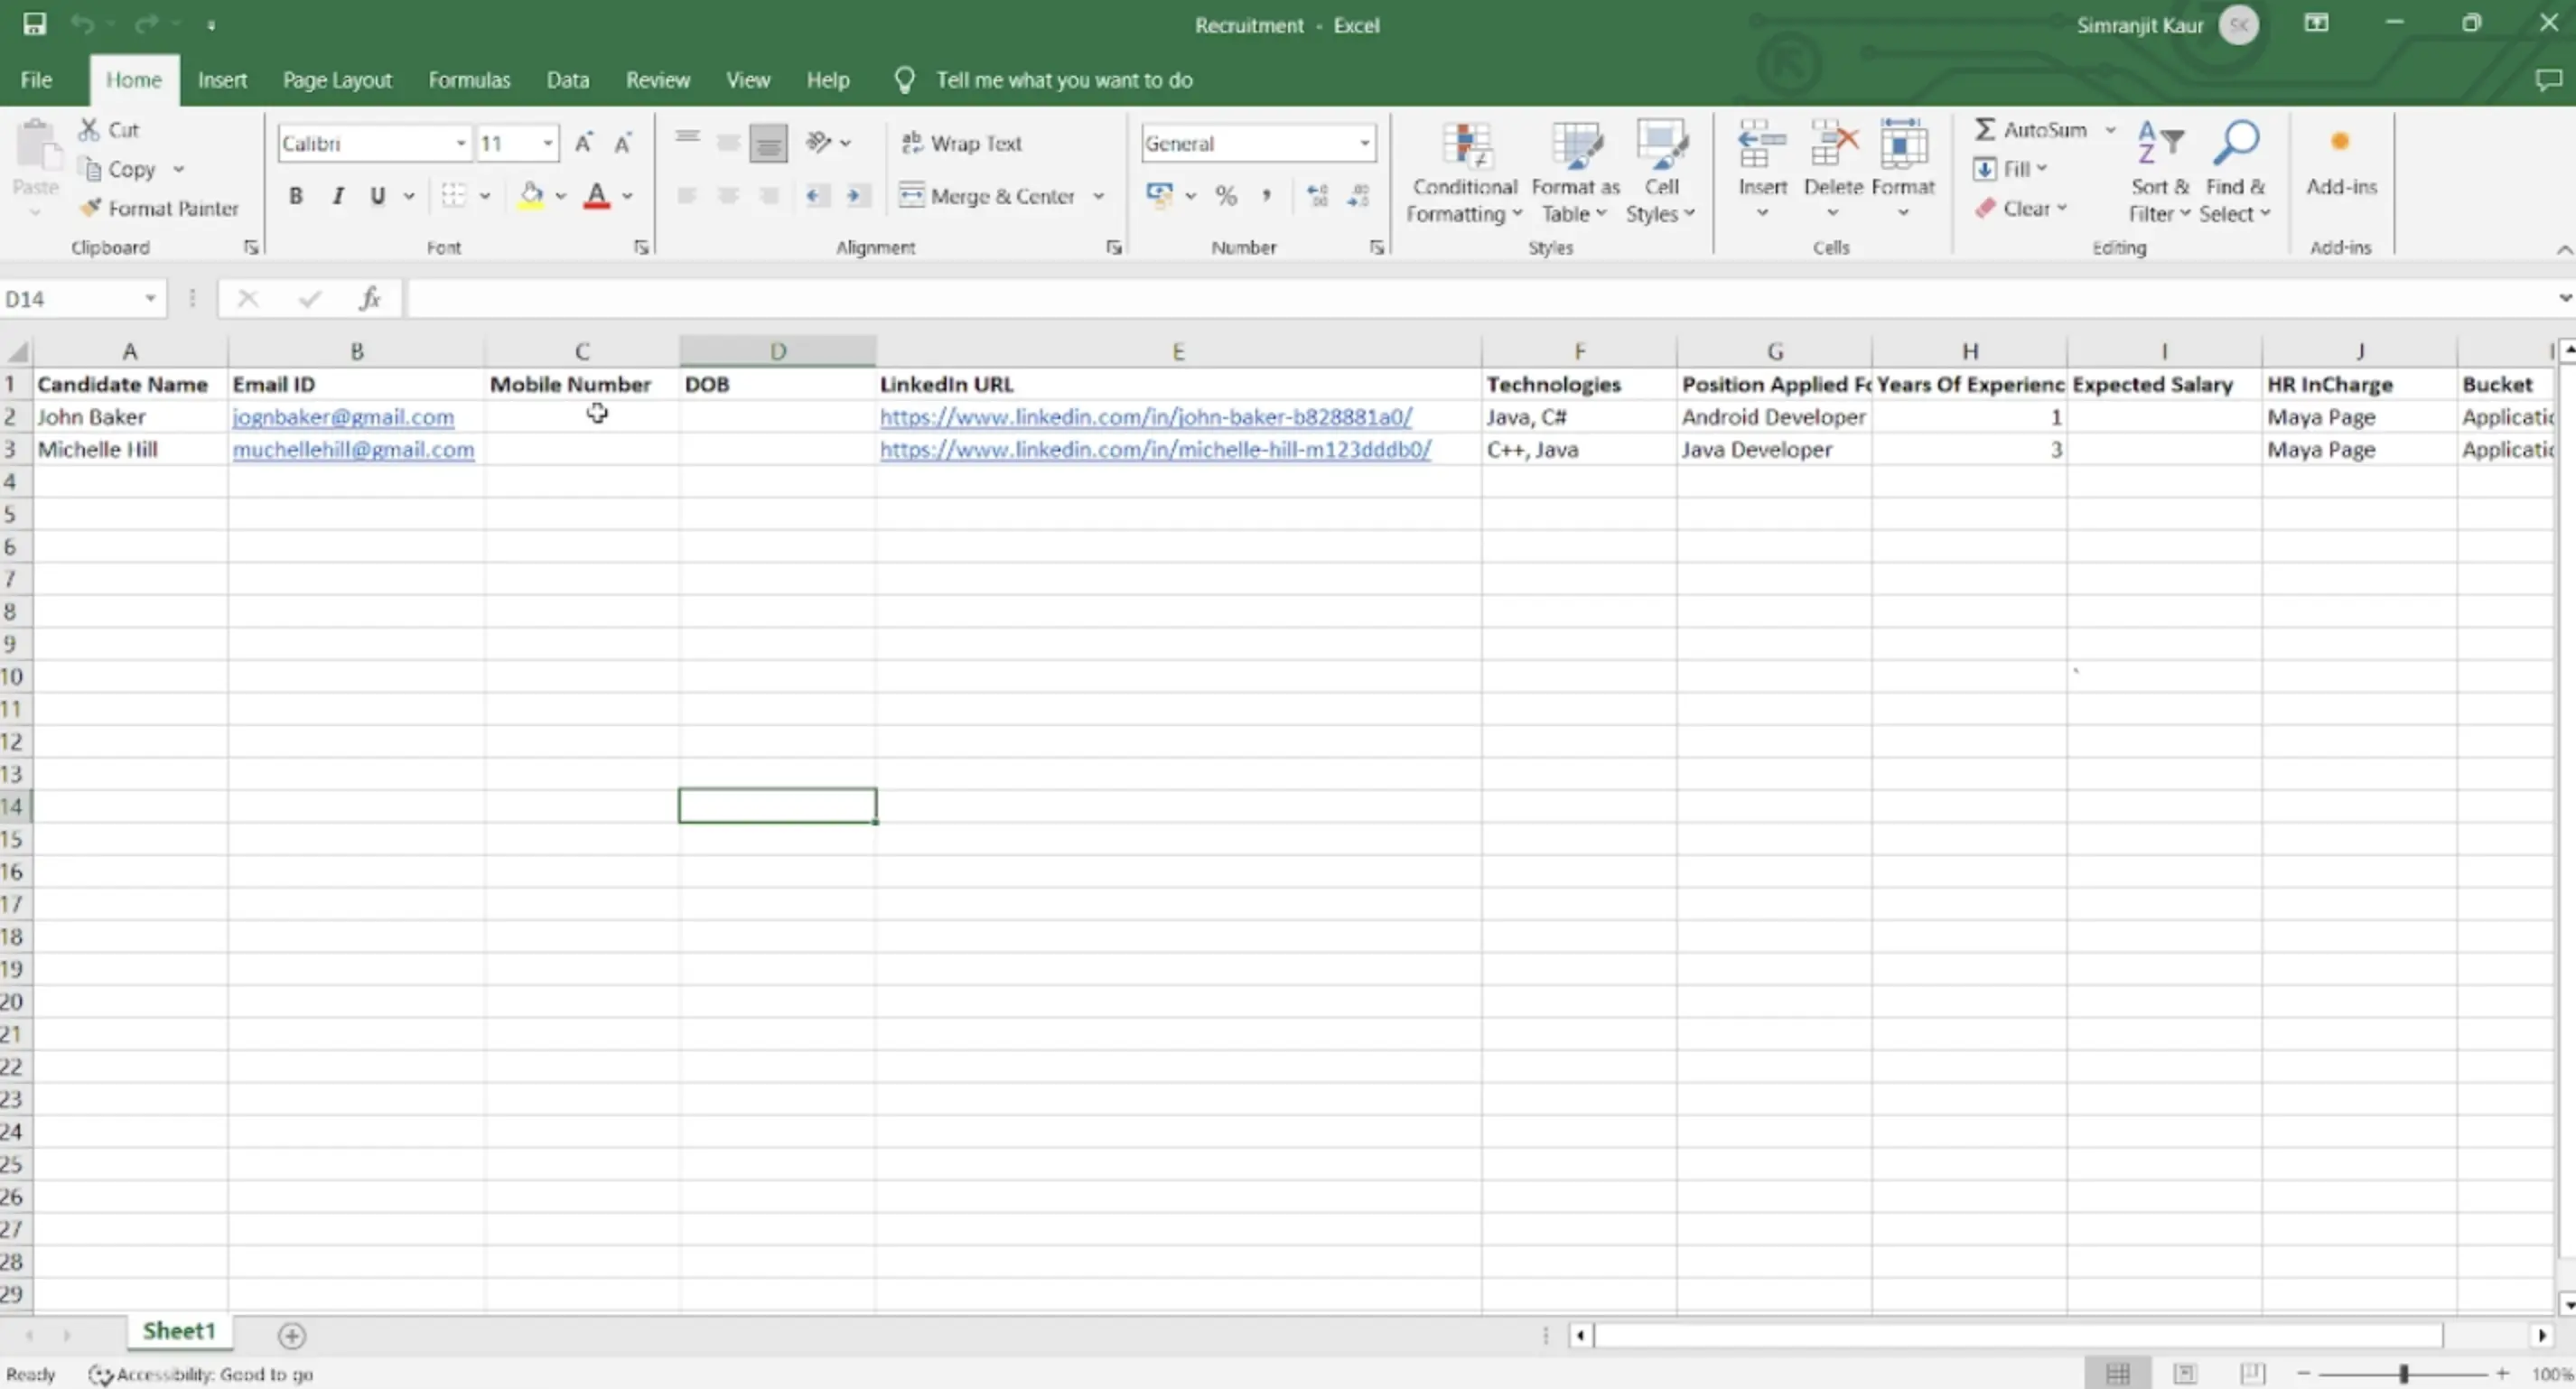
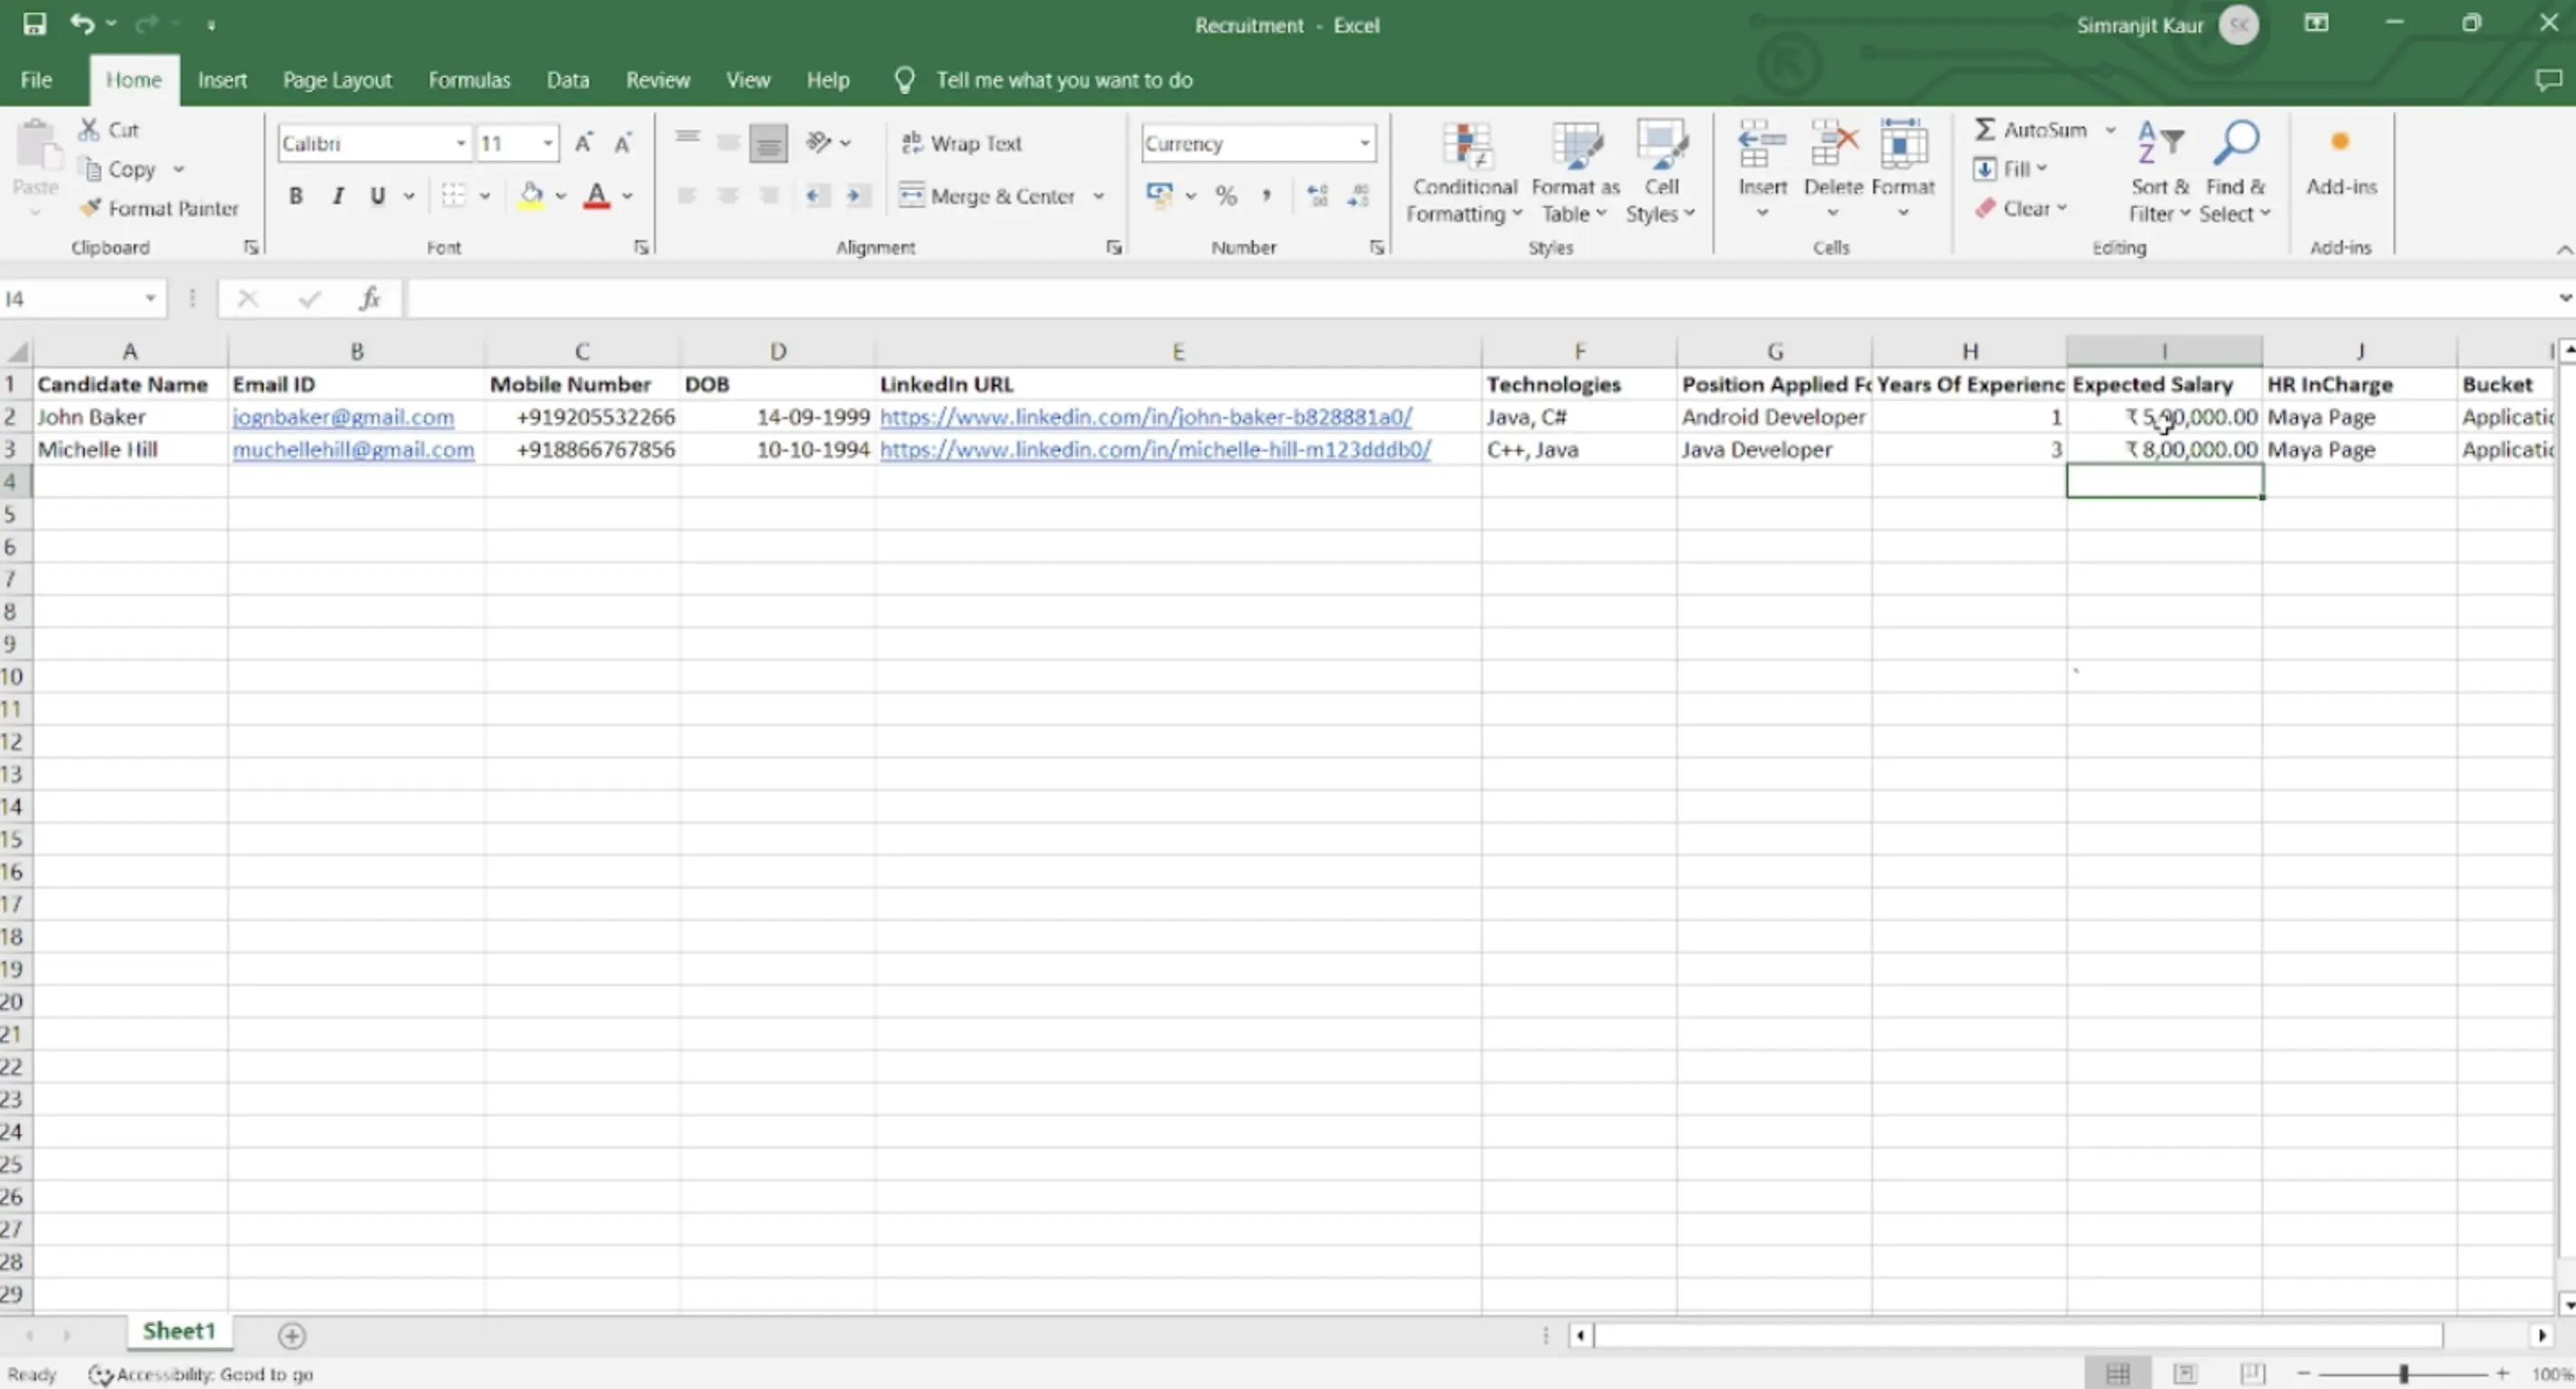
Before diving into Excel import, it is essential to complete your Pronnel board setup. This ensures a seamless mapping of attributes during the import process. In our example, we will use a Recruitment Board with various attributes like Candidate Name (Text), Email ID (Email), Mobile Number (Mobile), Position Applied For (Drop Down), Years of Experience (Number), LinkedIn URL (URL), Expected Salary (Currency), Date of Birth (Date), Technology (Multi Select), and HR in charge (User).
Prepare Your Excel File:
Check that your Excel file is well-prepared before importing. Ensure all mandatory fields, such as Title and Bucket, are filled. Additionally, format cells in Excel for fields like Mobile, Currency, and Date to facilitate easy mapping during the import process.
Note -Title and Bucket are mandatory by default. Also first row is considered as header and will not be uploaded as part of Excel Import.
Format Cells in Excel for Specific Fields:
-
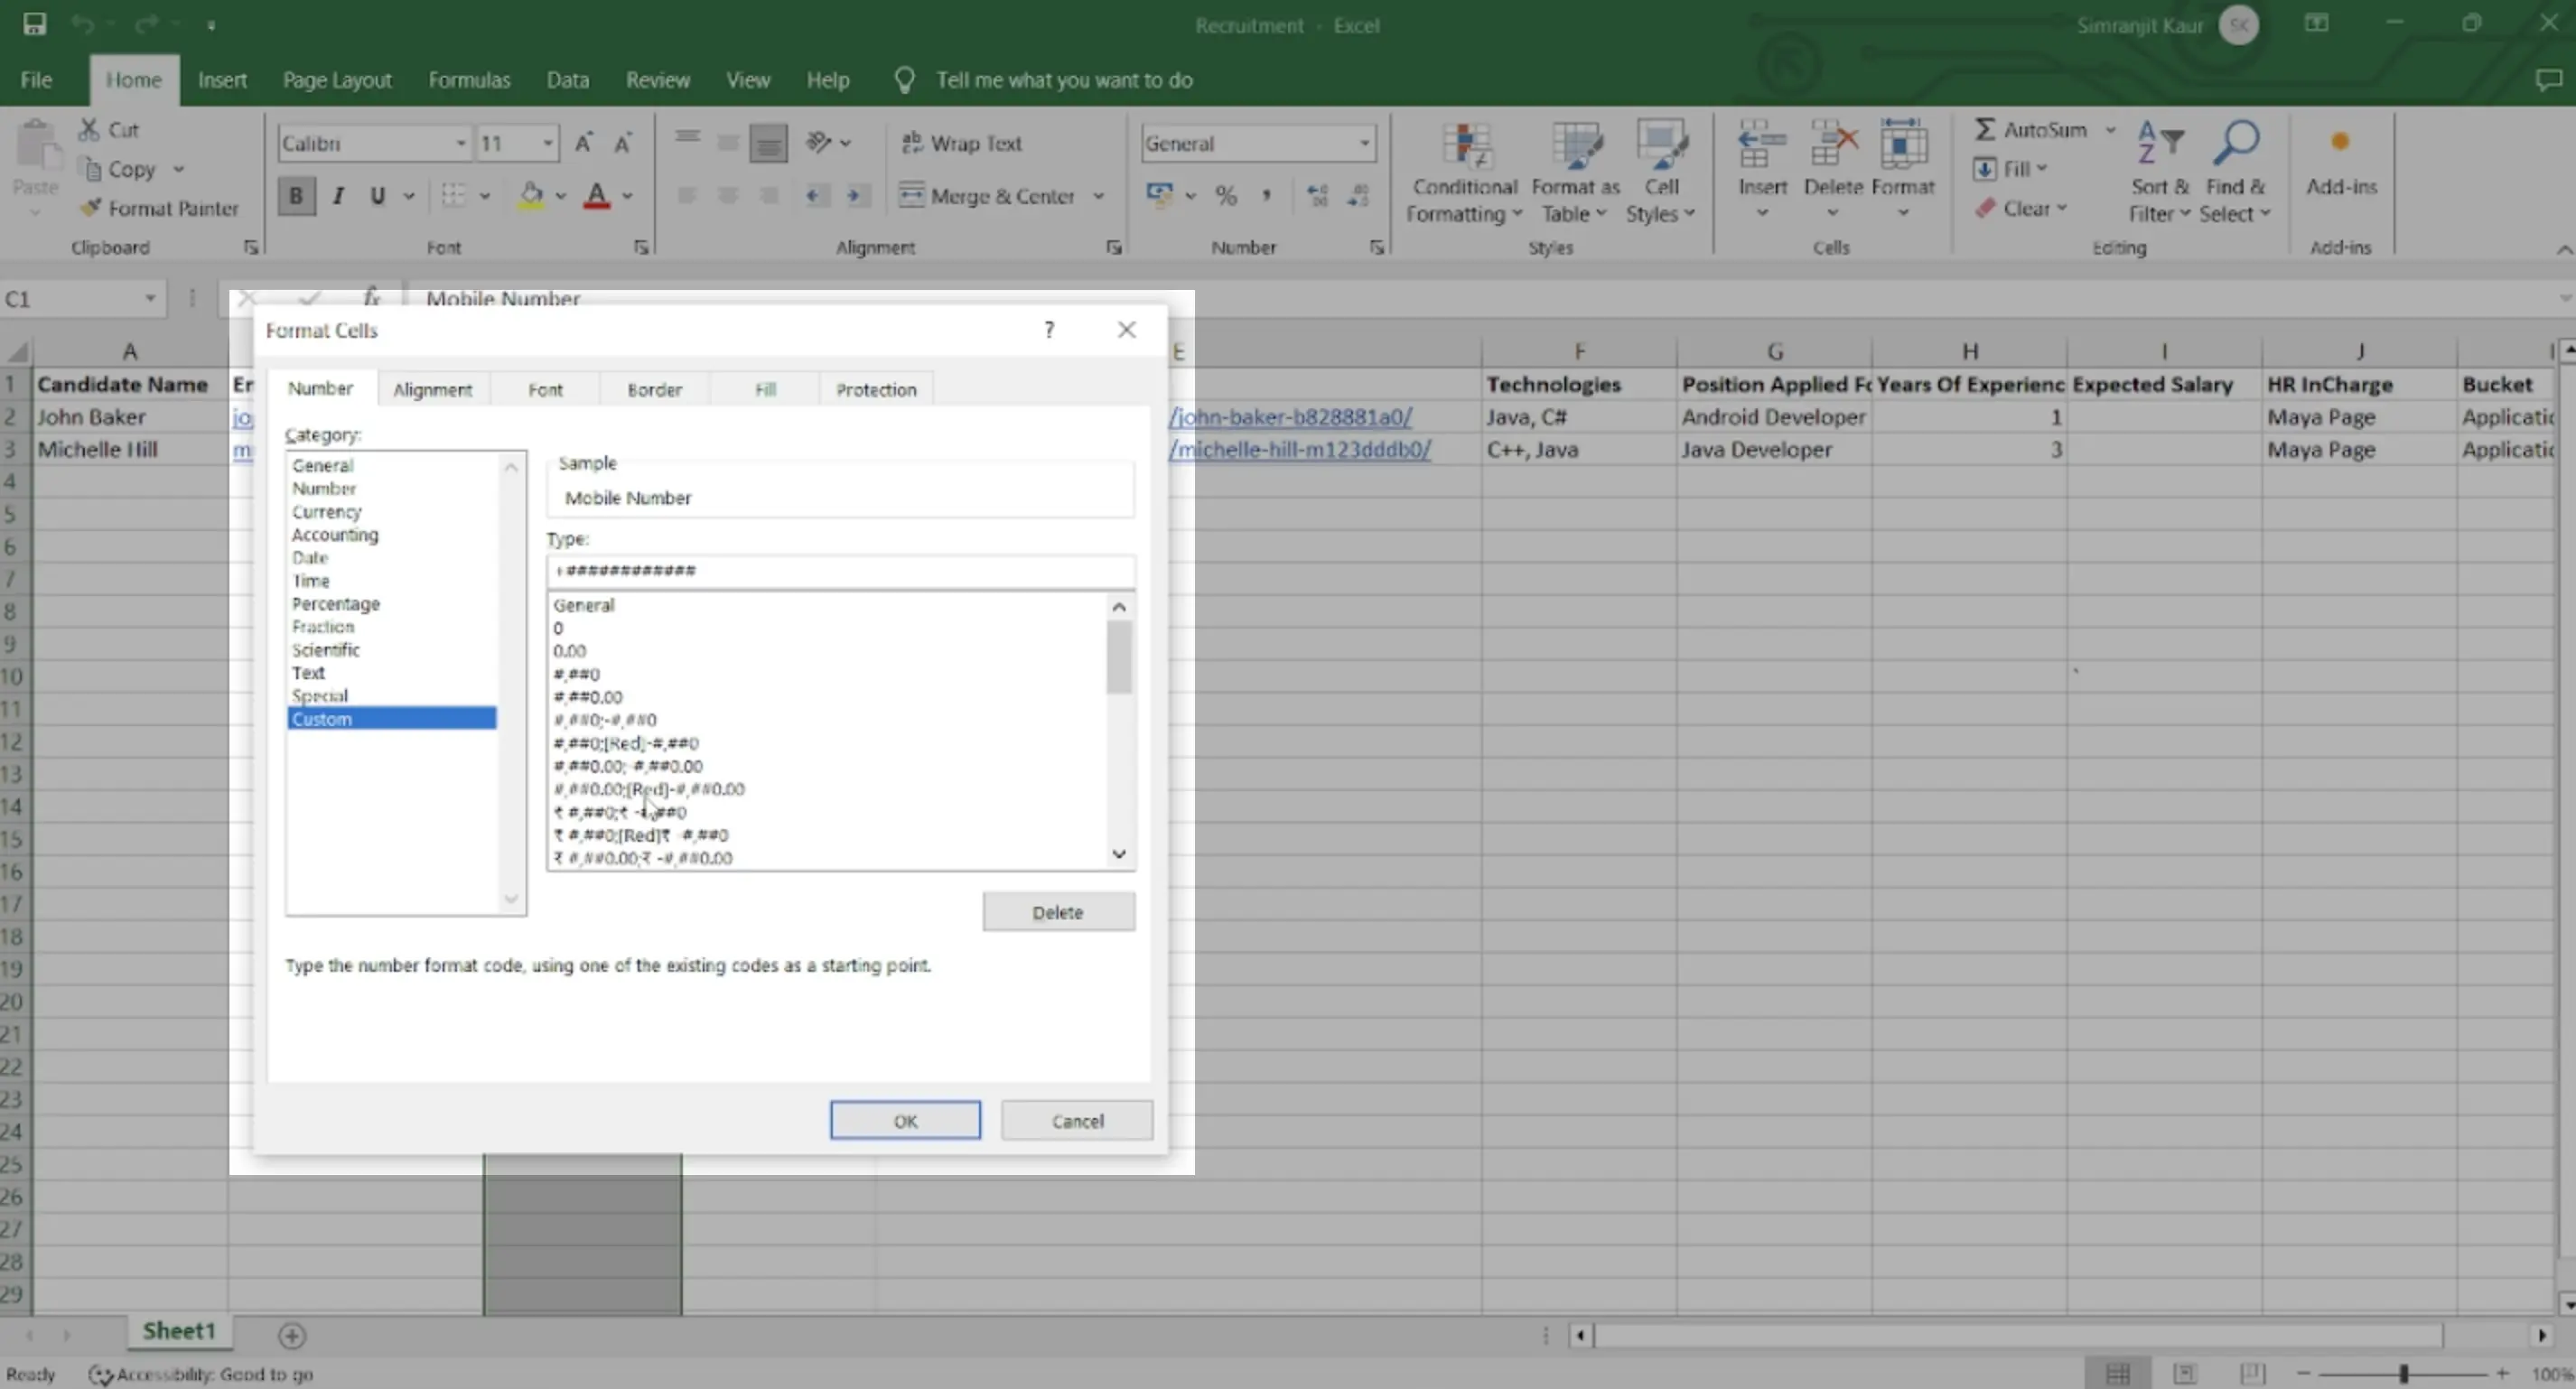
Mobile Field:
If your Mobile column has values like +919205532278, select the entire column, navigate to the format cells option, and choose custom. Type in the format +############.
-
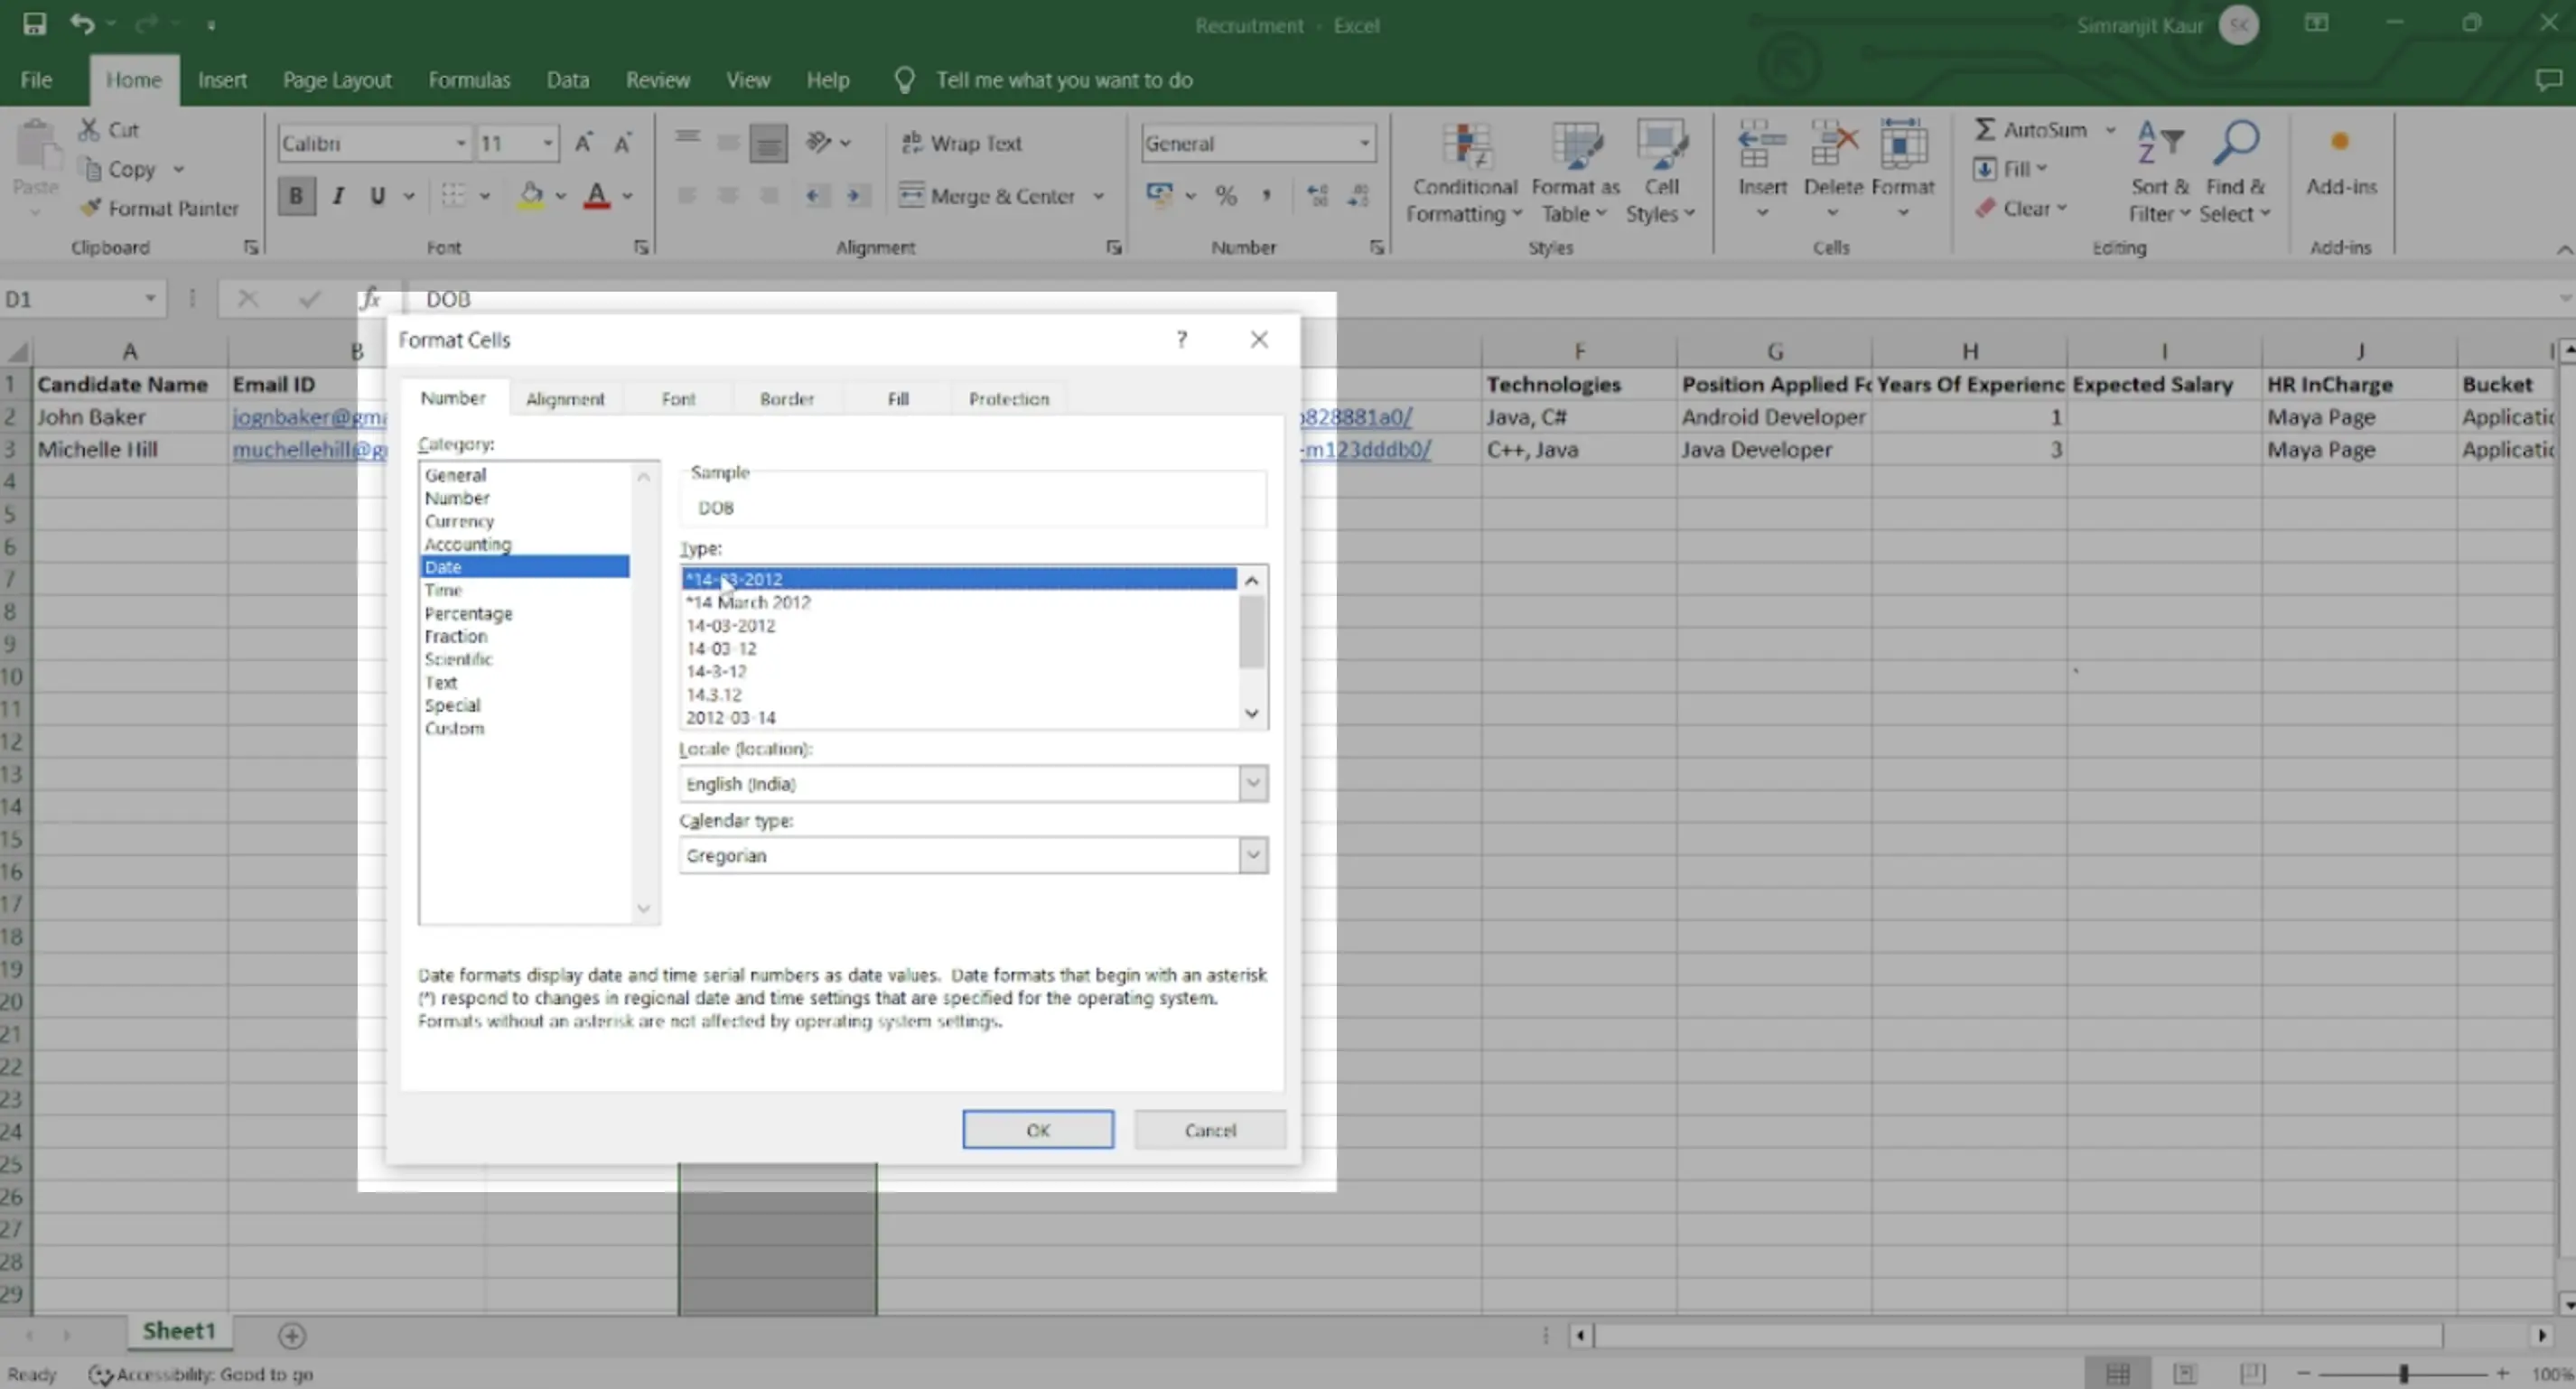
Date Field:
For the Date of Birth column, select the entire column in Excel. In the Format Cells dialog box, choose the Date option and specify the desired date format.
-
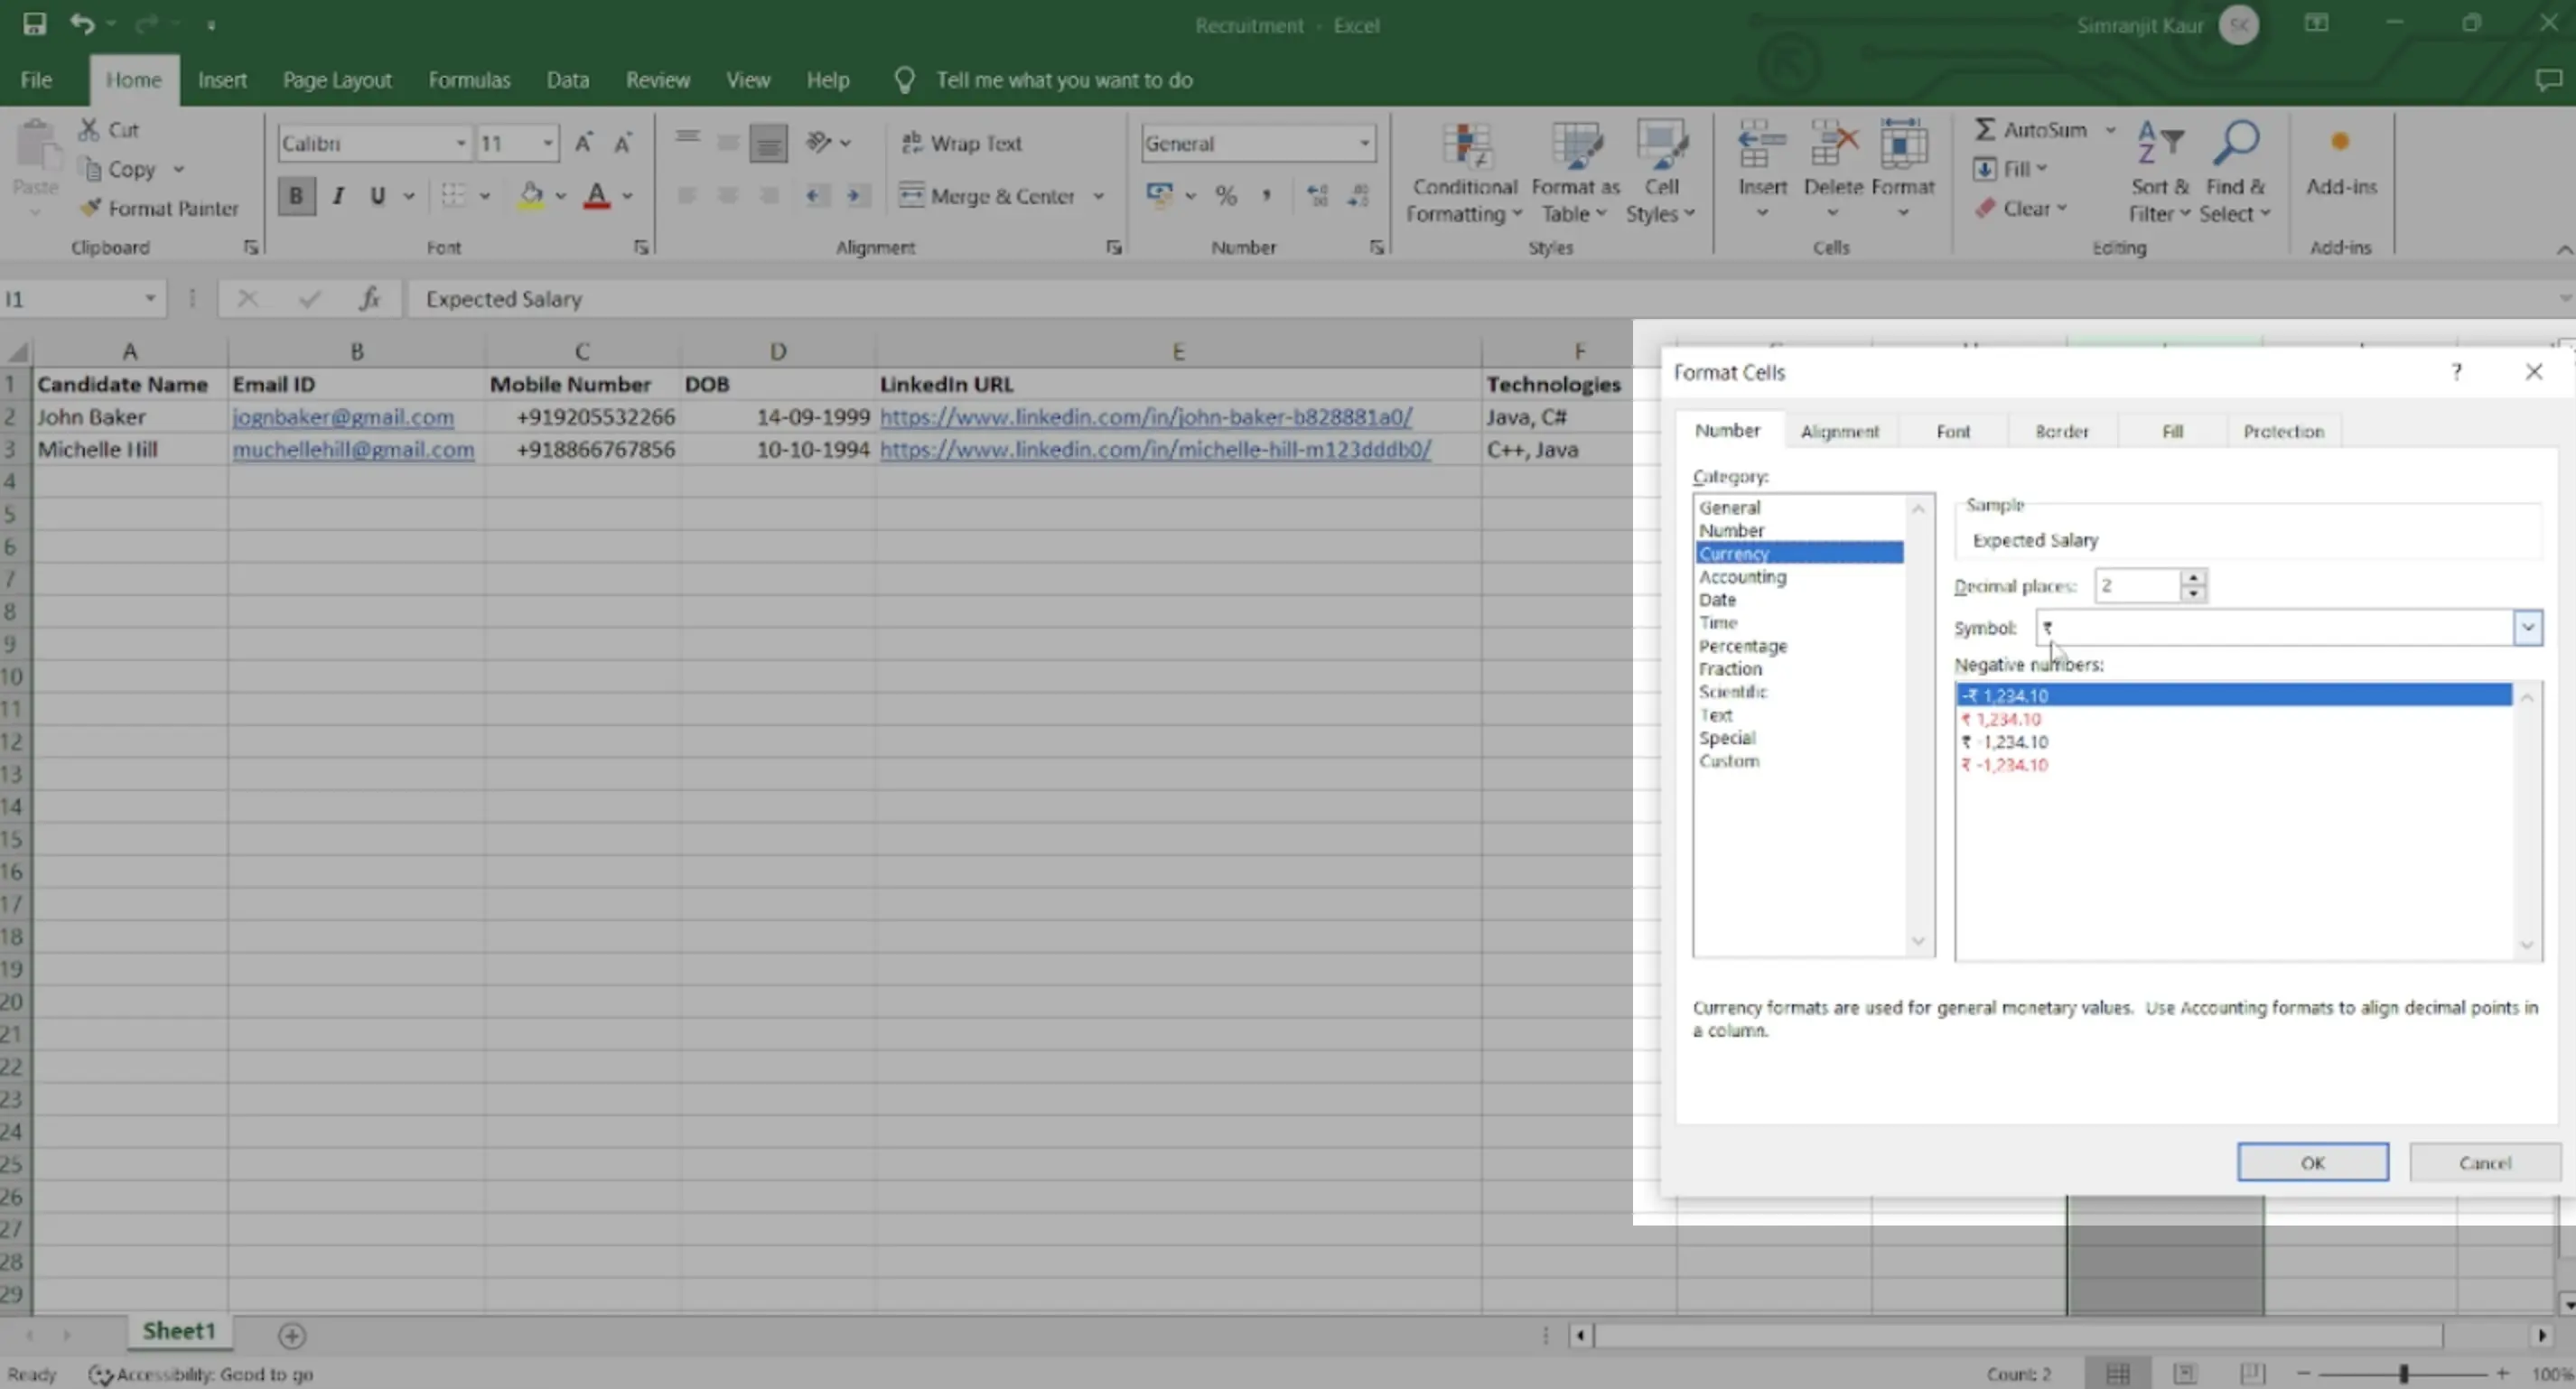
Currency Field:
Similarly, for the currency field, choose the currency type in the format cells dialog box.
-
Dealing with Checkbox and Multiselect Fields:
For fields like checkbox and multiselect, you can add values using a comma separator or allocate separate columns in the Excel sheet for each value. This ensures accurate mapping during the import process. In our example Technologies is a multi select field.
Initiating the Import:
-
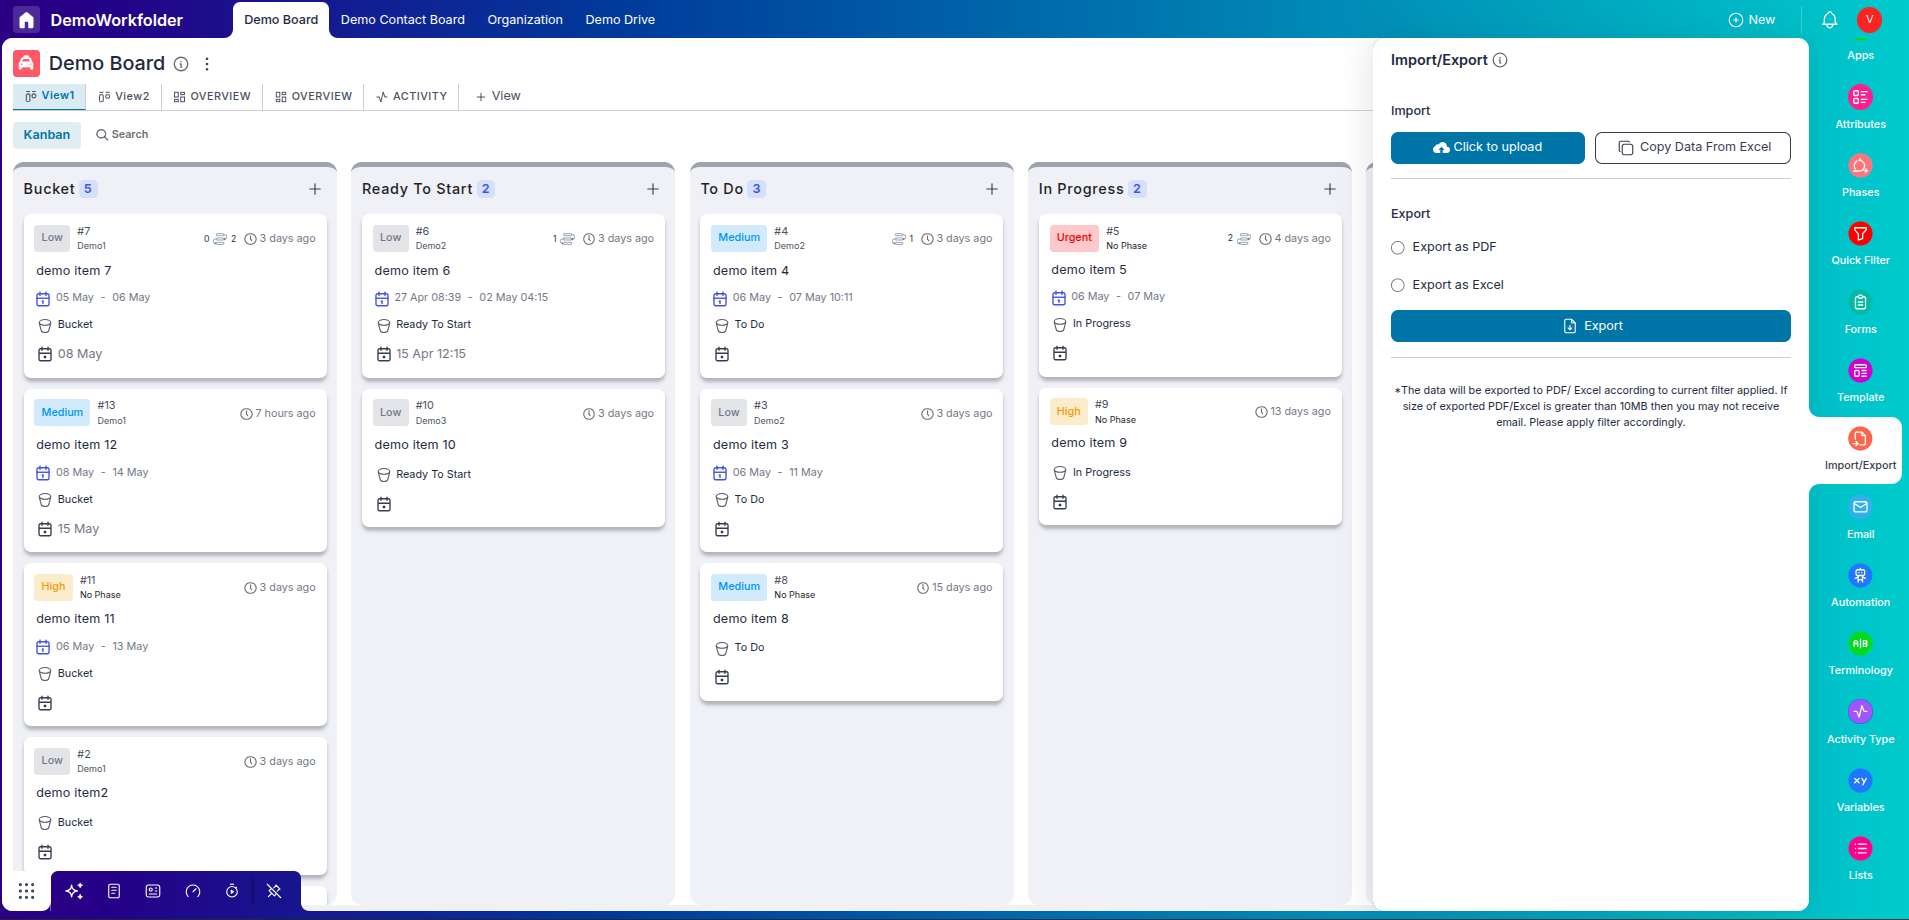
Upload Excel Sheet:
With your Excel sheet ready, go to your Pronnel Board settings. Scroll down to the Import/Export Option and click on "Click to Upload."
-
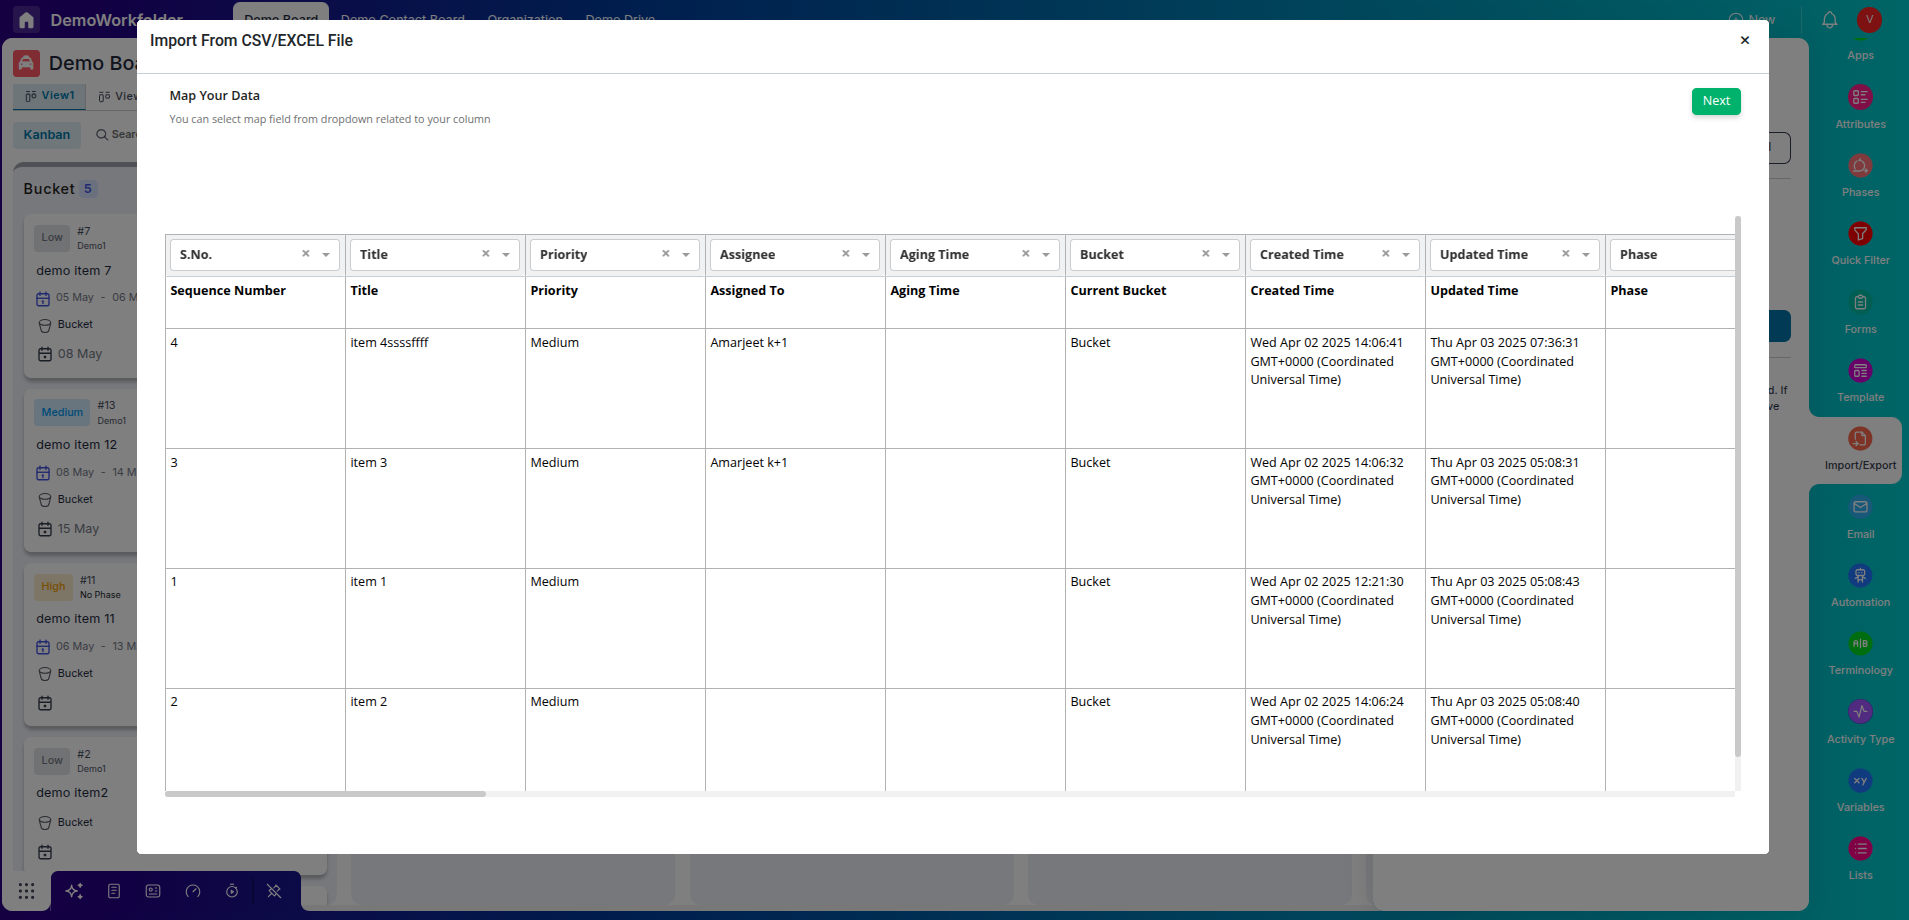
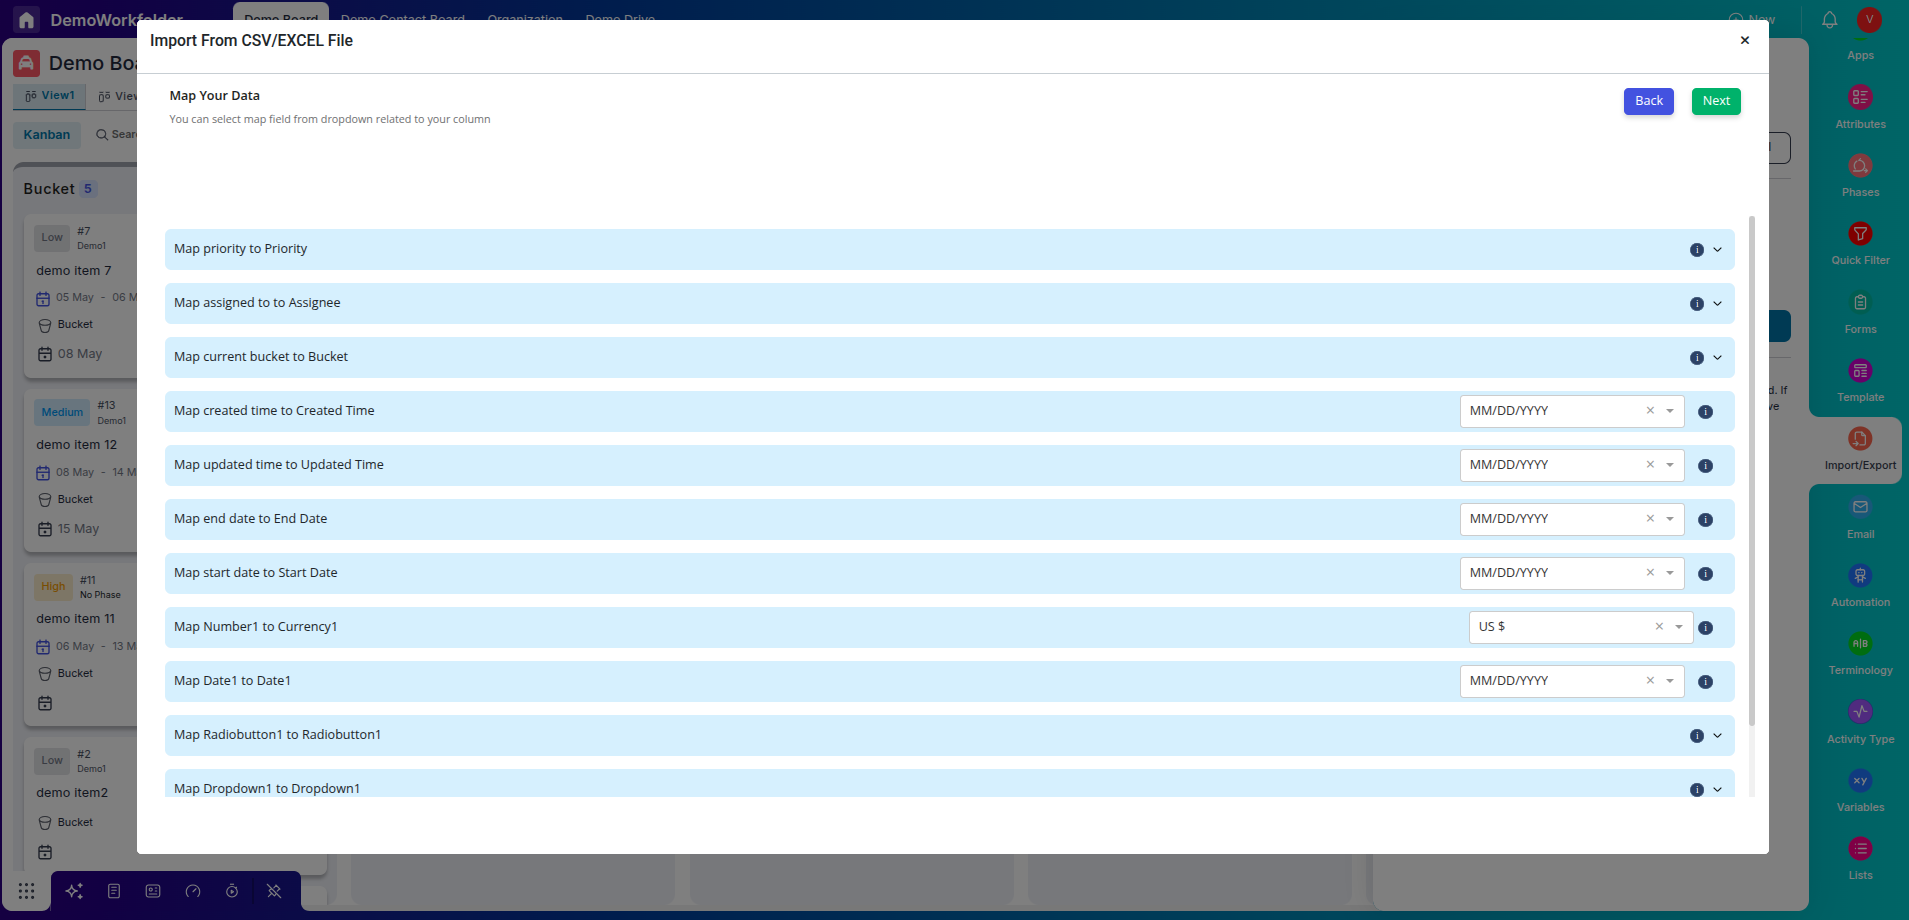
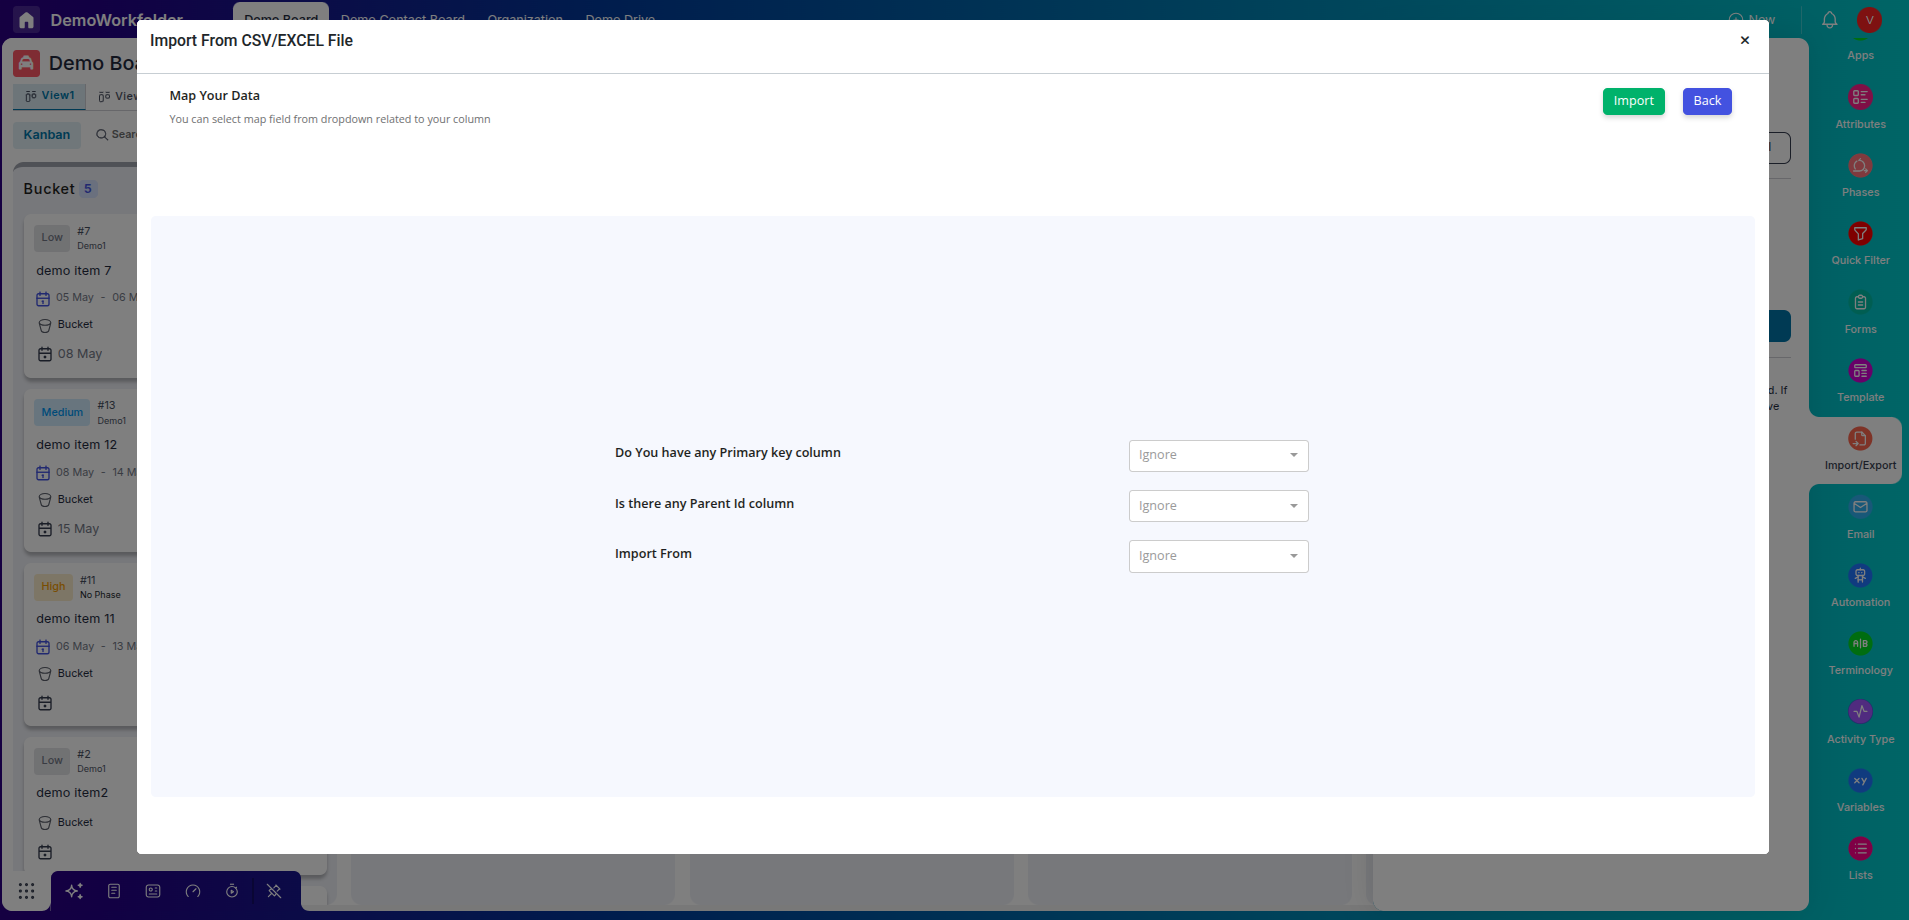
Map Excel Columns:
Pronnel will prompt you to map your Excel columns to the Item Attributes of your board. Take your time to ensure accurate mapping.
-
Verification and Import:
Once mapping is done, click on Next. Review the data mapping on the next screen, ensuring all attributes are correctly matched. Click on the import button to initiate the import process.
Handling Import Results:
-
Success Email:
Upon successful import, you will receive an email indicating the success of the import process.

-
Failure Log:
In case of import failures, download the error log Excel file provided in the email. This file highlights the reasons for failure, allowing you to correct the information directly in the same Excel file.
-
Re-upload Corrected Data:
After addressing the issues, re-upload the corrected Excel file, repeating the import process.
Conclusion
By following this comprehensive guide, you can seamlessly convert your Excel spreadsheet data into Pronnel boards. This not only helps in streamlining data management but also ensures data accuracy and integrity. Empower your organization with efficient data handling practices, enhancing productivity and decision-making.
Frequently Asked Questions About Importing Excel Data into Pronnel Boards
Why import Excel data into Pronnel boards?
It streamlines information management and structures your data for efficient tracking.
Do I need to complete board setup before importing?
Yes. Proper setup ensures smooth attribute mapping and organized data.
Can I import from multiple Excel tabs?
No. Only the first tab is imported—place relevant data there.
Which fields are mandatory by default?
Title and Bucket are mandatory. Populate other needed fields as well.
How should I format Mobile, Currency, and Date?
Mobile: +############; Date: choose a date format; Currency: select the currency type.
Why map Excel columns to board attributes?
Accurate mapping prevents discrepancies and import errors.
How to handle Checkbox and Multiselect fields?
Use comma-separated values or separate columns for each value.
How do I verify a successful import?
You receive a success email after import completes.
What if the import fails?
Download the error log from the email, fix issues in the same Excel file, and re-upload.