Mastering Kanban Views in Pronnel
Welcome to this comprehensive guide on making the most of Kanban views in Pronnel. Known for its simplicity and effectiveness, Kanban is a favorite among project managers and productivity experts. At Pronnel, we’ve made Kanban our primary view, designed to help you visualize, manage, and act on your data effortlessly. In this tutorial, you’ll learn how to create and customize Kanban views, manage tasks with advanced filters and sorting, collaborate with your team, and more.
Creating Kanban Views
Pronnel makes it easy to set up your personalized Kanban layout:
-
Step 1:Open any board in Pronnel.
-
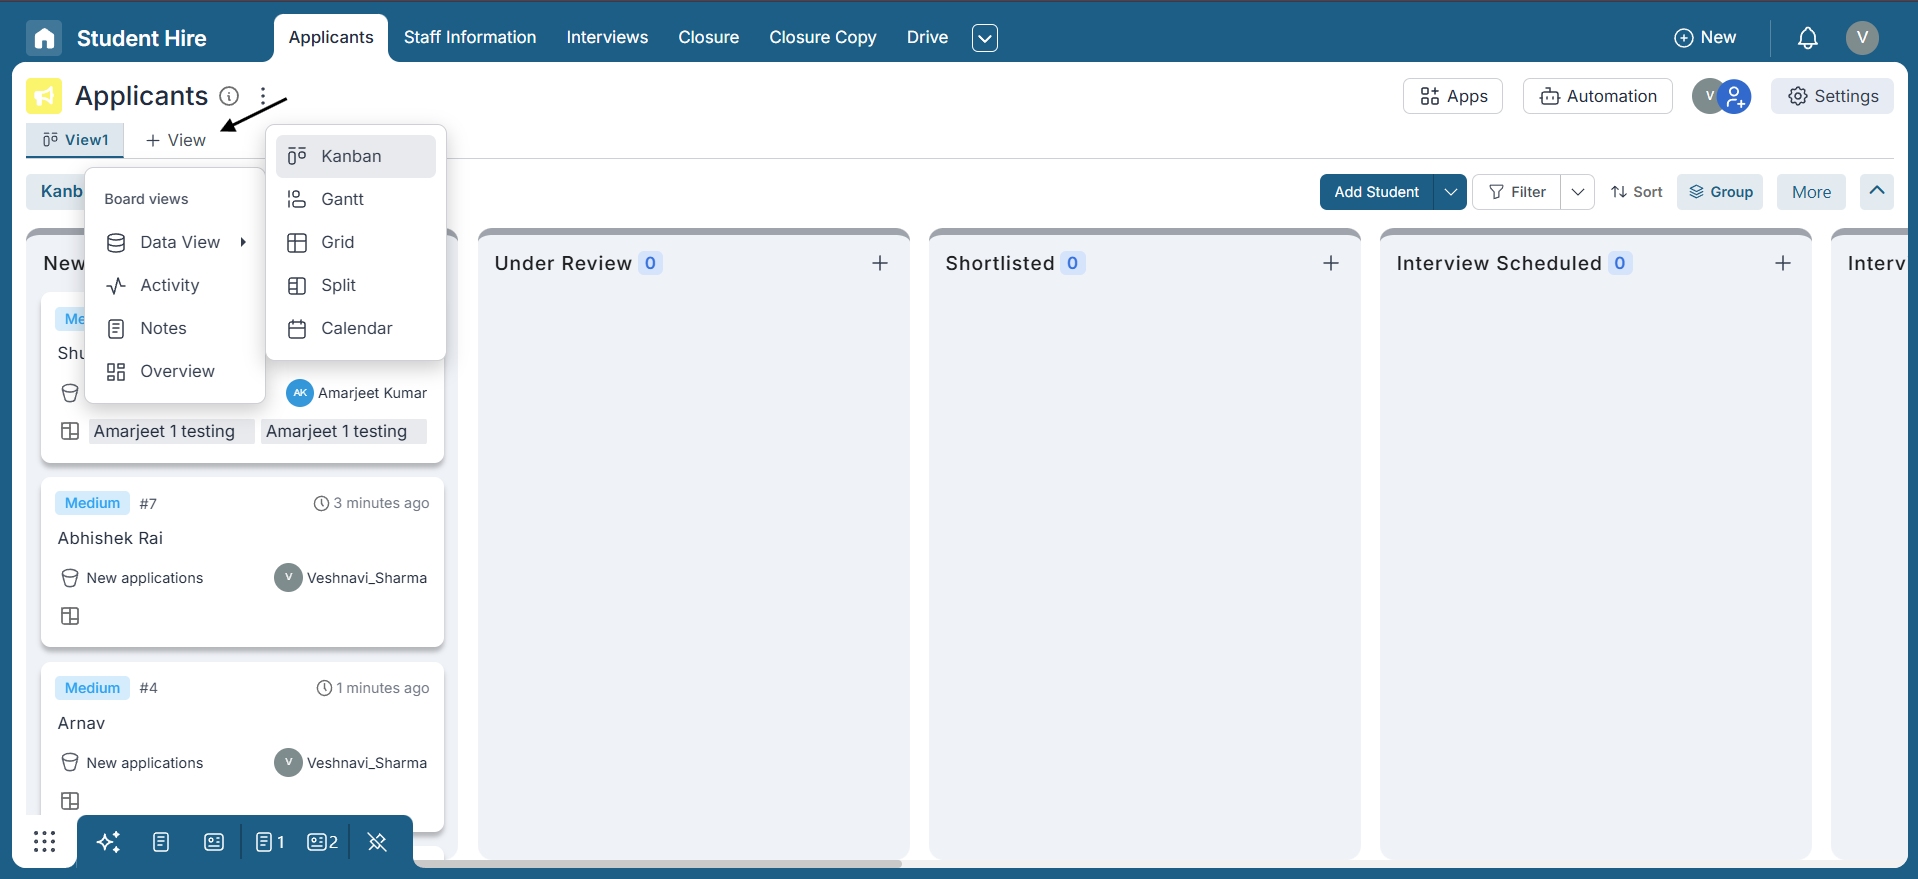
Step 2: Click on the “+ View” button at the top. A popup will appear—select “Data View” from the options. This opens another popup where you can choose from various view types such as Kanban, Gantt, Grid, Split, and Calendar. For this tutorial, we’ll proceed with creating a Kanban view.
-
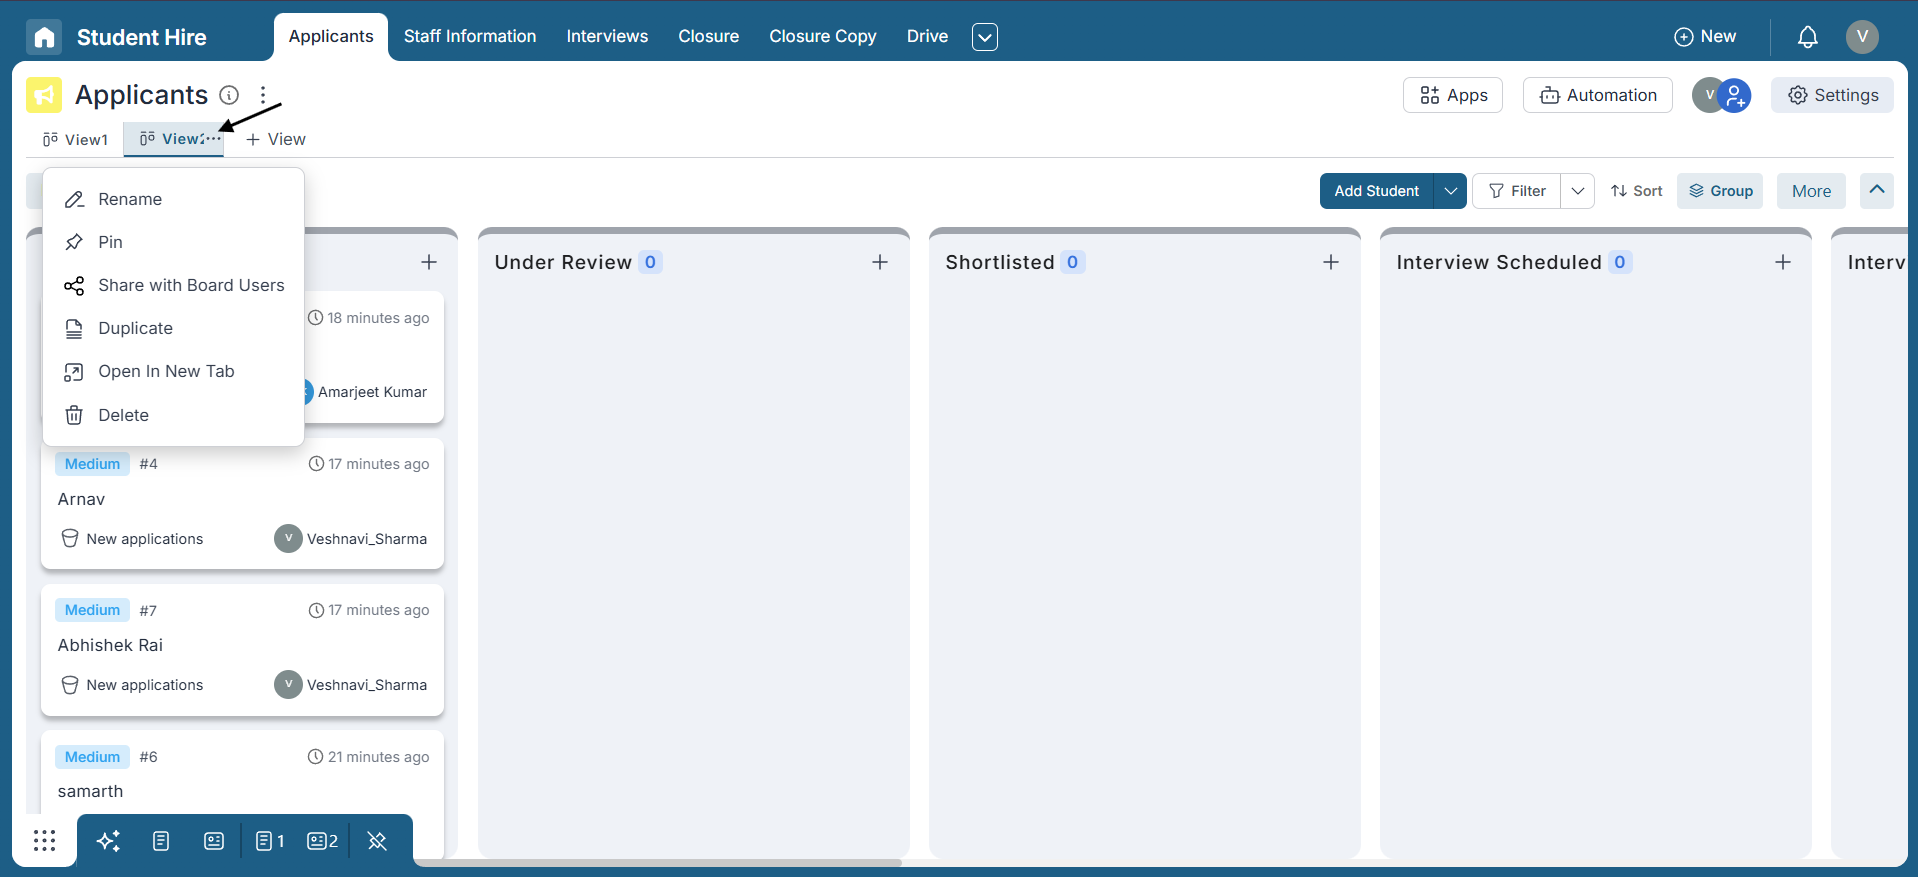
Step 3: Click on the three-dot menu next to the view name to access various options such as renaming, duplicating, deleting, or adjusting visibility settings. Use these options to customize the view according to your needs.
-
Step 4:You can create multiple Kanban views, each tailored to specific requirements.
Applying Filters and Sorting
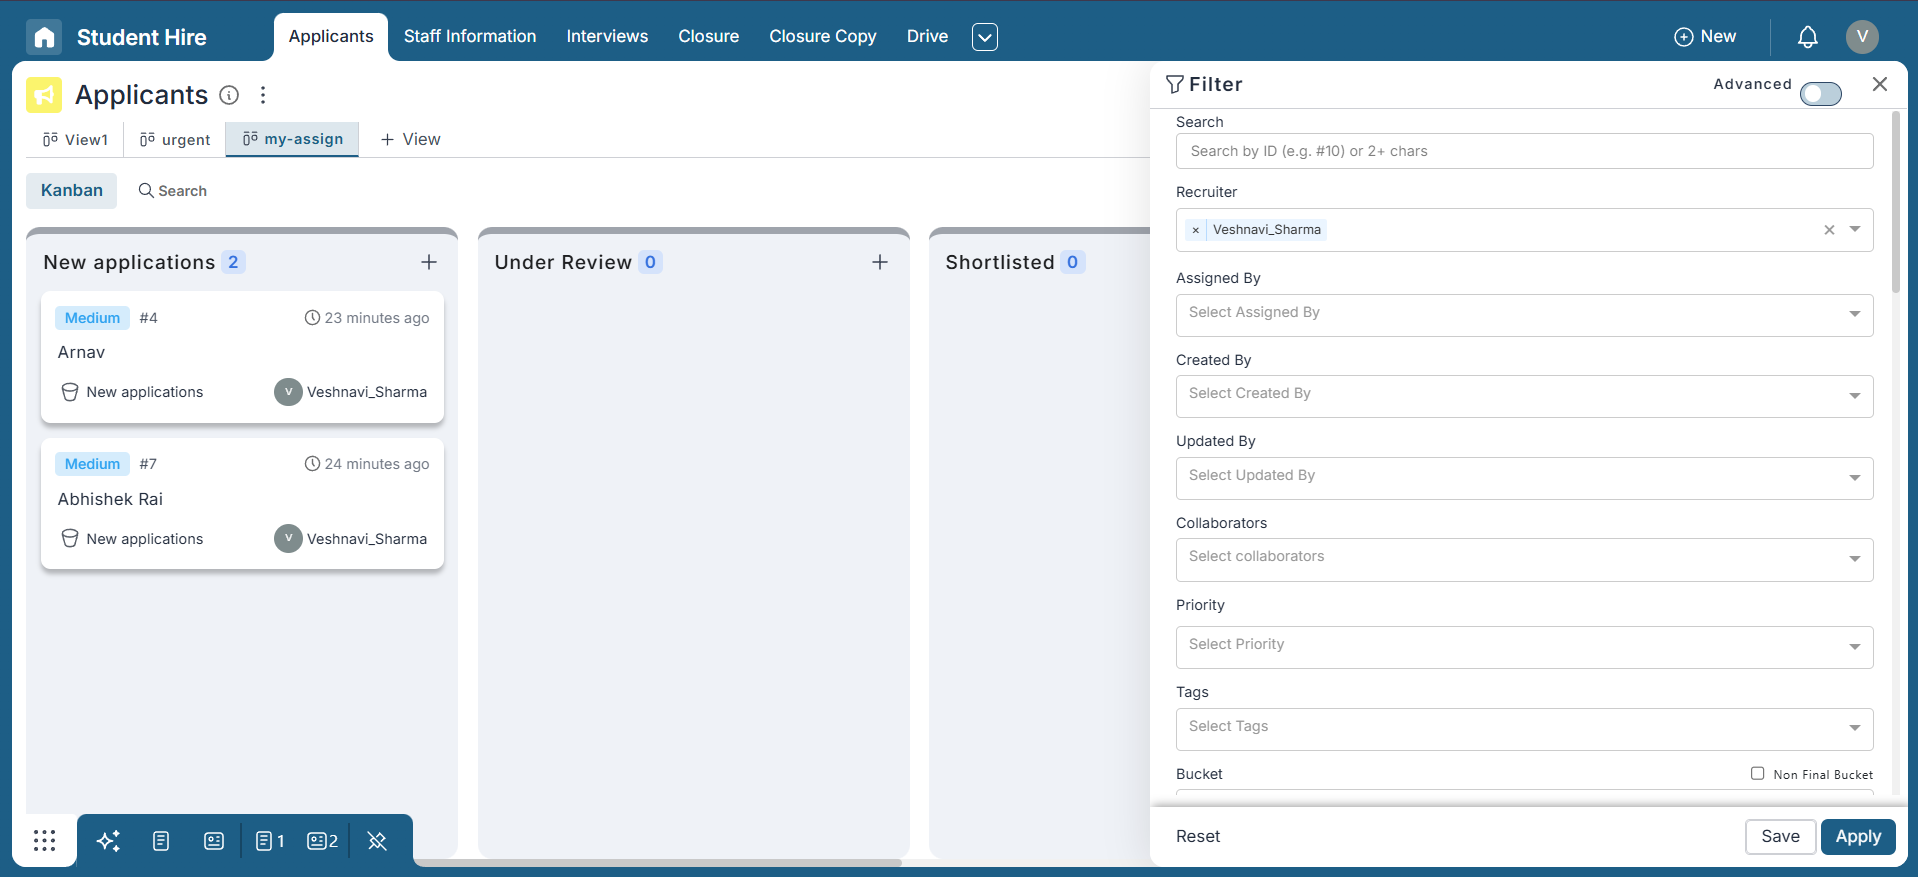
Creating multiple Kanban views is a valuable feature in Pronnel, as you can apply filters and sorting options to each view. When you return to the board later, your Kanban view will display the data per your previously applied filters and sorting preferences.
Sharing Kanban Views
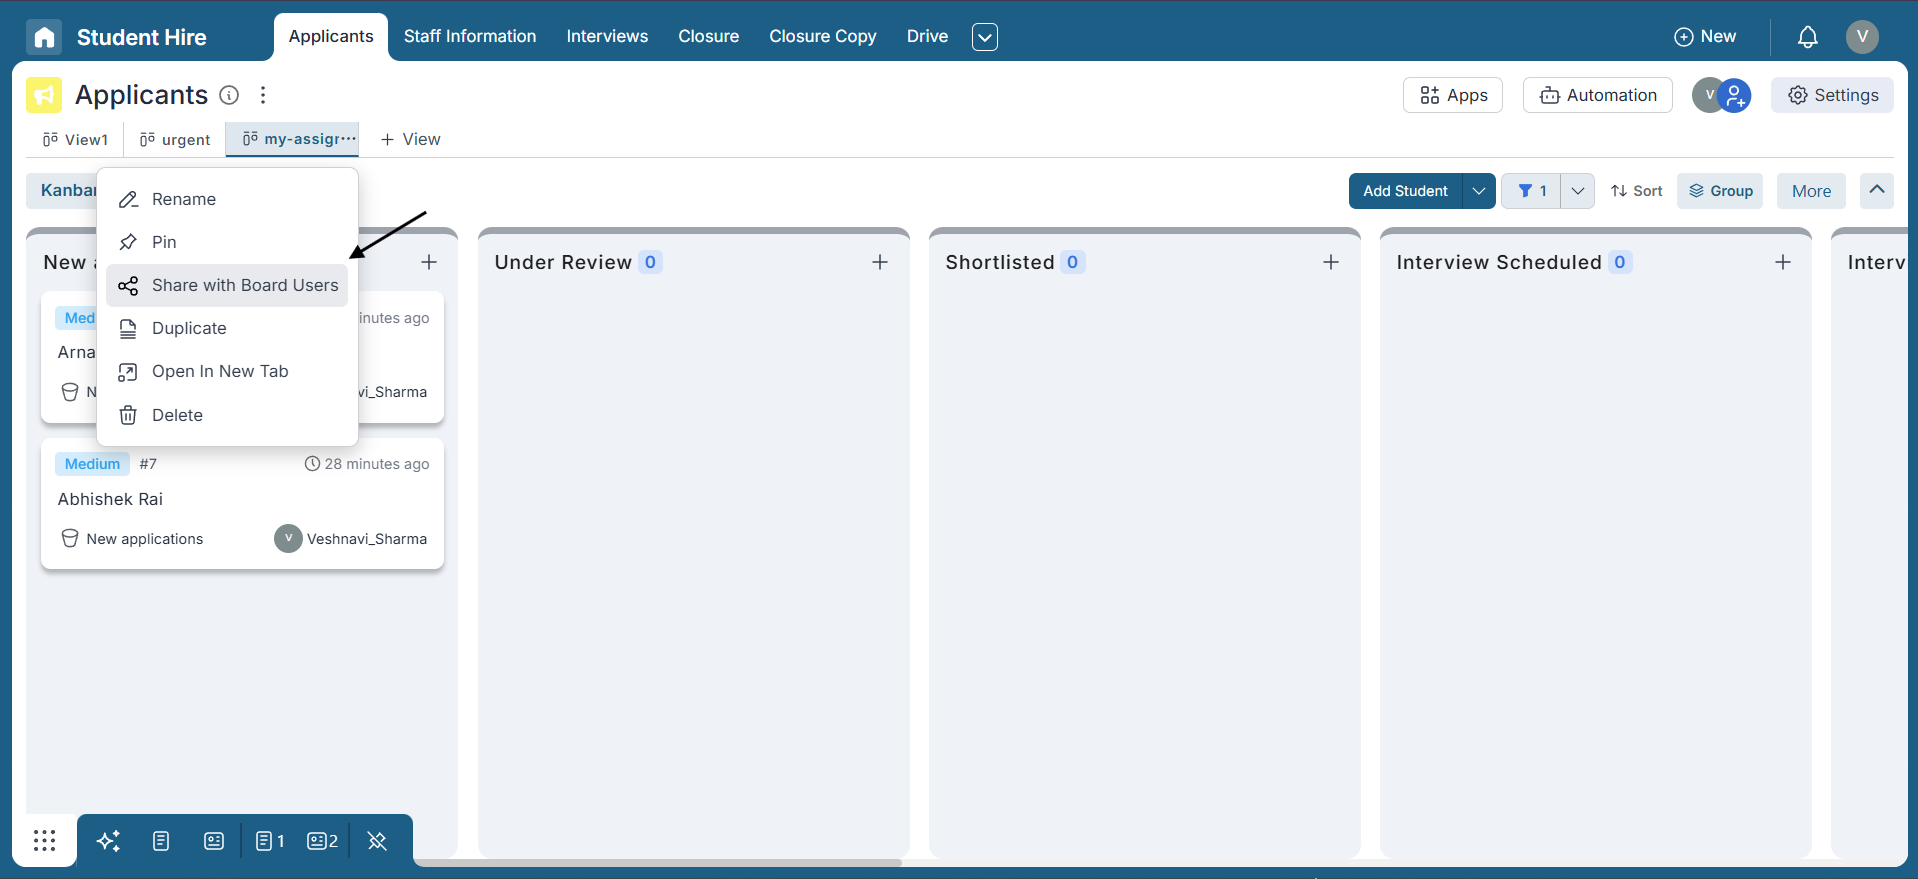
You can easily share your Kanban views with your team by using the "Share with Board Users" option. This allows others on the board to access the same view with all the applied filters and sorting, promoting better collaboration and transparency across your projects.
Customizing Buckets in Your Workflow
Buckets in Pronnel represent the stages or categories of your workflow and appear across view like Kanban . You can fully customize these Buckets from the Process section under Settings.
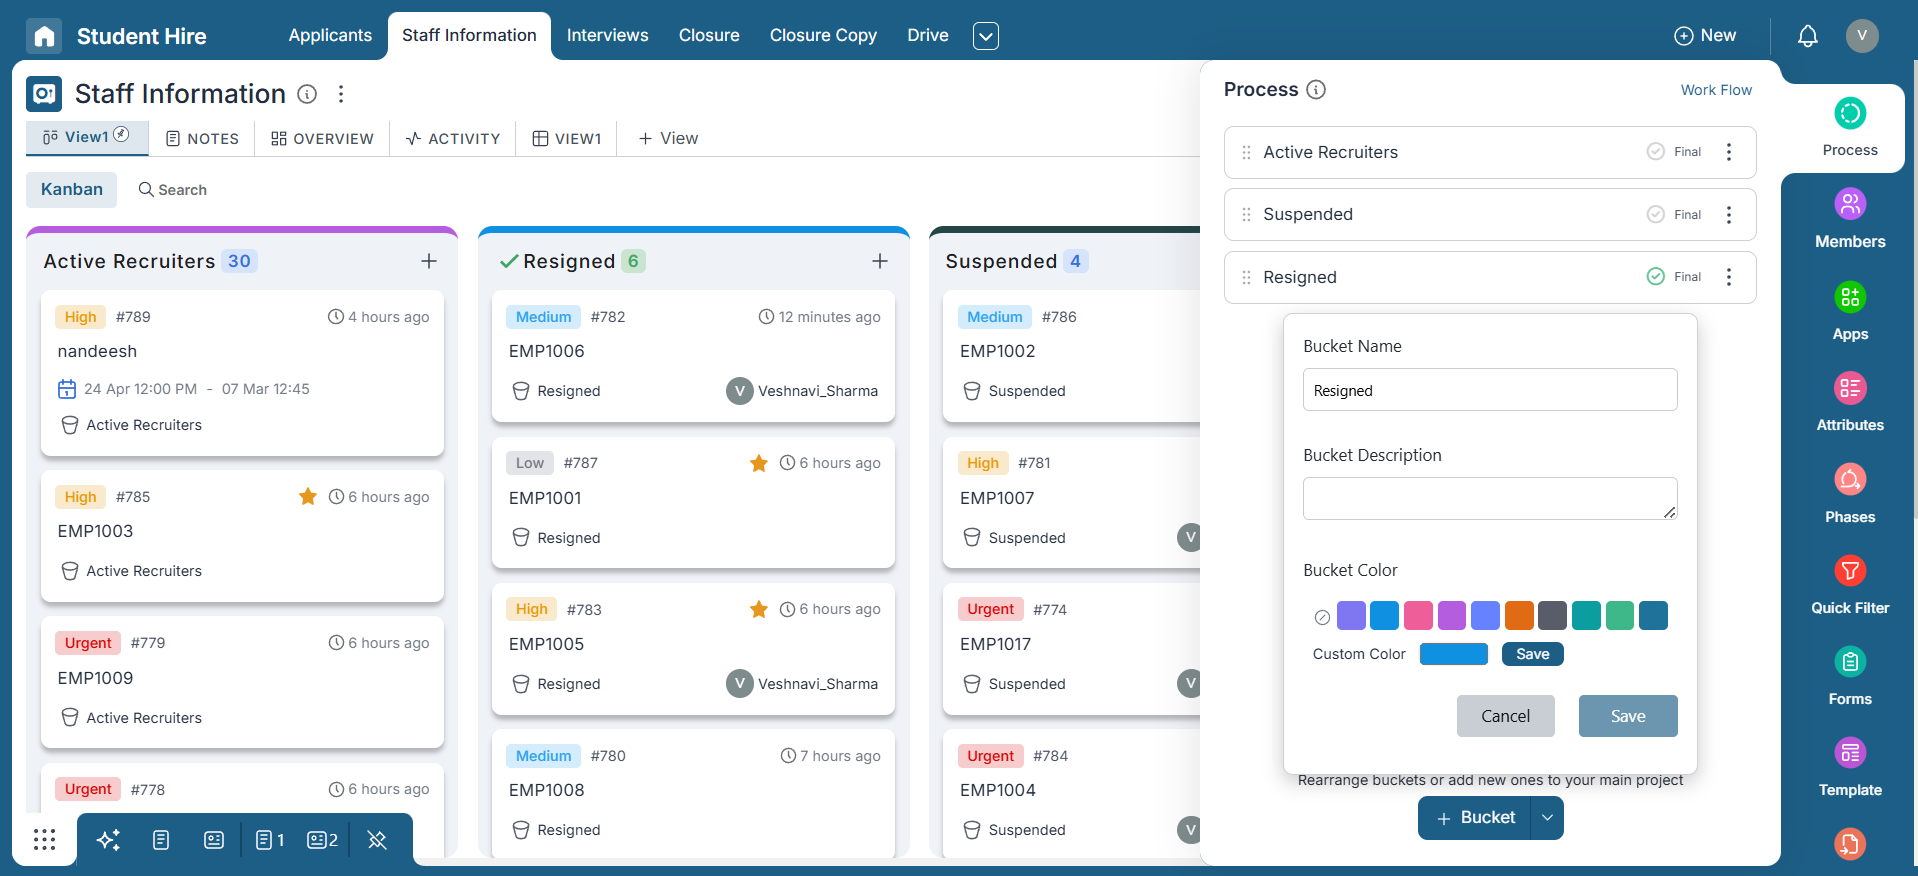
In the Process settings, you’ll see a complete list of all Buckets configured for your board. Click the three-dot menu next to any Bucket to access options like Edit, Delete, or Make Default. When you choose Edit, you can rename the Bucket, add a description, change its color, and even mark it as the final stage by enabling the Final checkbox.
Rearranging Buckets in Your Workflow
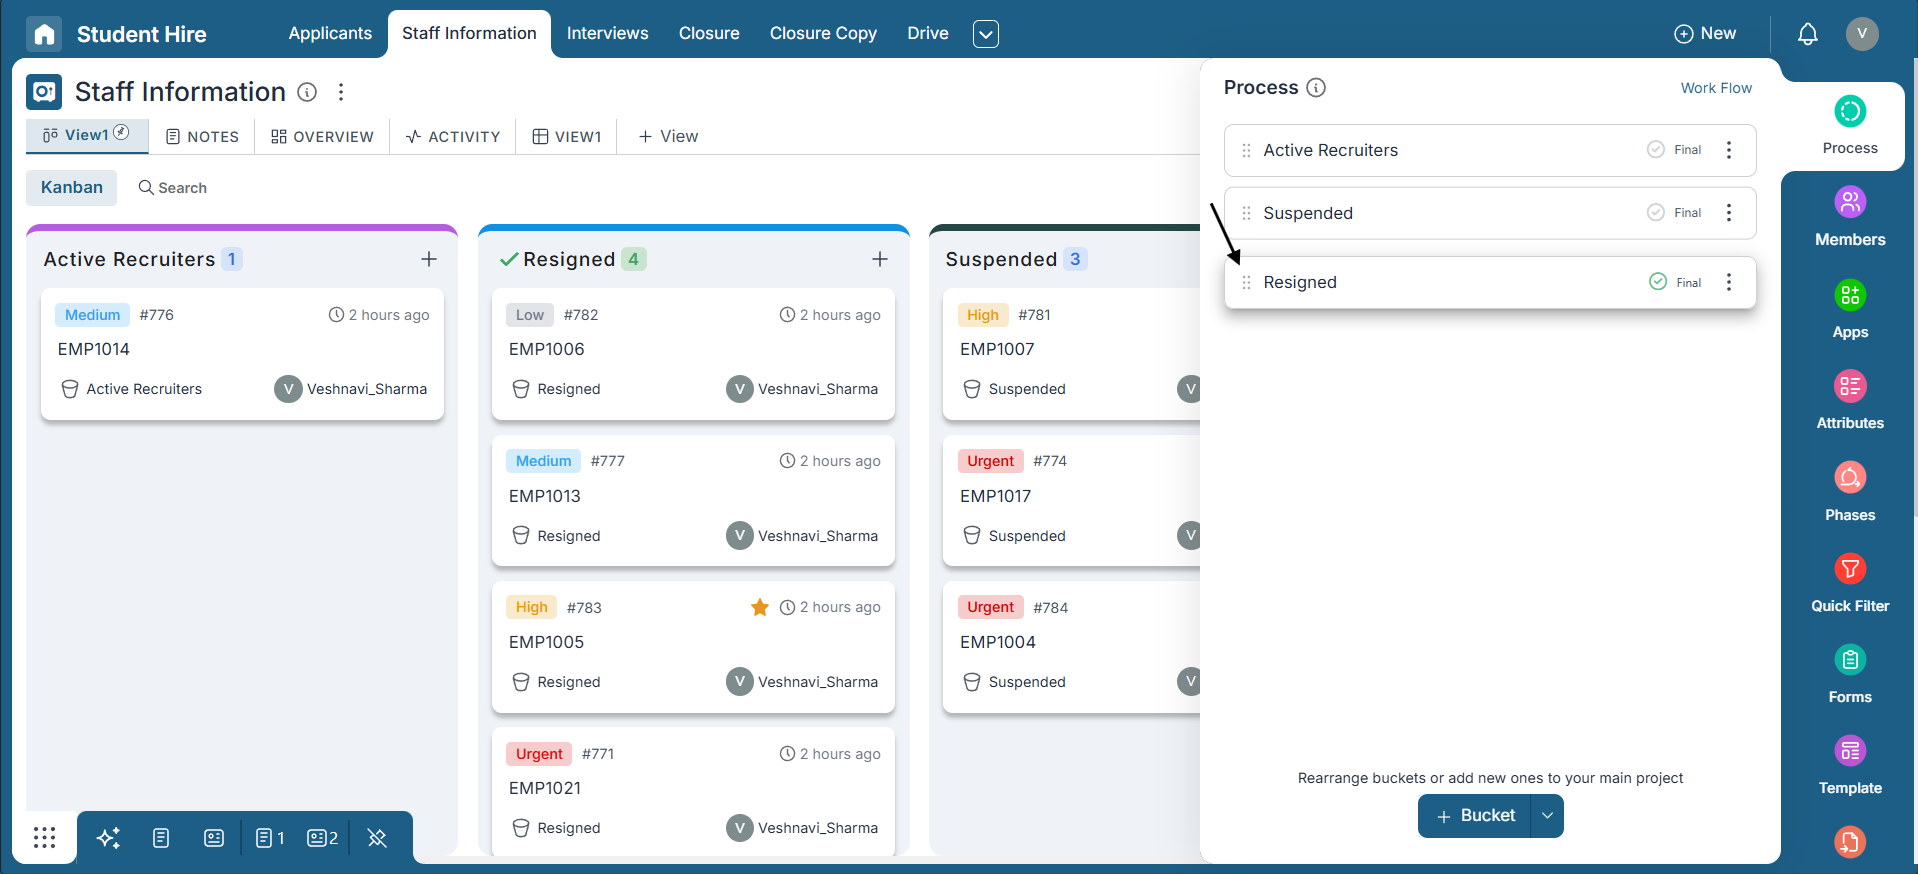
If you want to reorder your Buckets, go to the Process section under Settings. There, you'll find a list of all Buckets configured for your board. Simply click and hold the six-dot icon next to a Bucket name, then drag it vertically to your desired position. Once dropped, the new order will be automatically saved and reflected across all views, including Kanban and List.
Using Column Options
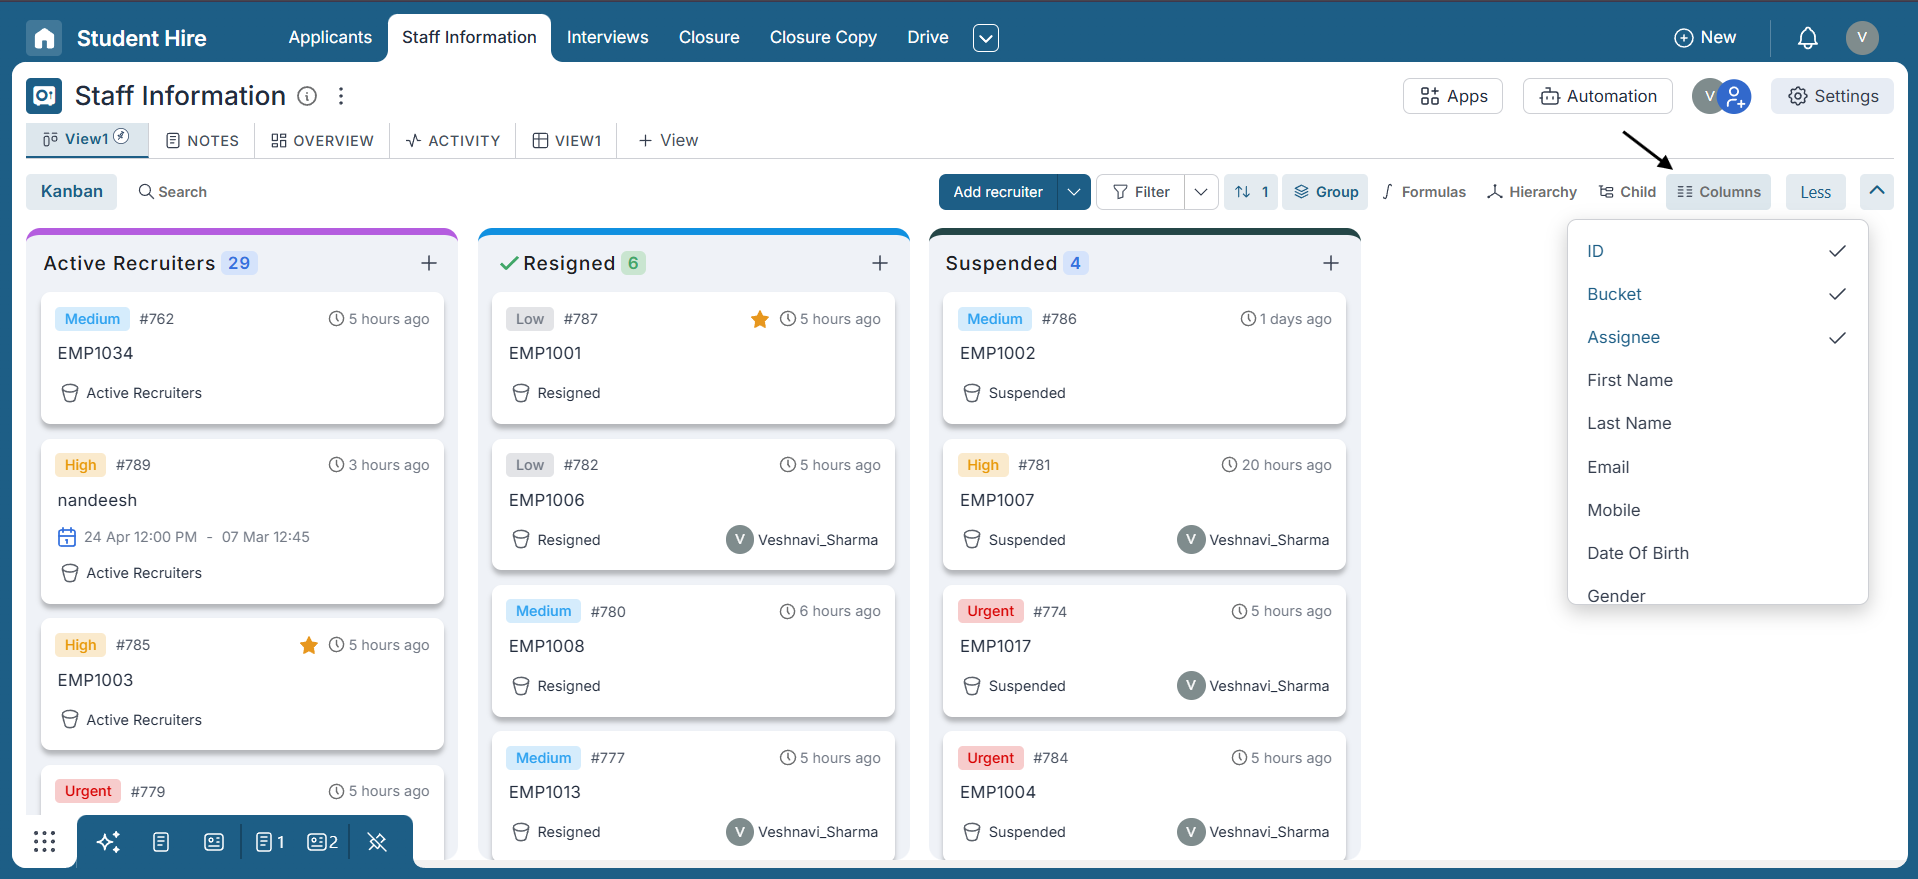
In the Kanban view, you can use the column options to choose which attributes are displayed directly on the item cards. This makes it easy to view key information at a glance without needing to open each card individually. You can also adjust which attributes appear, allowing you to tailor the view based on what matters most to you.
Moving Items Between Groups
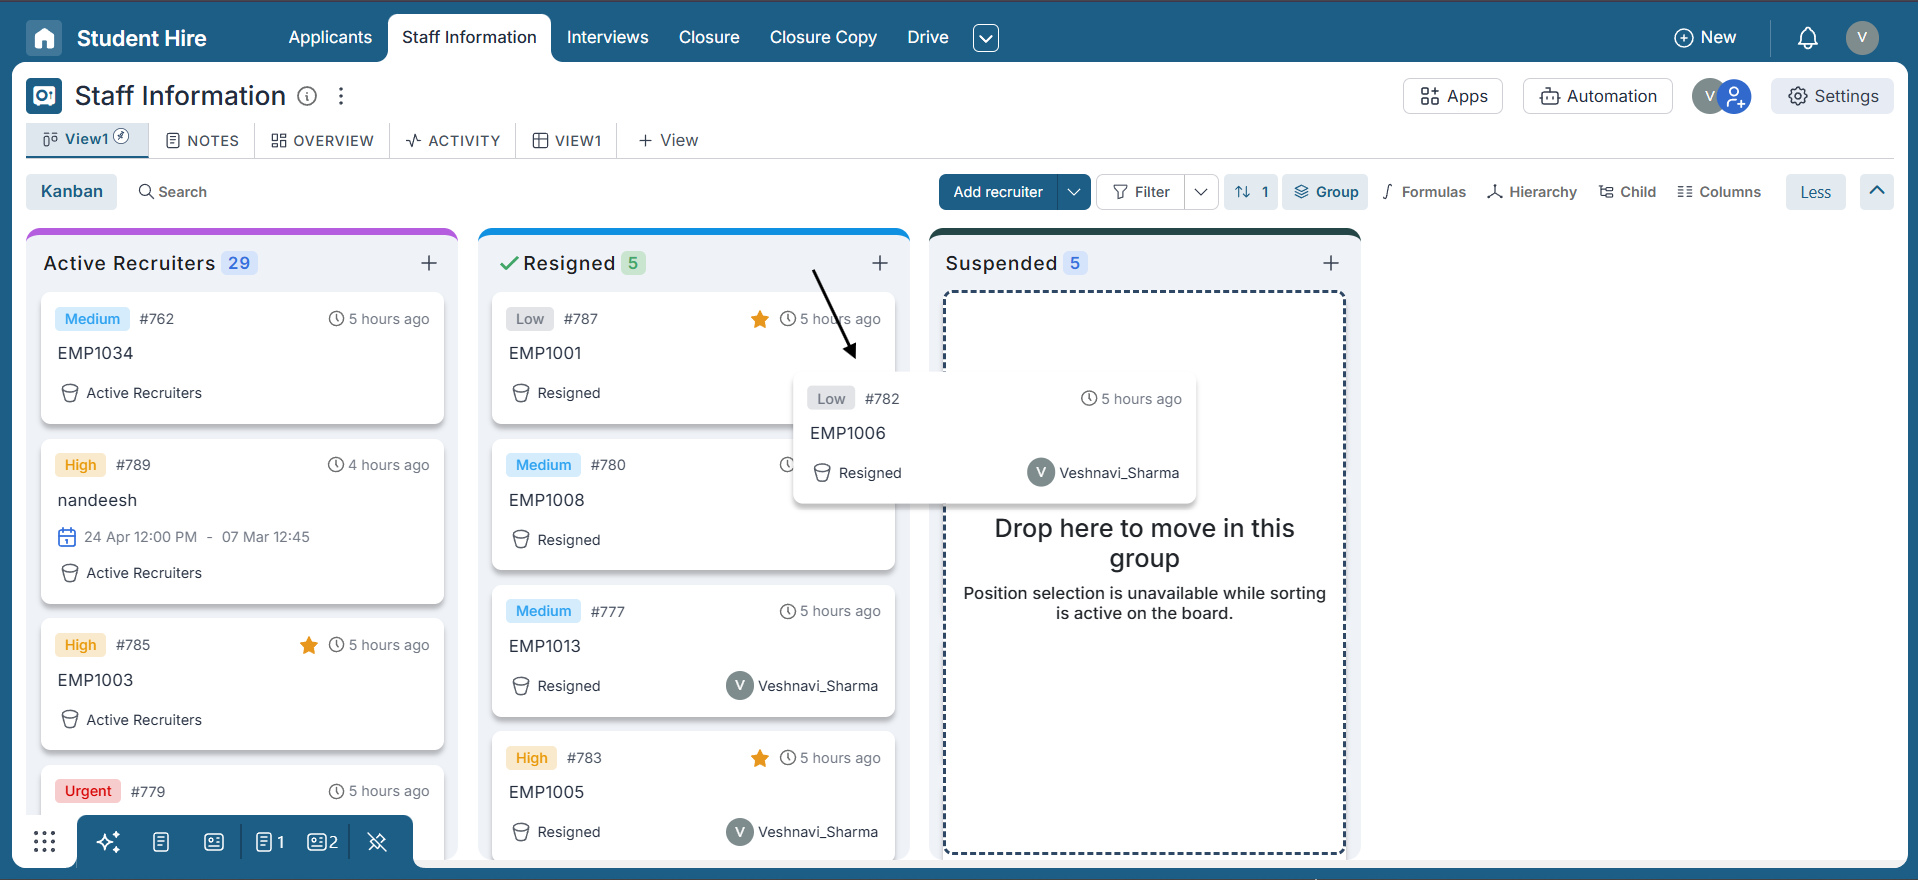
In the Kanban view, items are organized into Groups based on a selected field—such as Bucket, Priority, Assignee, or any other item attribute. To move an item between groups, simply click and hold the item card, drag it to the desired group, and release it. This action will automatically update the underlying field value. Alternatively, you can open the item card and manually update the field that the view is grouped by.
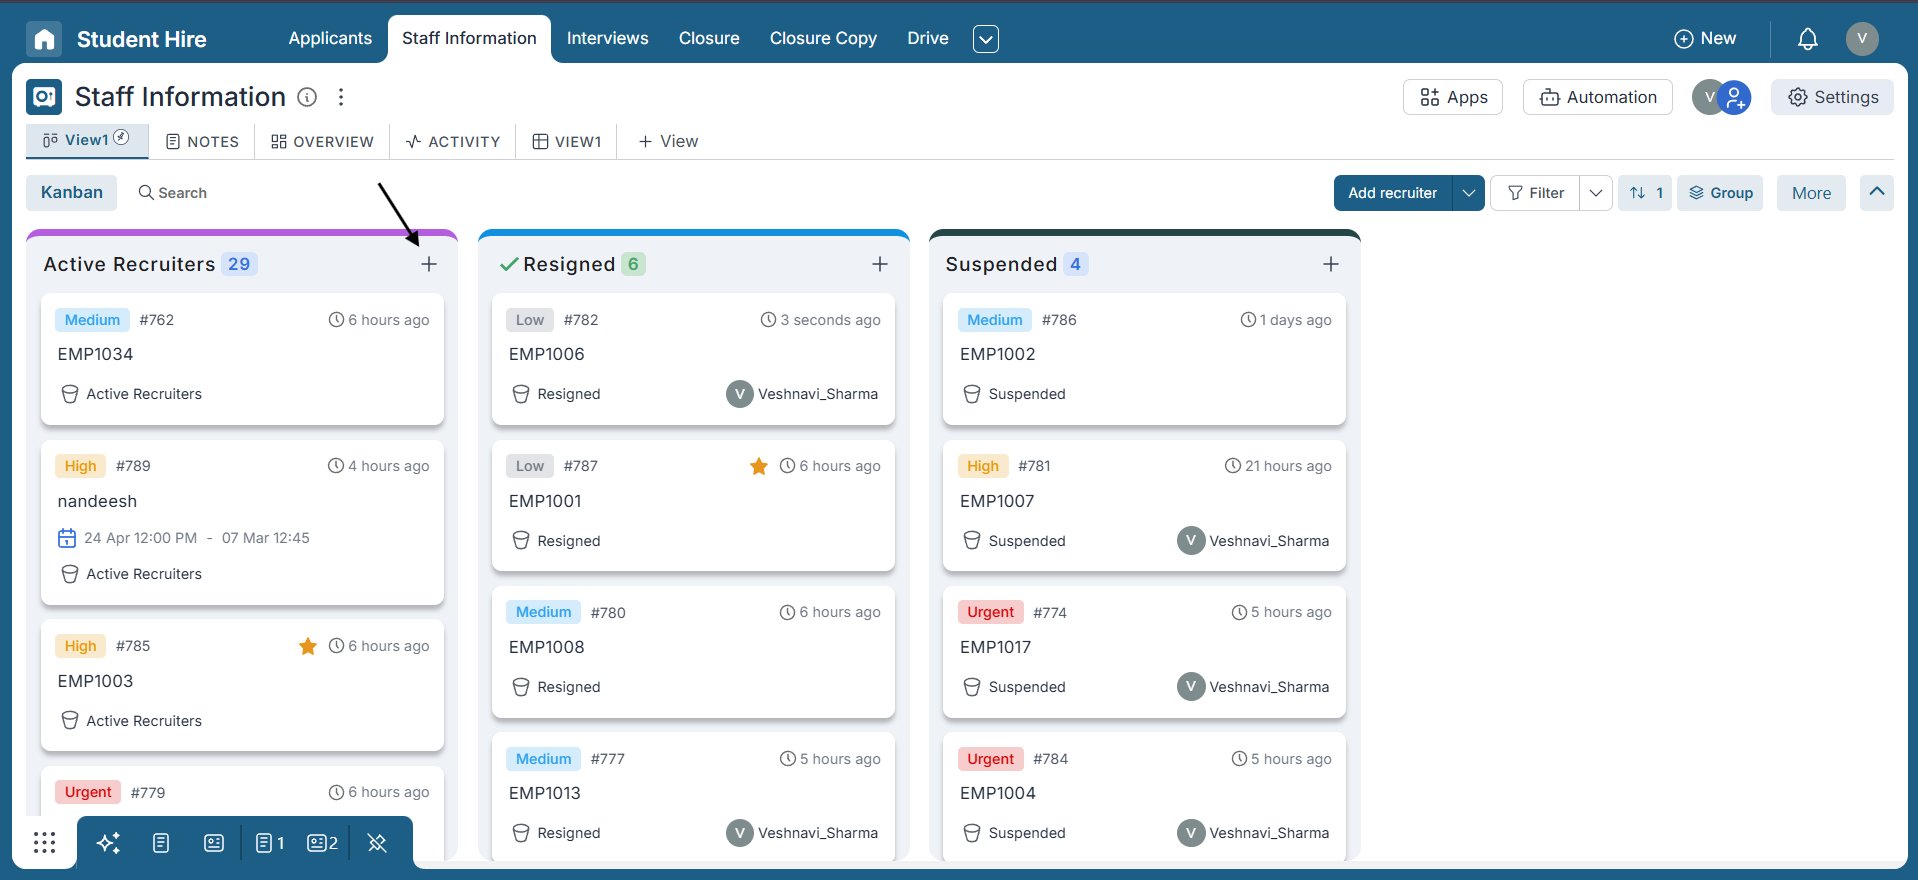
Creating New Items
To create a new recruiter in a Kanban bucket, simply click the + icon within the desired bucket—this will open a quick popup to enter the title. Alternatively, you can use the Add Recruiter button available at the top of the view, next to the filter, group, and sort options. If the + icon is not visible in a bucket, it means recruiter creation is disabled for that bucket. Note: In this view, the terminology is set to “Recruiter.” By default, this option appears as “Add Item” if the terminology hasn't been customized.
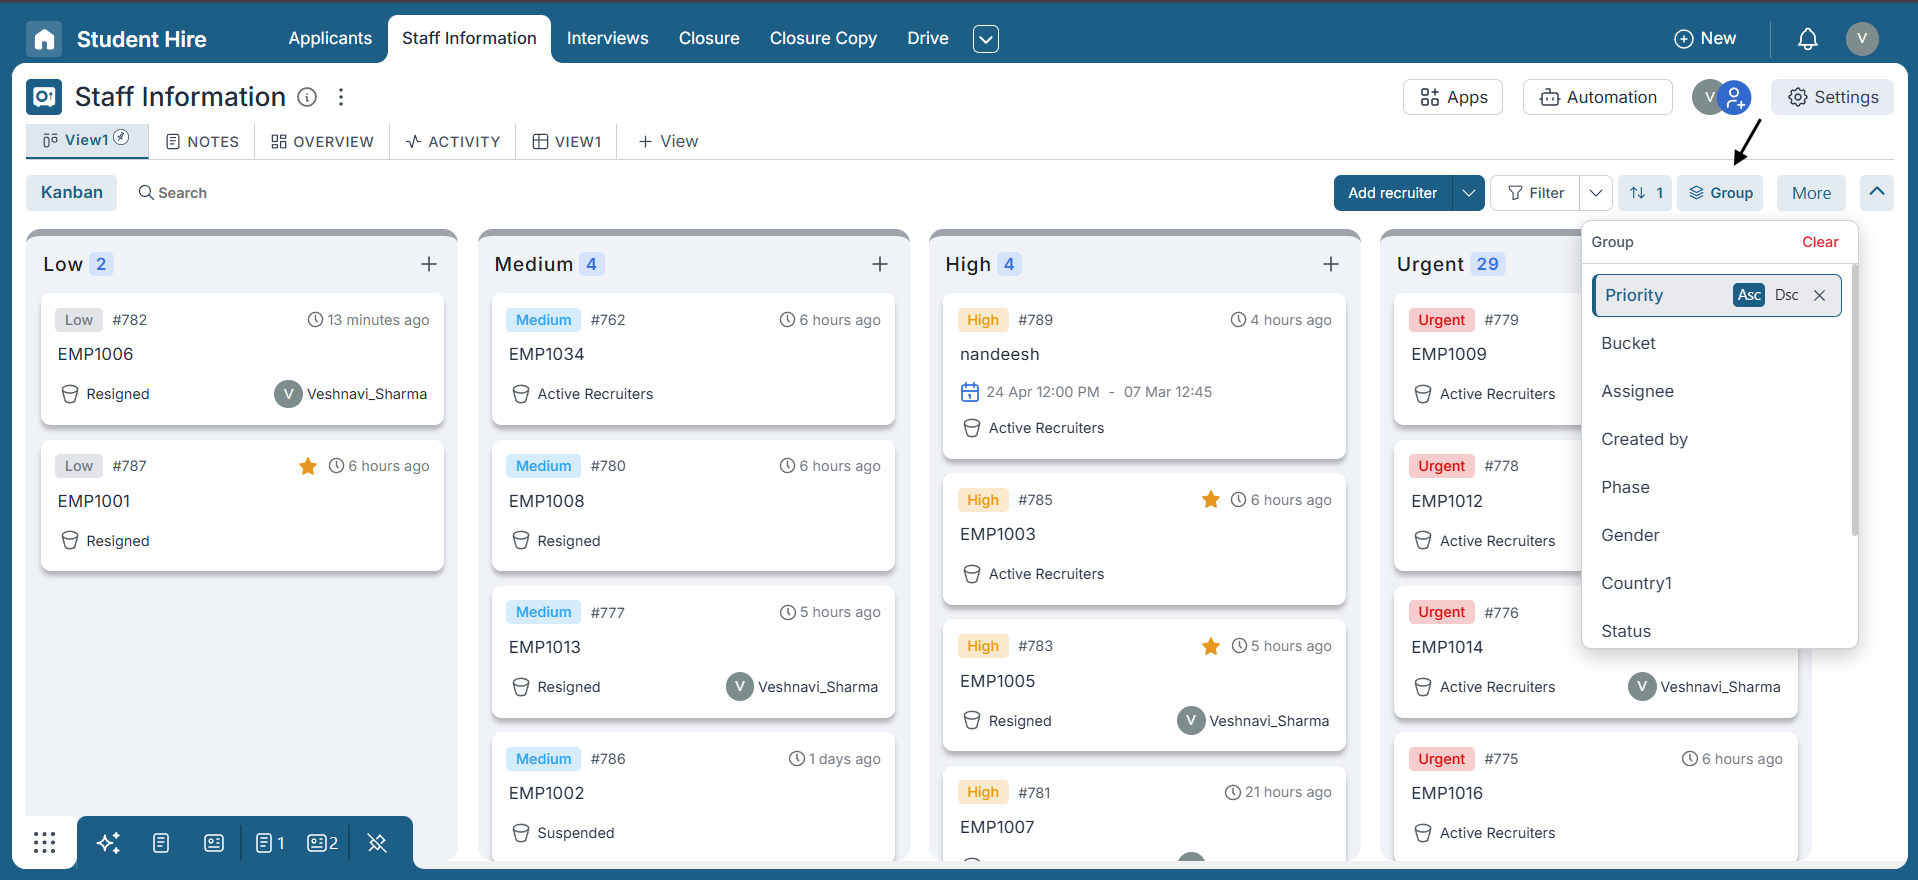
Grouping Items
Pronnel allows you to view your data in different formats, such as by priority, assignee, or custom fields with dropdown options, using the Group by feature. This provides a holistic 360-degree view of your data. You can also control the order in which groups appear—selecting ascending will display values from lowest to highest (e.g., grouping by Priority in ascending order will show items from Low to Urgent), while descending will show them from highest to lowest.
Conclusion
Now that you're familiar with the features and capabilities of Kanban views in Pronnel, it's time to put them into action. Kanban remains one of the most intuitive and effective methods for managing tasks, and Pronnel enhances its potential with flexible customization and powerful tools. Explore different view setups, tailor your boards to your workflow, and boost team collaboration with transparency and efficiency. Happy organizing with Pronnel!
Frequently Asked Questions About Kanban Views in Pronnel
What is Kanban, and why is it primary in Pronnel?
Kanban is a visual method focused on clarity and flow. Pronnel uses it as the primary view for efficient team management.
How do I create a Kanban view?
Open a board → + View → Data View → select Kanban. Name and customize as needed.
Can I apply filters and sorting?
Yes. Filters and multi-level sorting are saved per view and retained.
How do I share a Kanban view?
Use Share with Board Users to let others access the same filtered/sorted view.
What are Kanban columns called and can I rename them?
Columns are Buckets. Rename them from Attributes to match your workflow.
Can I rearrange Buckets?
Yes. Settings → Process → drag buckets to reorder; changes apply across views.
Why use column options?
Show key attributes on cards to reduce open/close clicks and increase visibility.
How do I move items between buckets?
Drag and drop between buckets or edit the bucket field on the card.
How do I create new items?
Click + on a bucket or use the Add button in the top bar; label may vary by terminology.
Can I view data beyond Kanban columns?
Yes. Group by priority, assignee, or dropdown fields; control ascending/descending order.