Integrating Pronnel with Line for Efficient Client Management
Effective communication with clients is crucial for any business, and if you're using Line for client interactions, integrating it with Pronnel can streamline your enquiry and support management. This tutorial guides you through setting up your Business Line bot with Pronnel quickly and efficiently.
Step-by-Step Guide
-
Step 1: Set Up Your Line Business ID
-
Access Line Developer Console: First, go to the Line Developer Console.
-
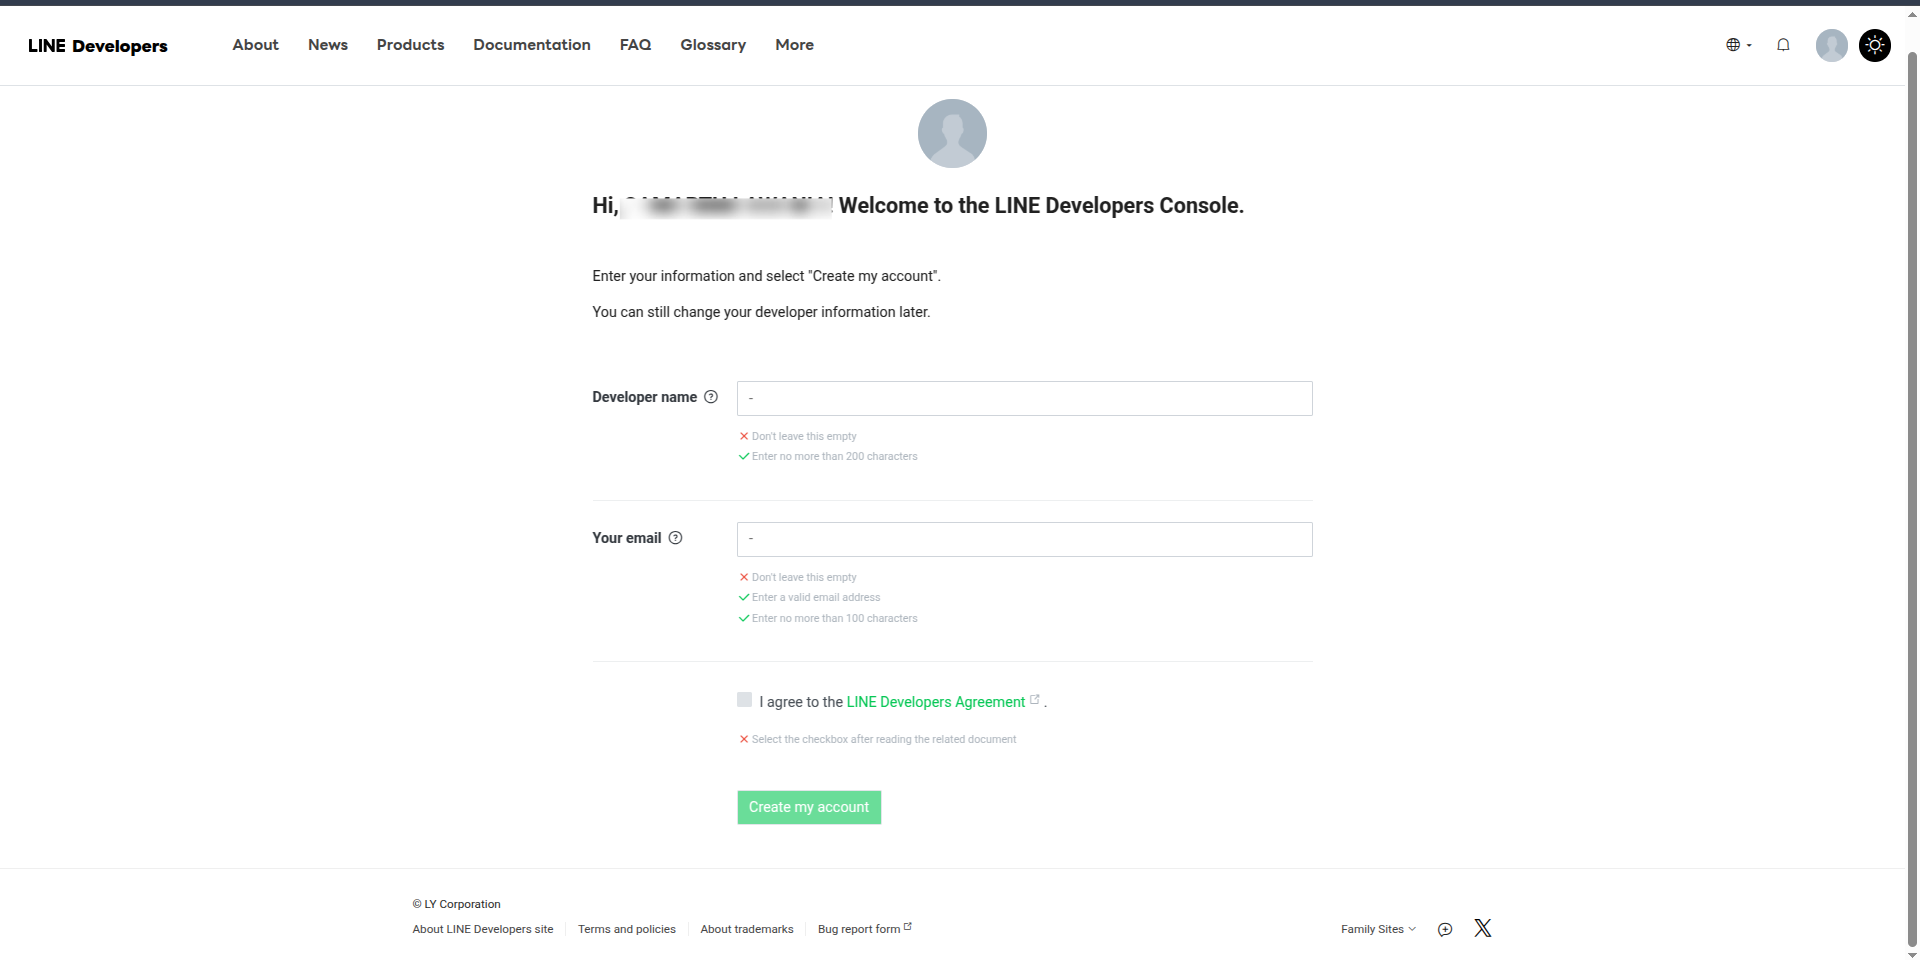
Log In and Create a Business ID: Log in and create a new Line Business ID. You'll need to provide your name and email
-
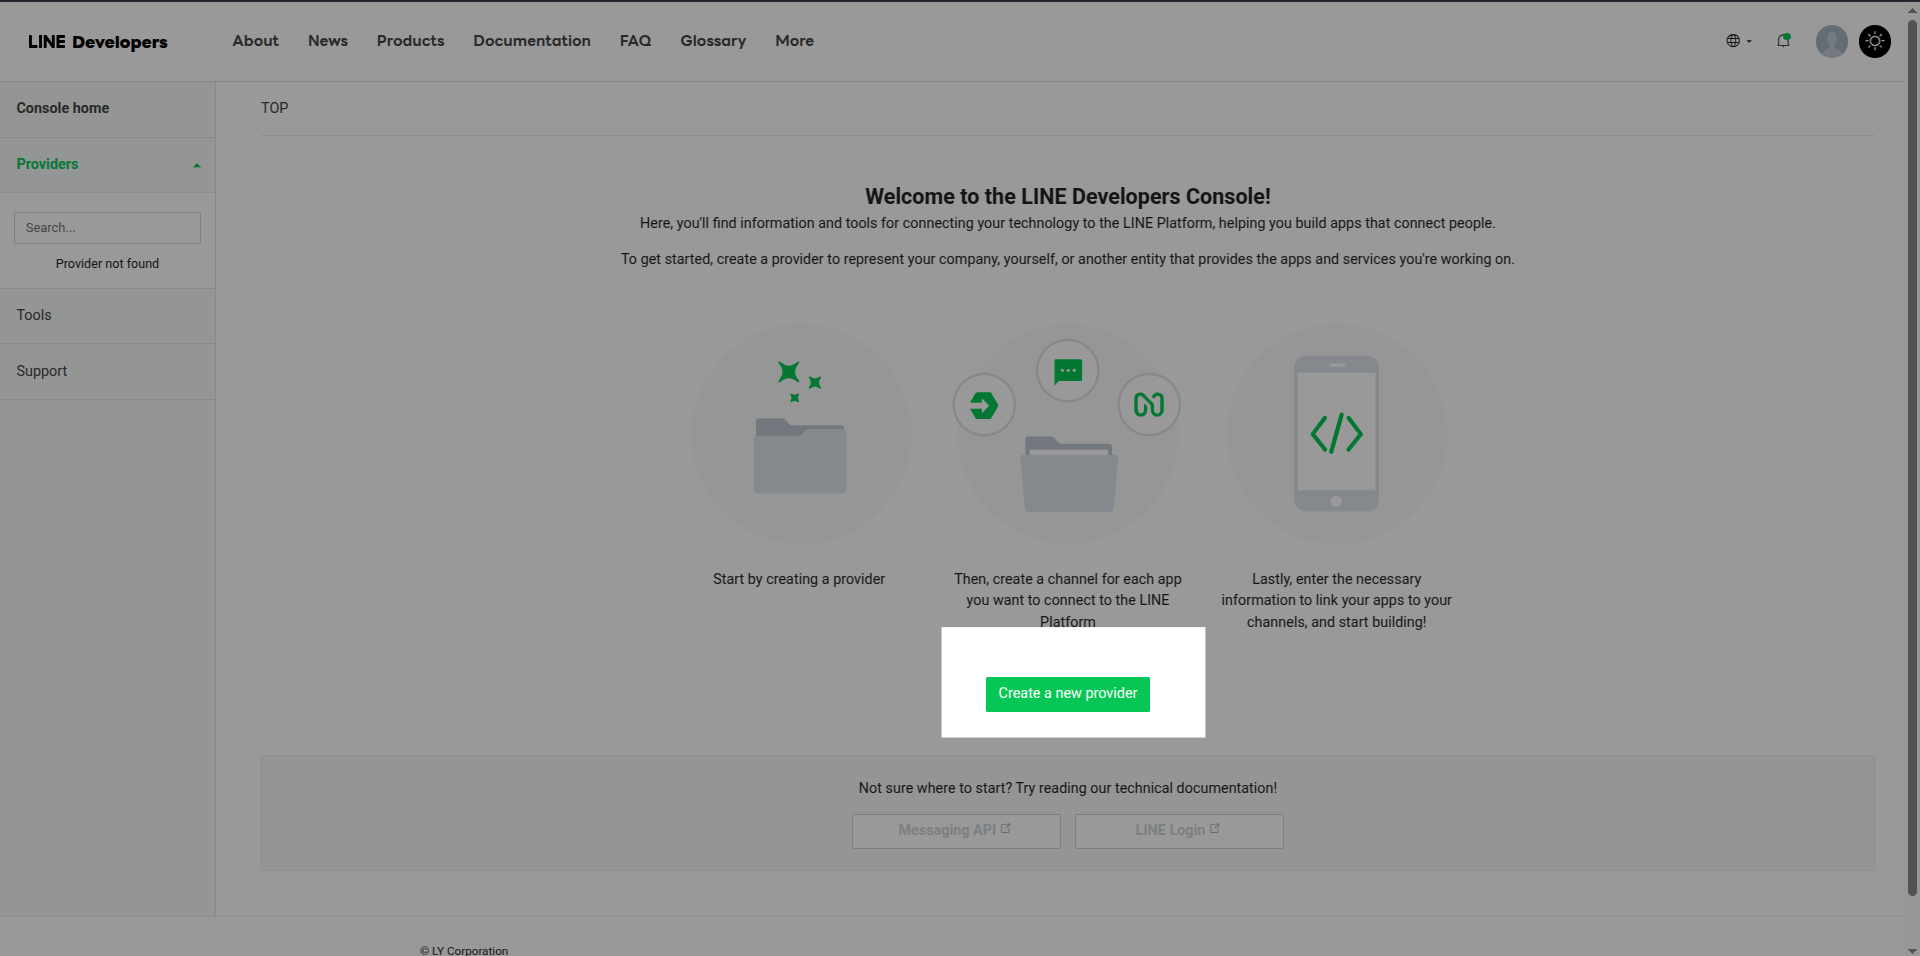
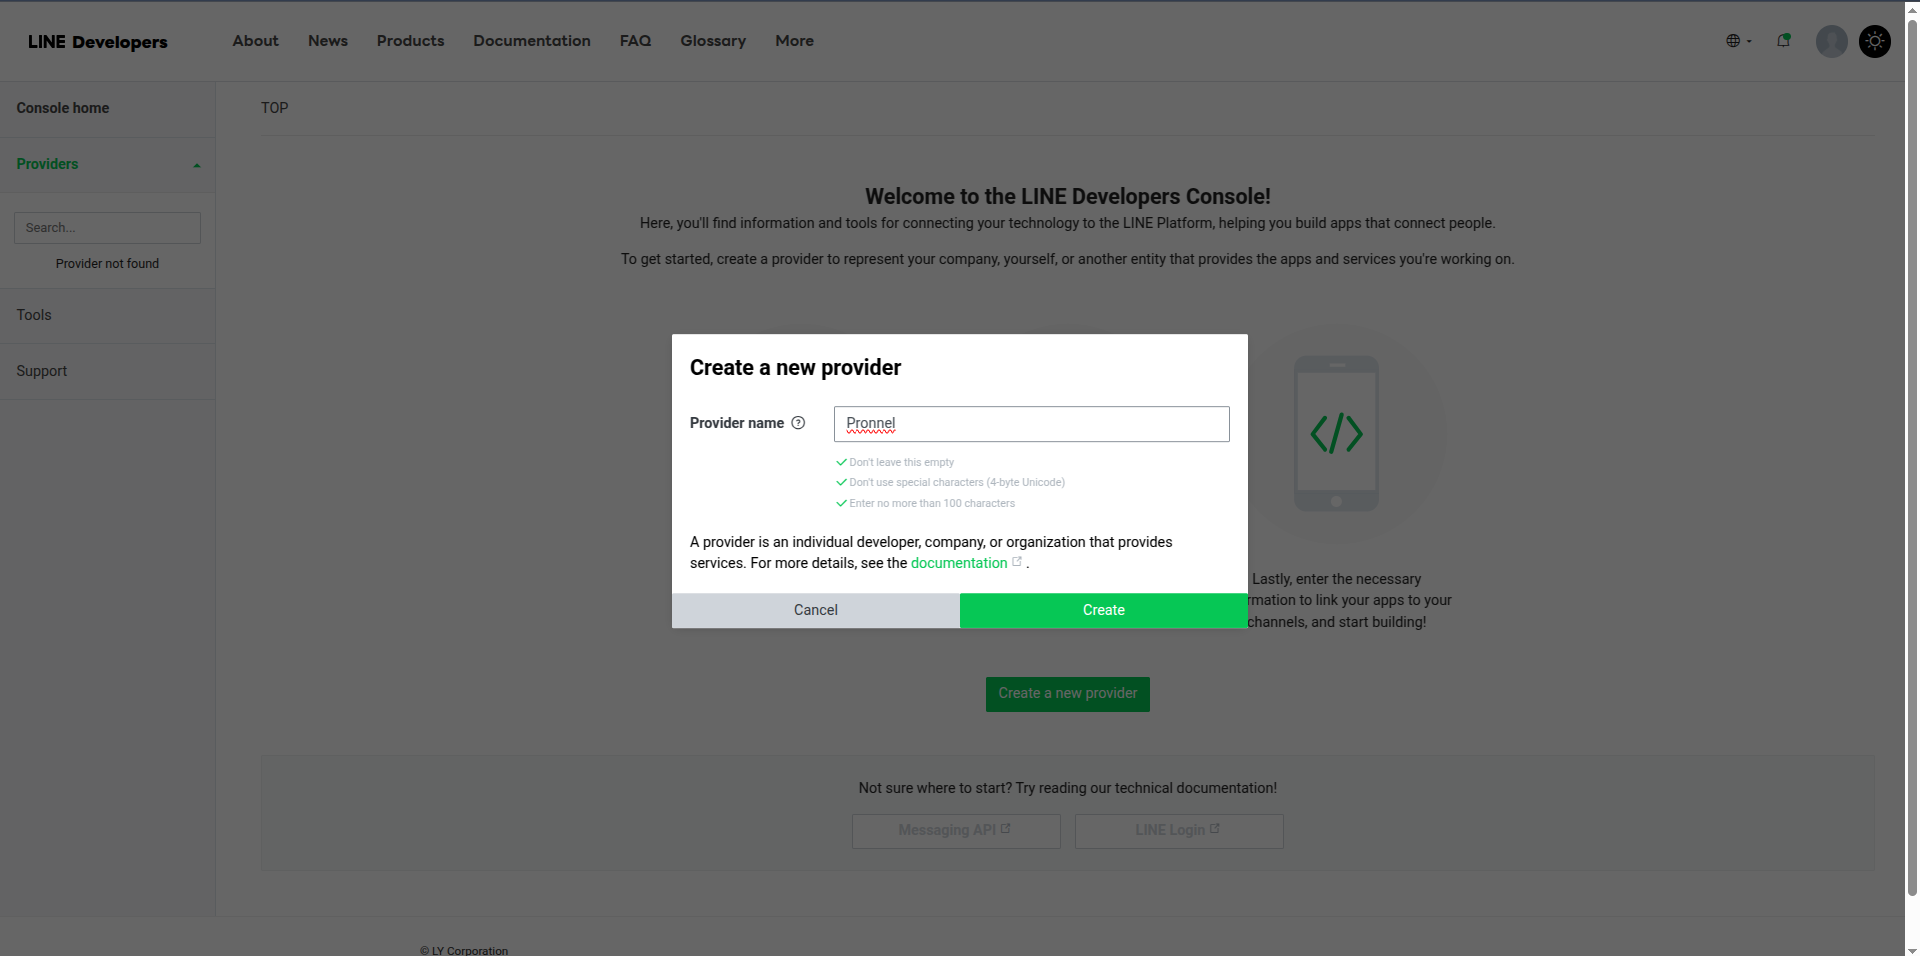
Create a New Provider: Follow the prompts to make a new business provider.
-
Create a Messaging API Channel: Create a Messaging API channel in the Channels tab. Fill out the form with the necessary information.
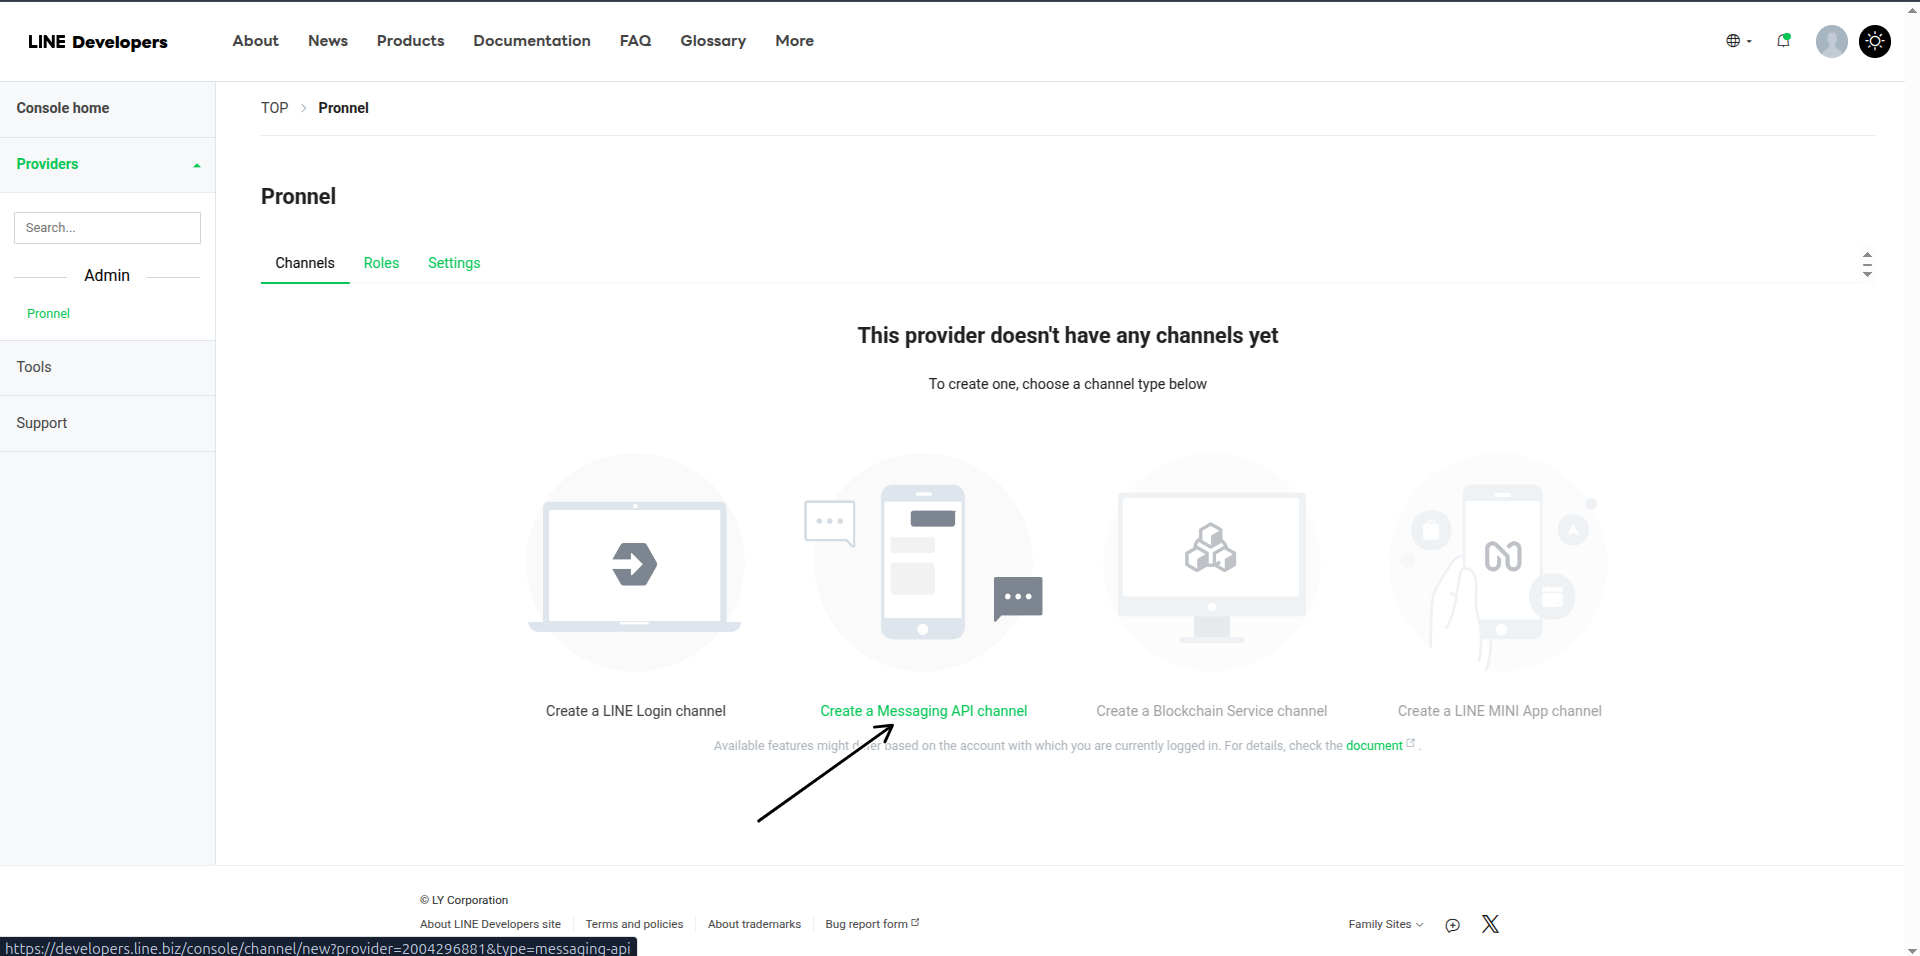
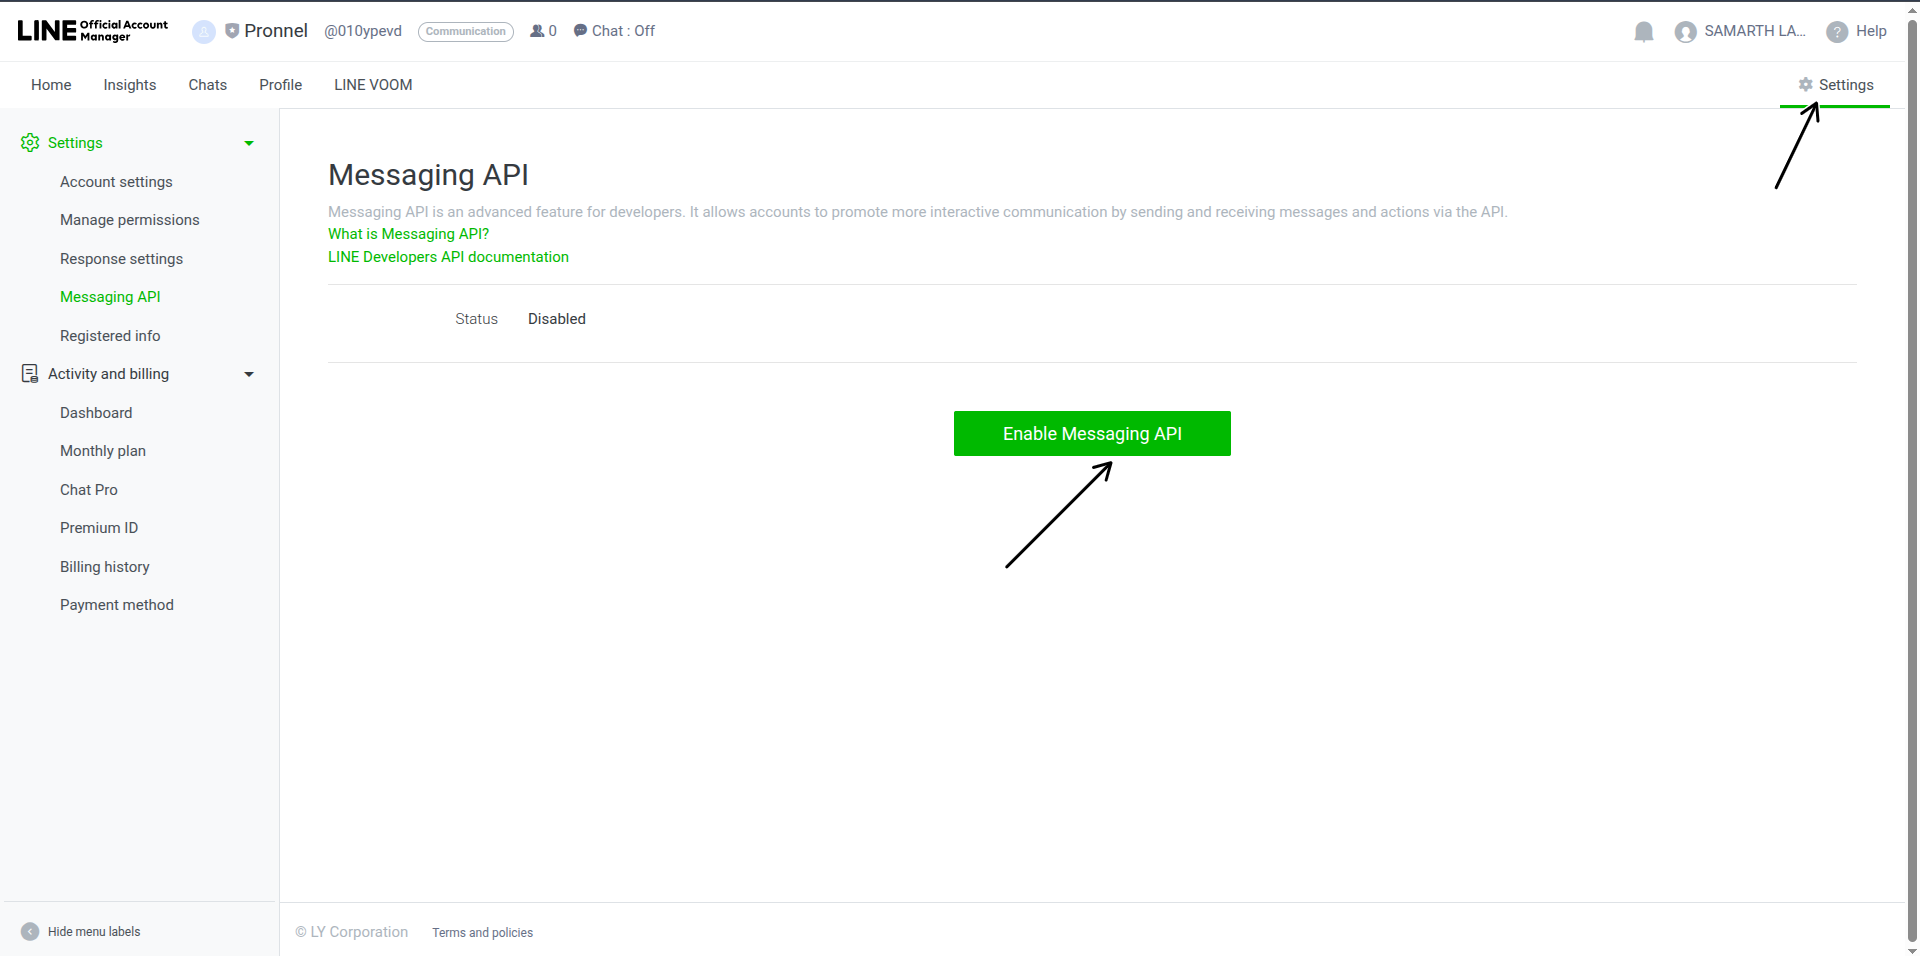
To create a Messaging API channel, create a LINE Official Account using the Create a LINE Official Account button, and then enable the use of the Messaging API on the LINE Official Account Manager.

After creating you will get directed to the web version administration screen. Go on settings and enable messaging API
- Go to your developer console and choose your channel and go to messagin tab
-
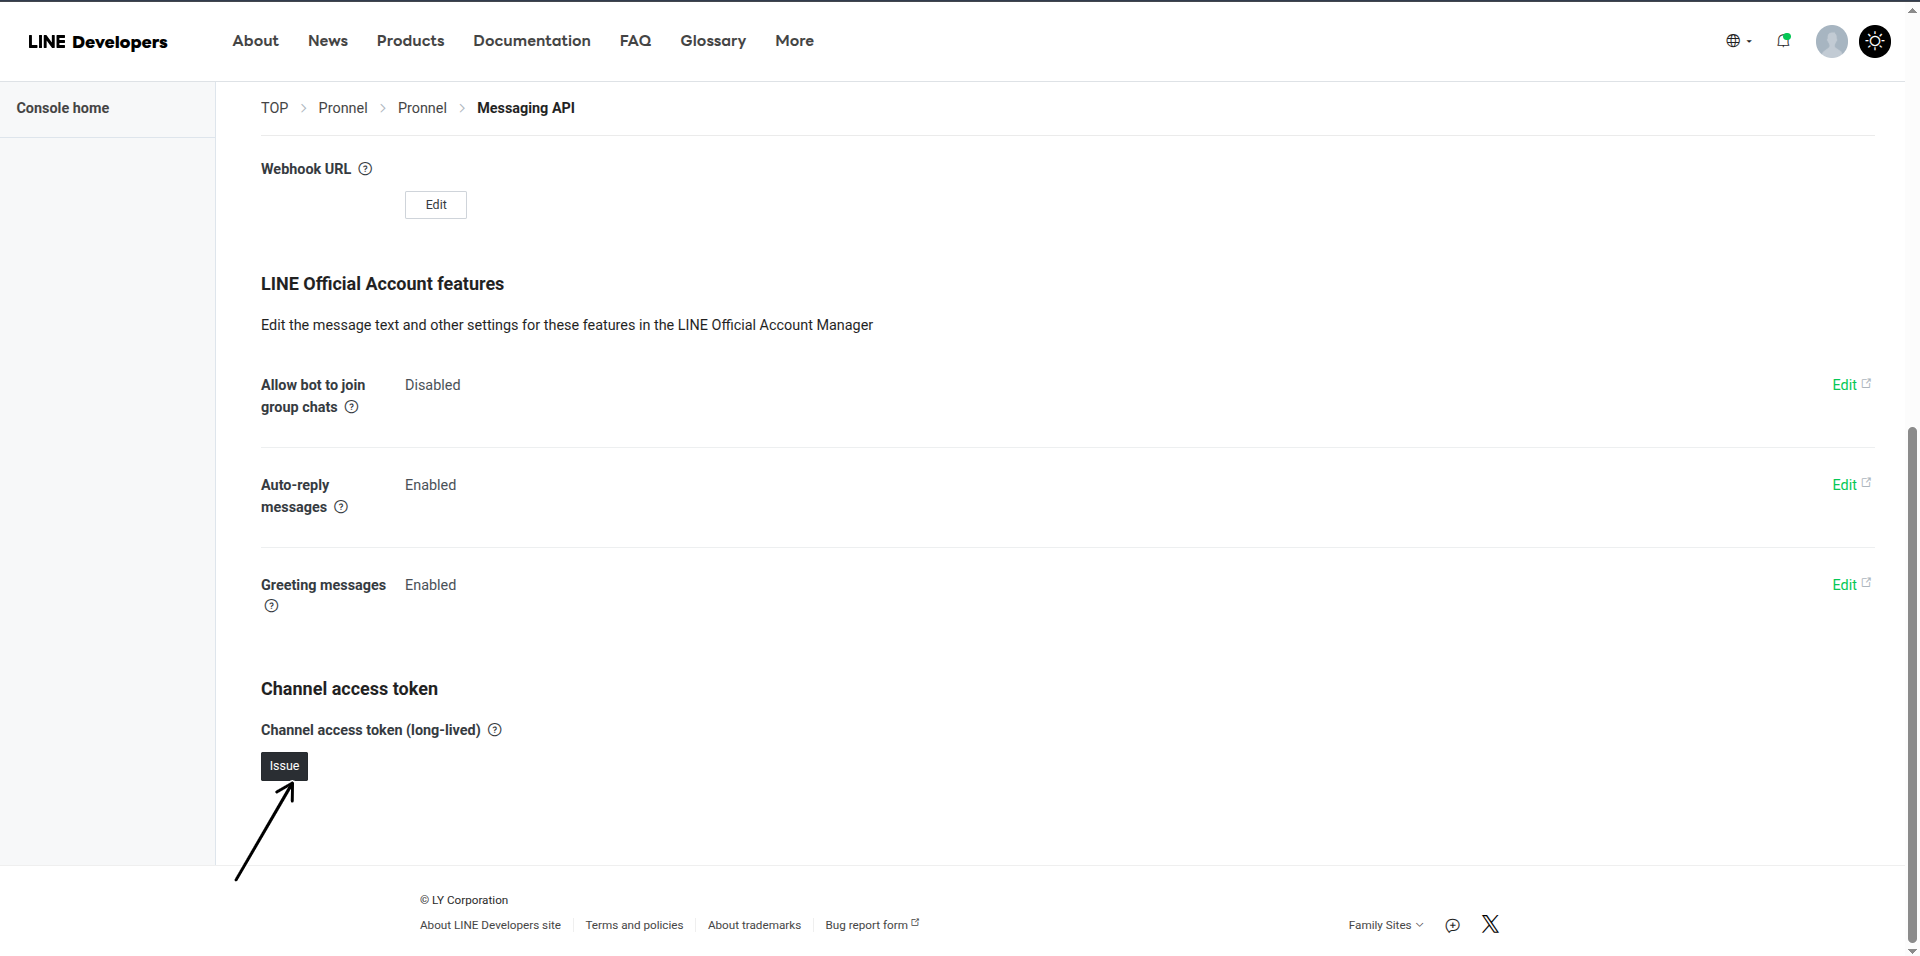
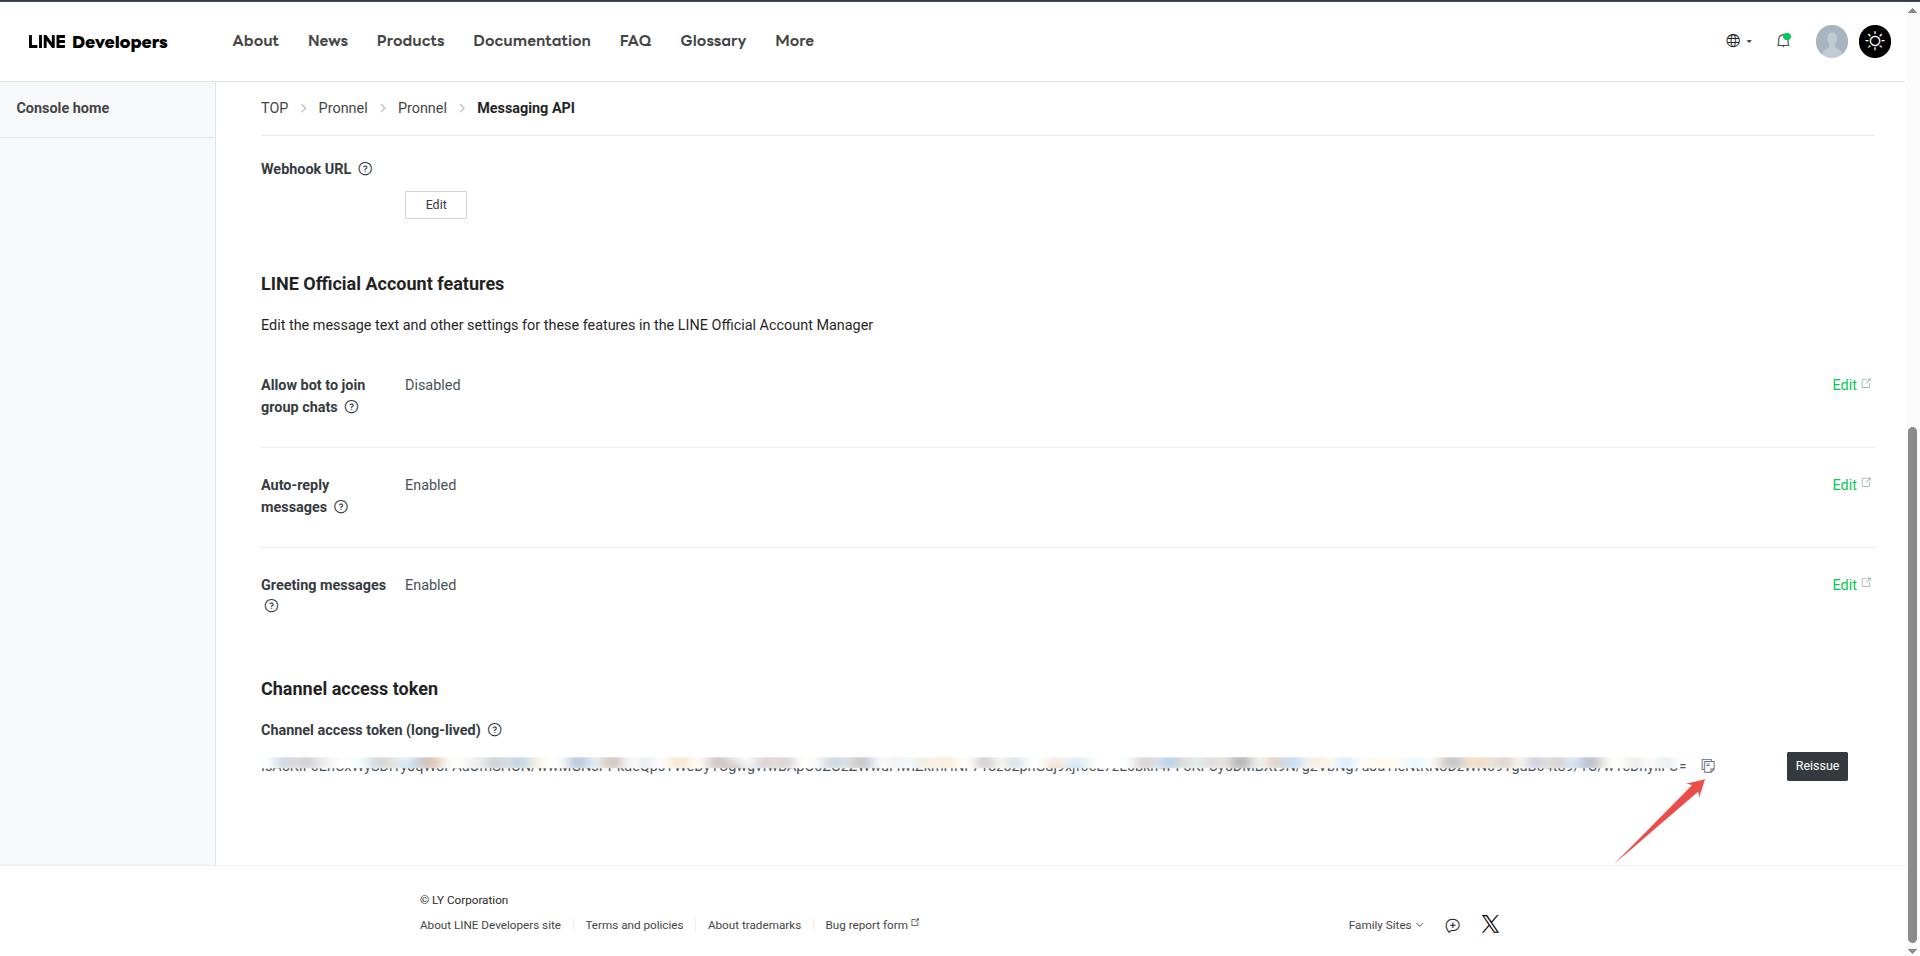
Generate Channel Access Token: Create a channel access token under the Messaging API tab.
-
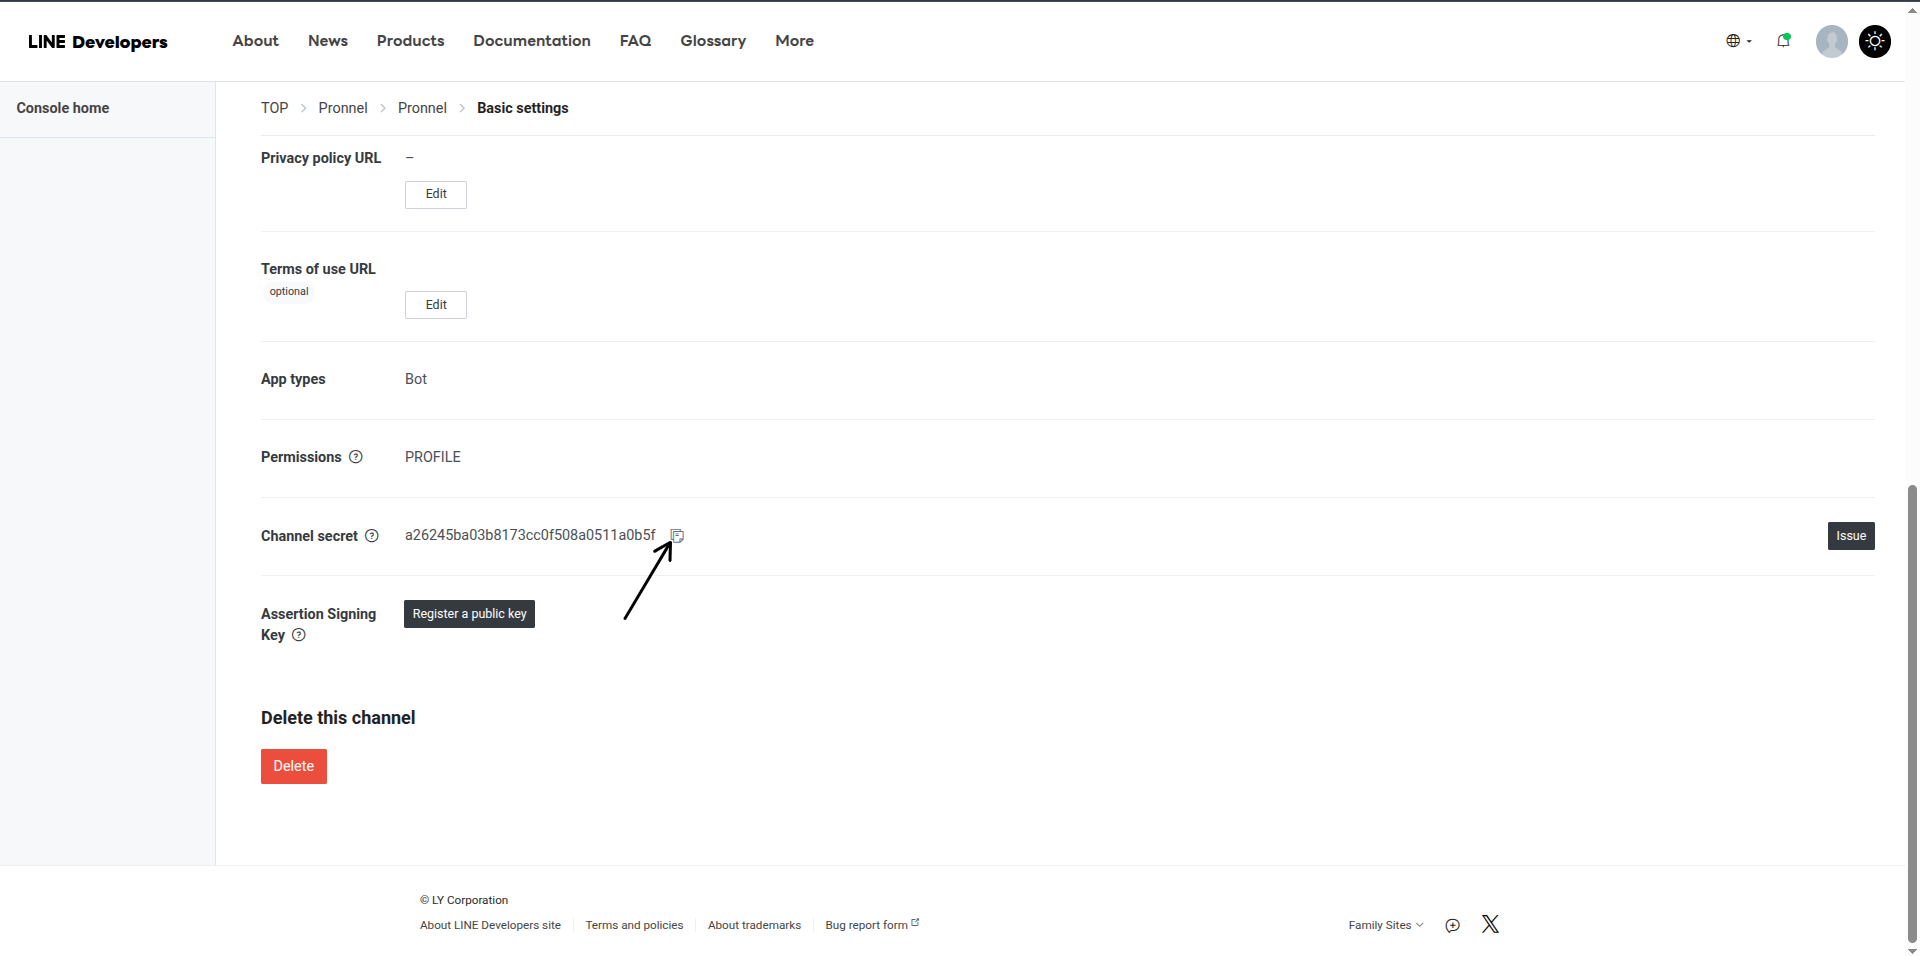
Copy Essential Information: Remember to copy the Bot Basic ID, access token, and Channel secret key from the Basic settings tab. These will be crucial for the next step.
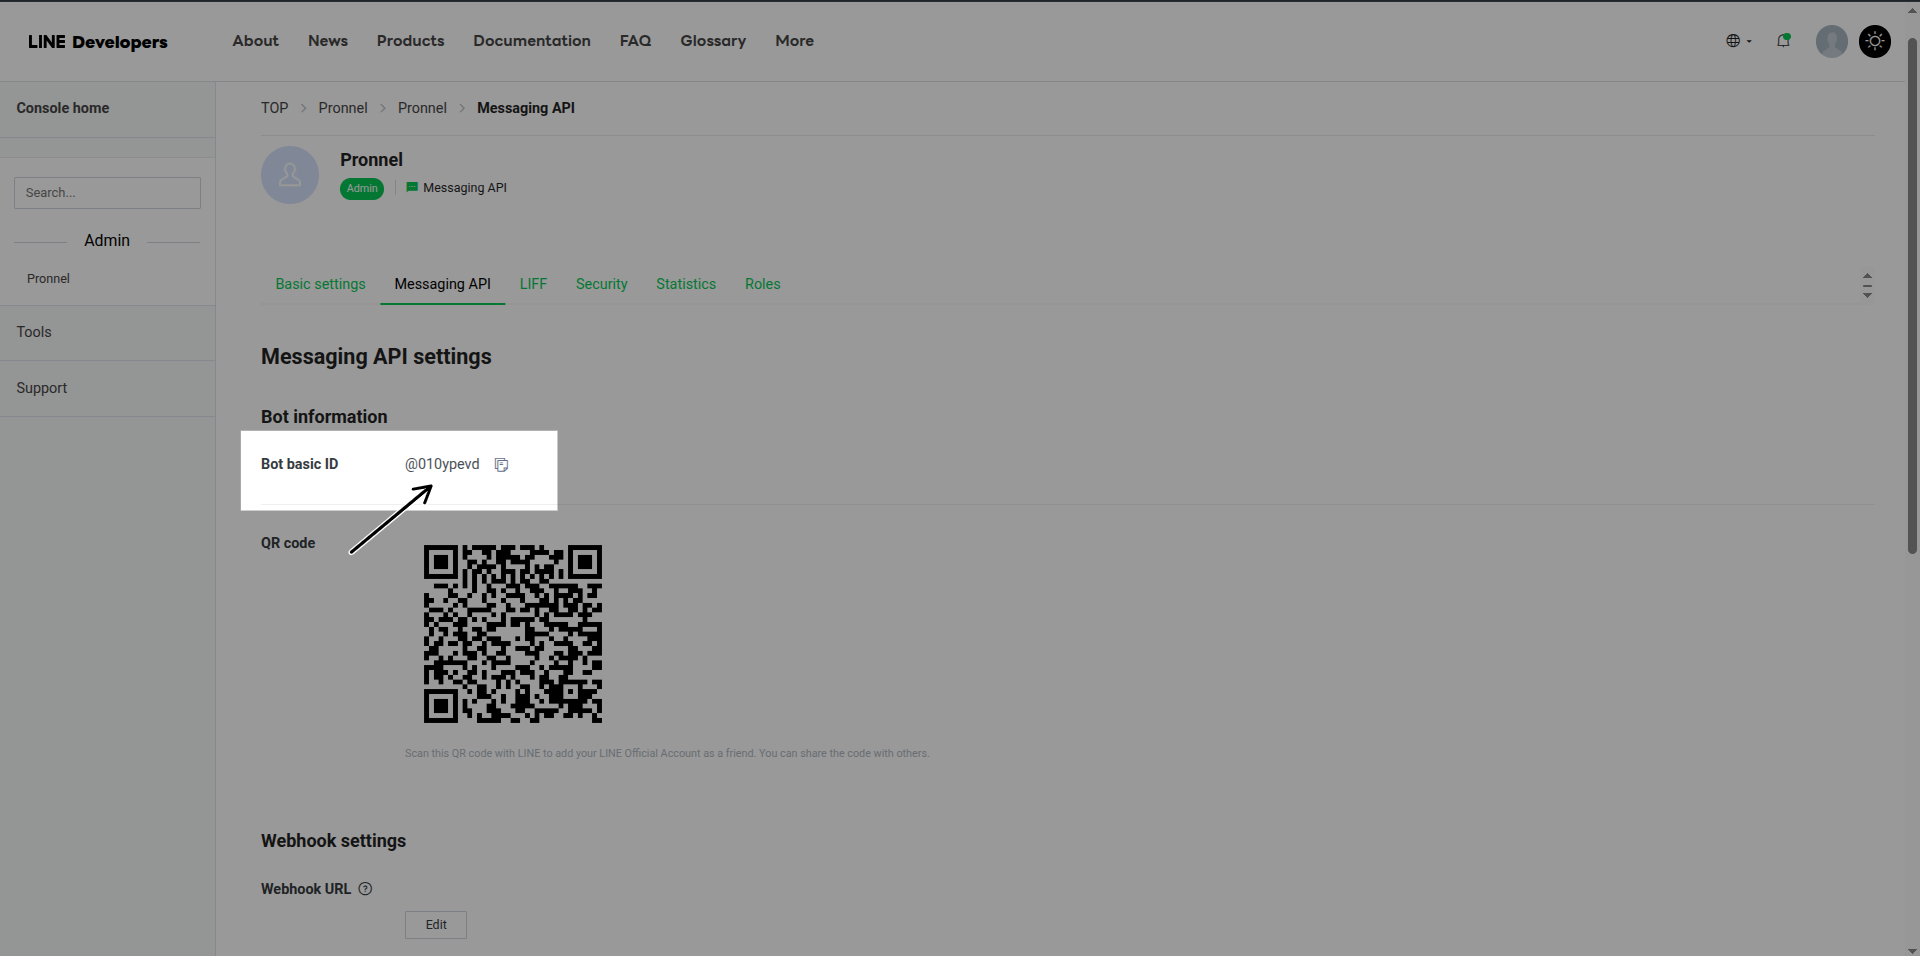
Channel sceret key is from basic tab
-
-
Step 2: Configure Pronnel Settings
-
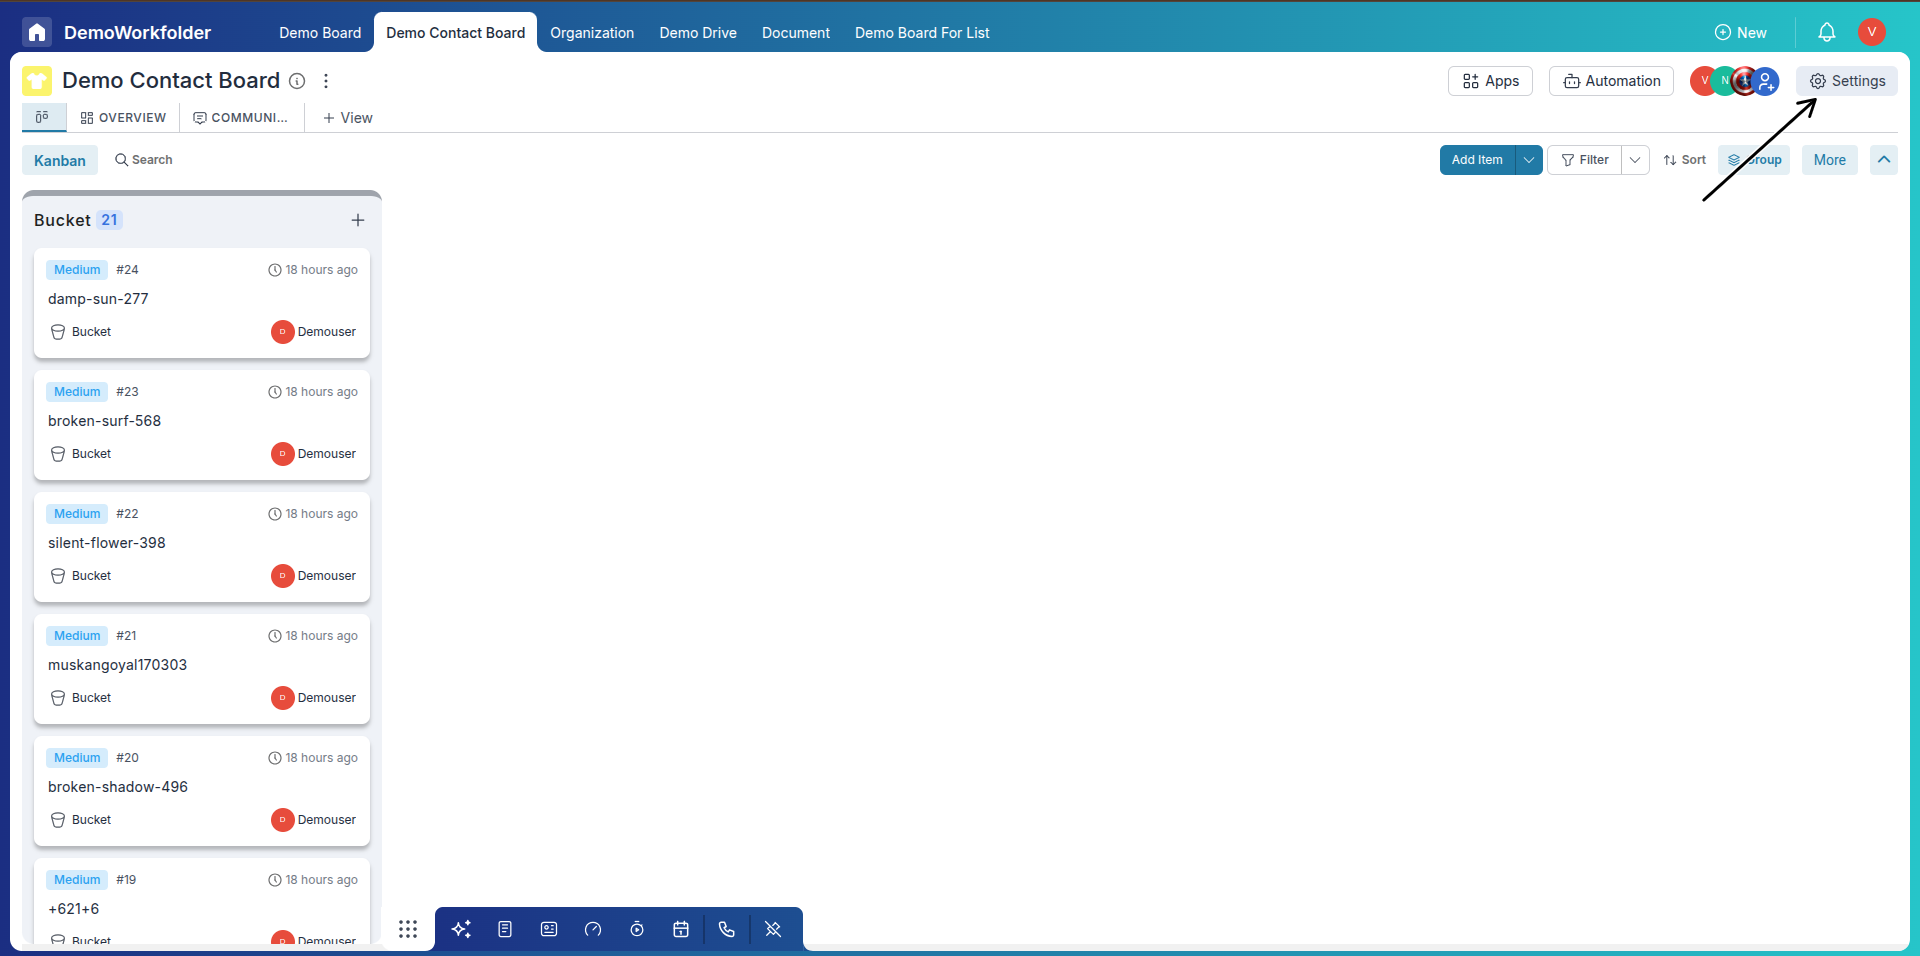
Navigate to Pronnel Lead Board: Go to the Pronnel Lead board, which is linked to a Contact board.
-
Access Settings: Click on the settings tab.
-
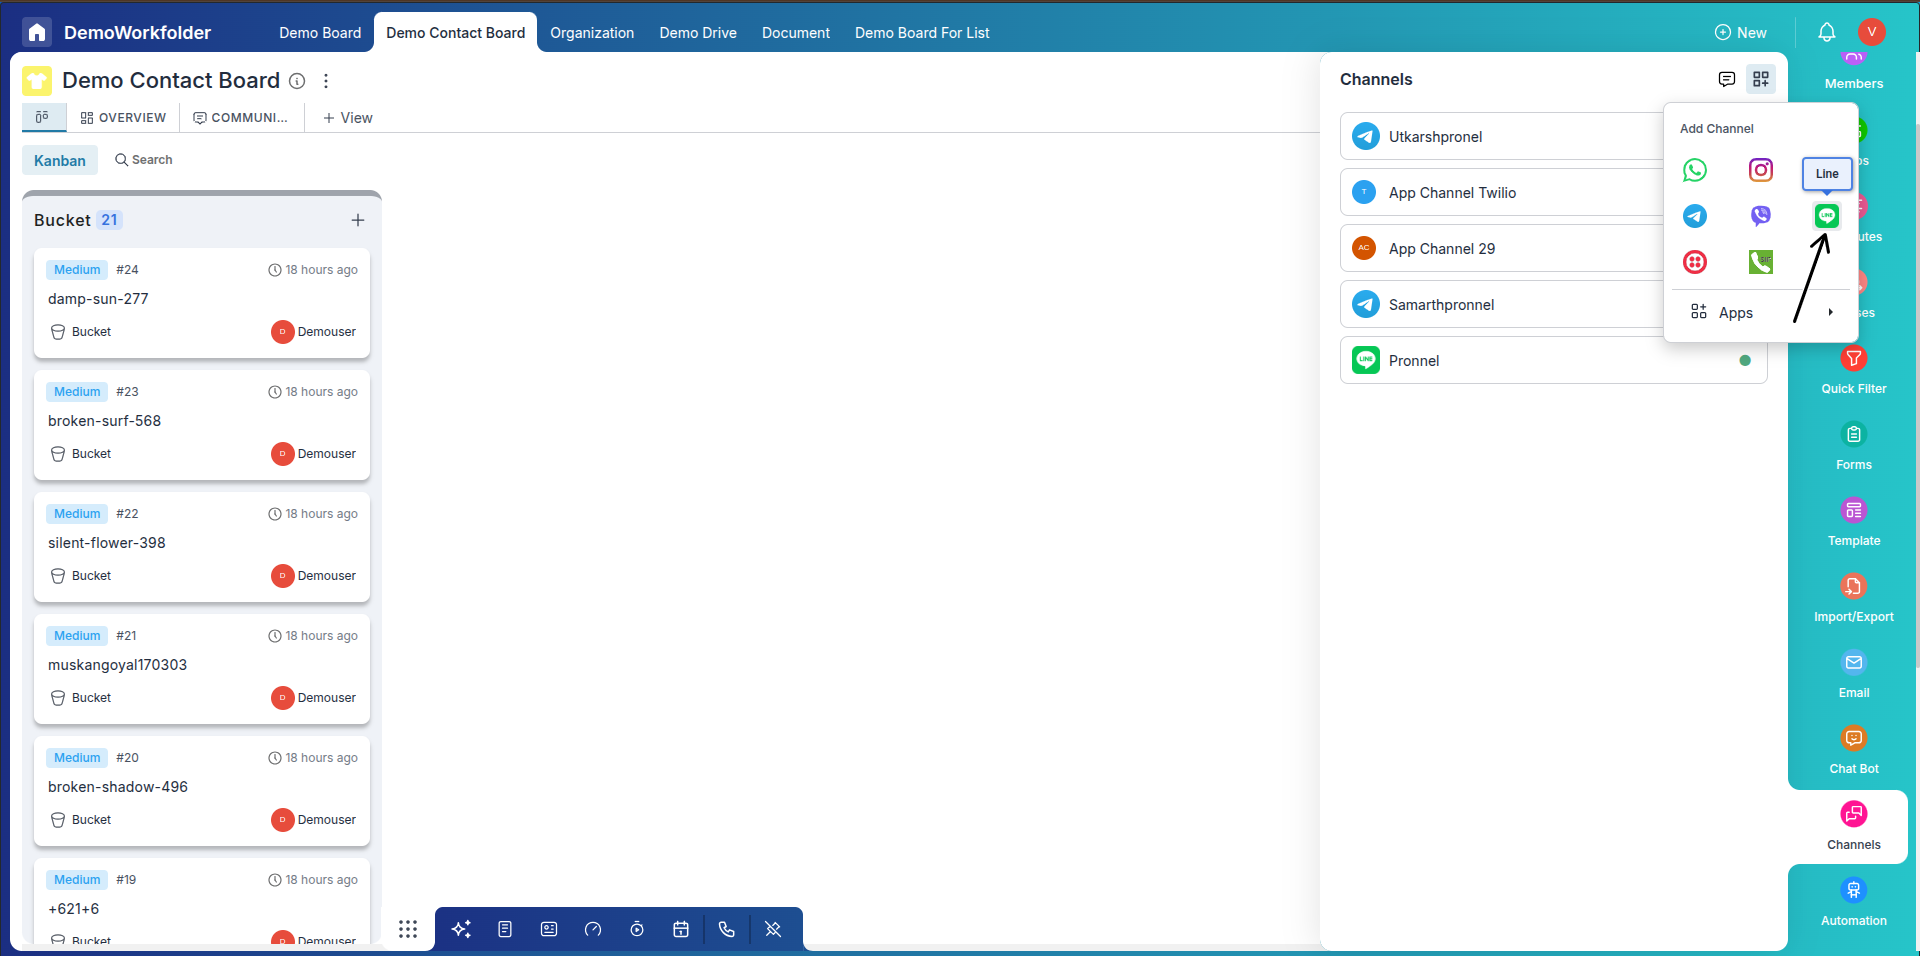
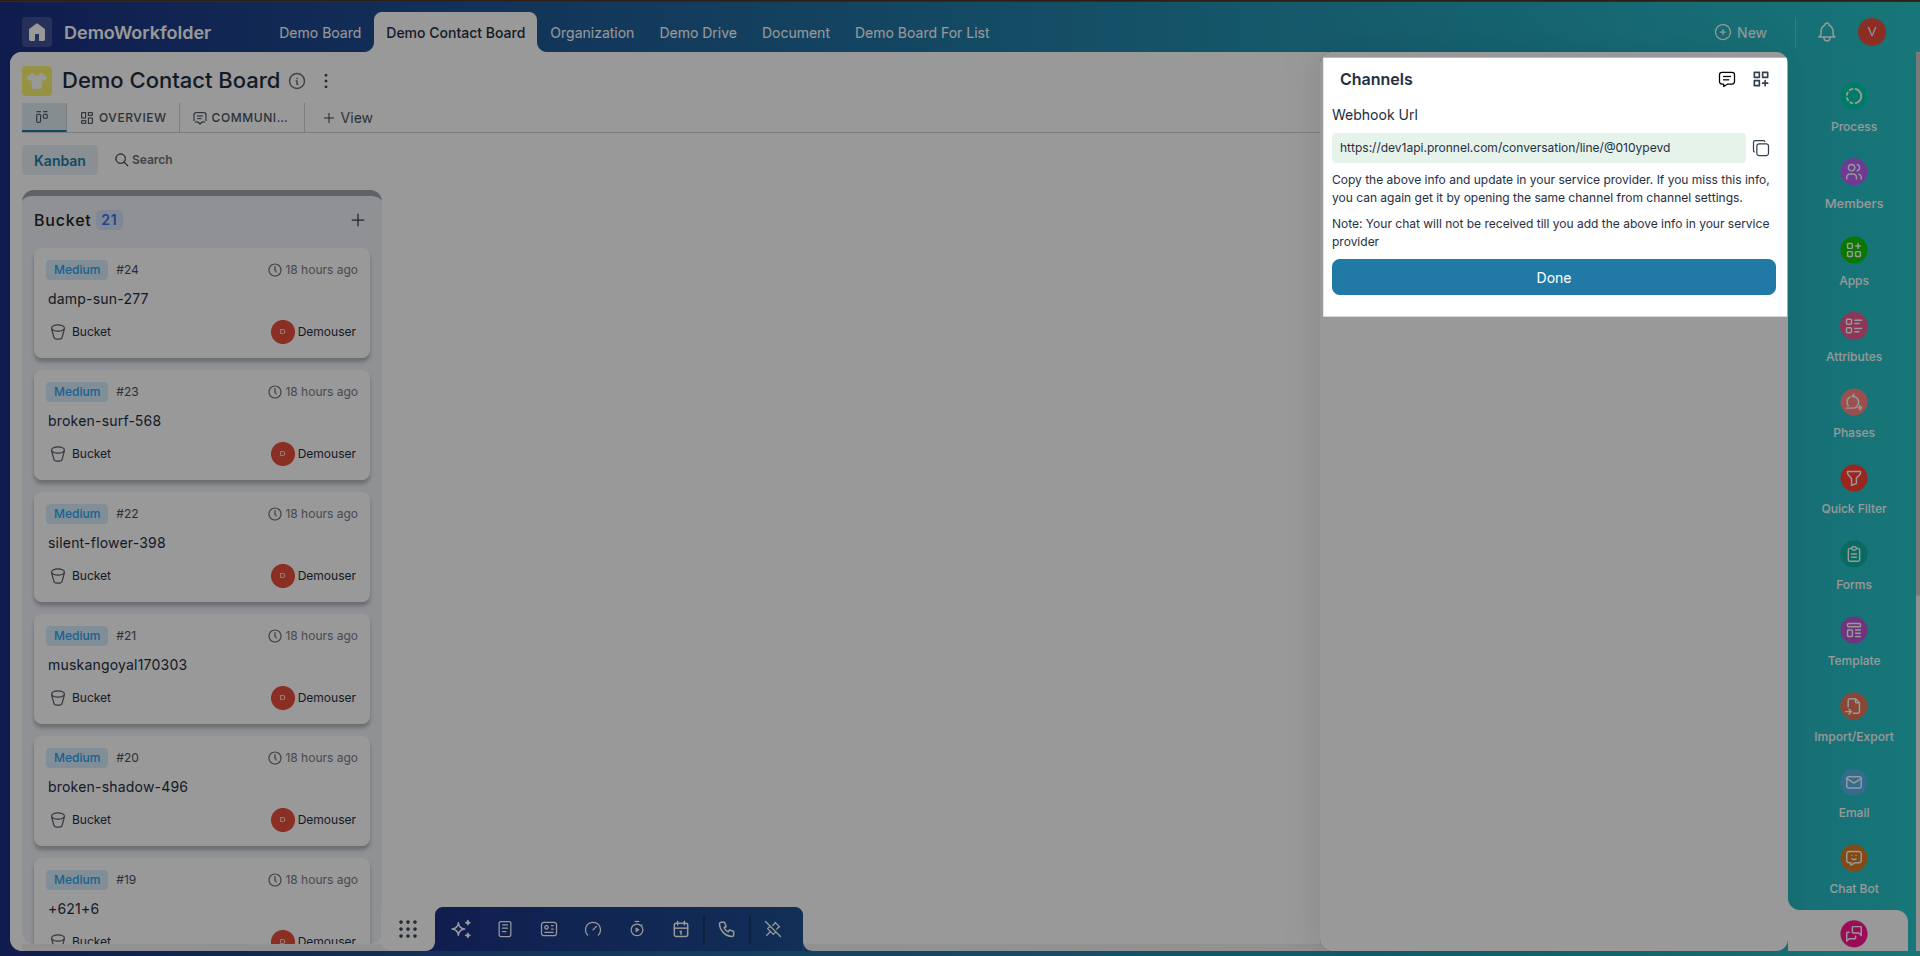
Select Line Channel: Find the Channel option in the settings and select Line.
-
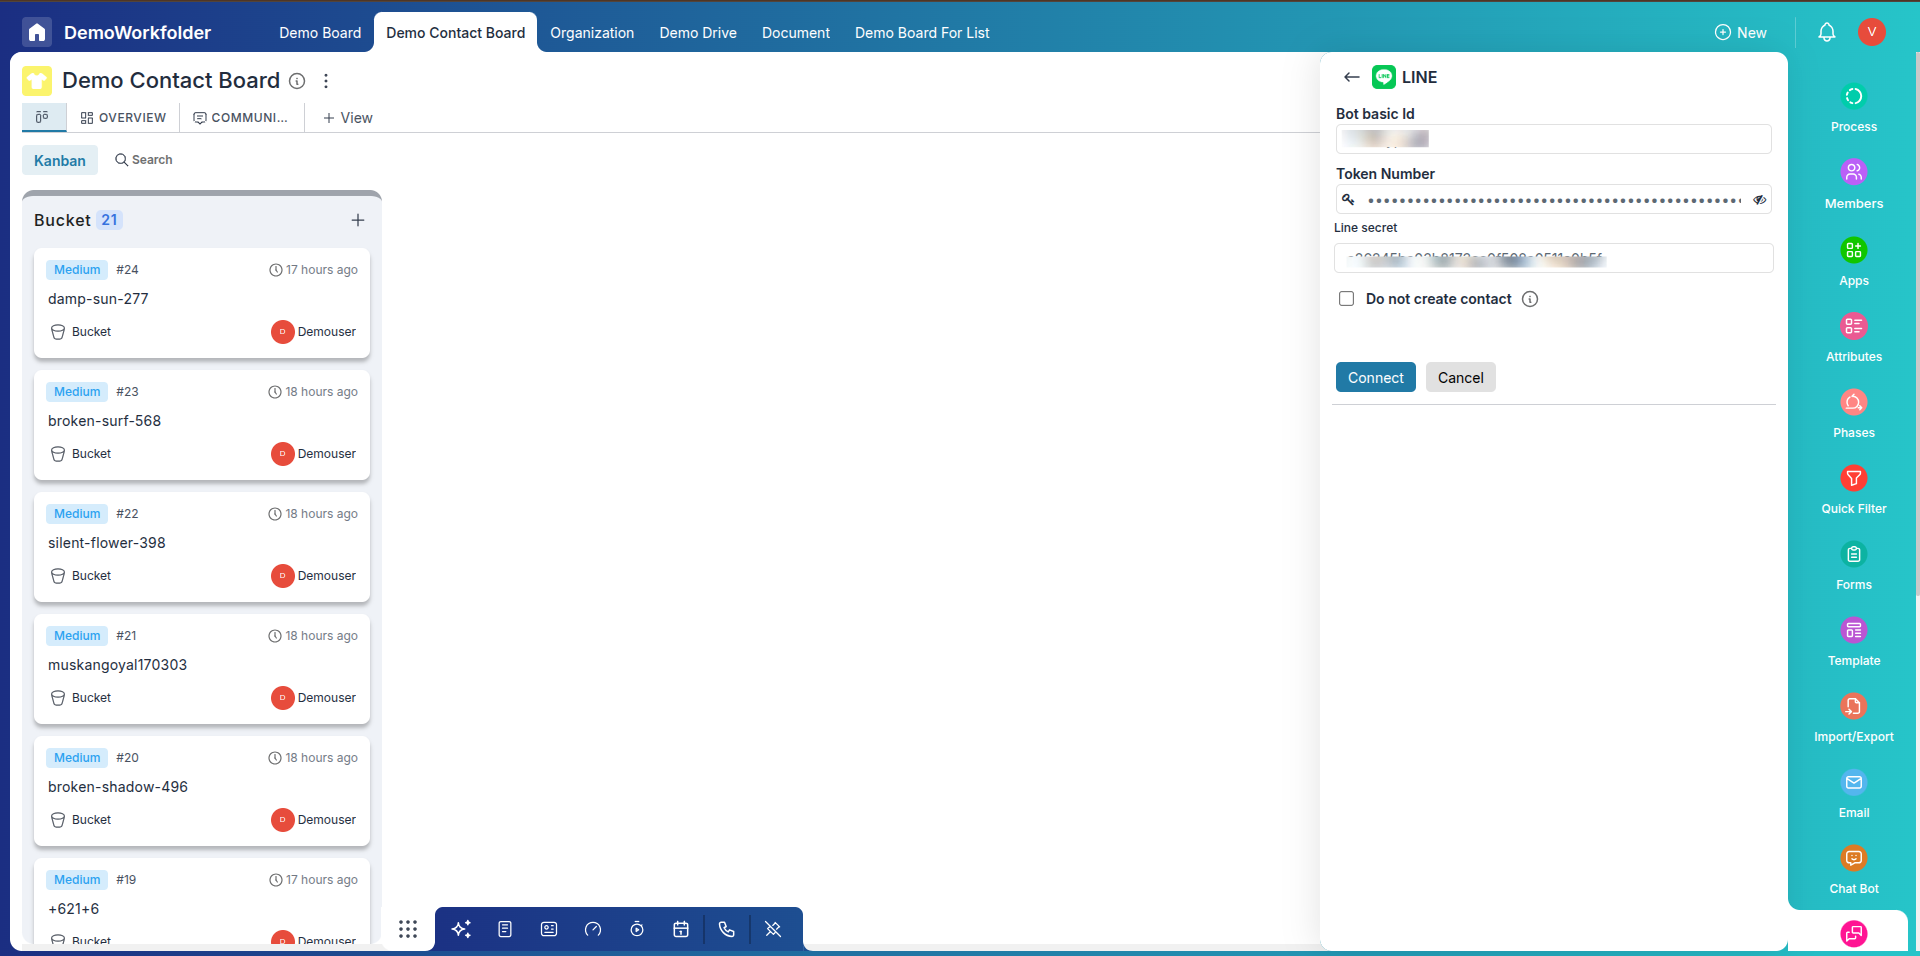
Enter Credentials: Enter the Bot Basic ID, token number, and Line secret key you obtained from Step 1.
-
Connect and Save Webhook URL: Click on the Done button. Pronnel will provide you with a webhook URL. Save this URL for the next step.
-
-
Step 3: Establish Two-Way Communication
-
Return to Line Developer Console: Go back to the Line Developer console.
-
Edit Messaging Channel API: Under the Provider tab, select Messaging Channel
-
Update Webhook URL: Edit the section and enter the URL you received from Pronnel.
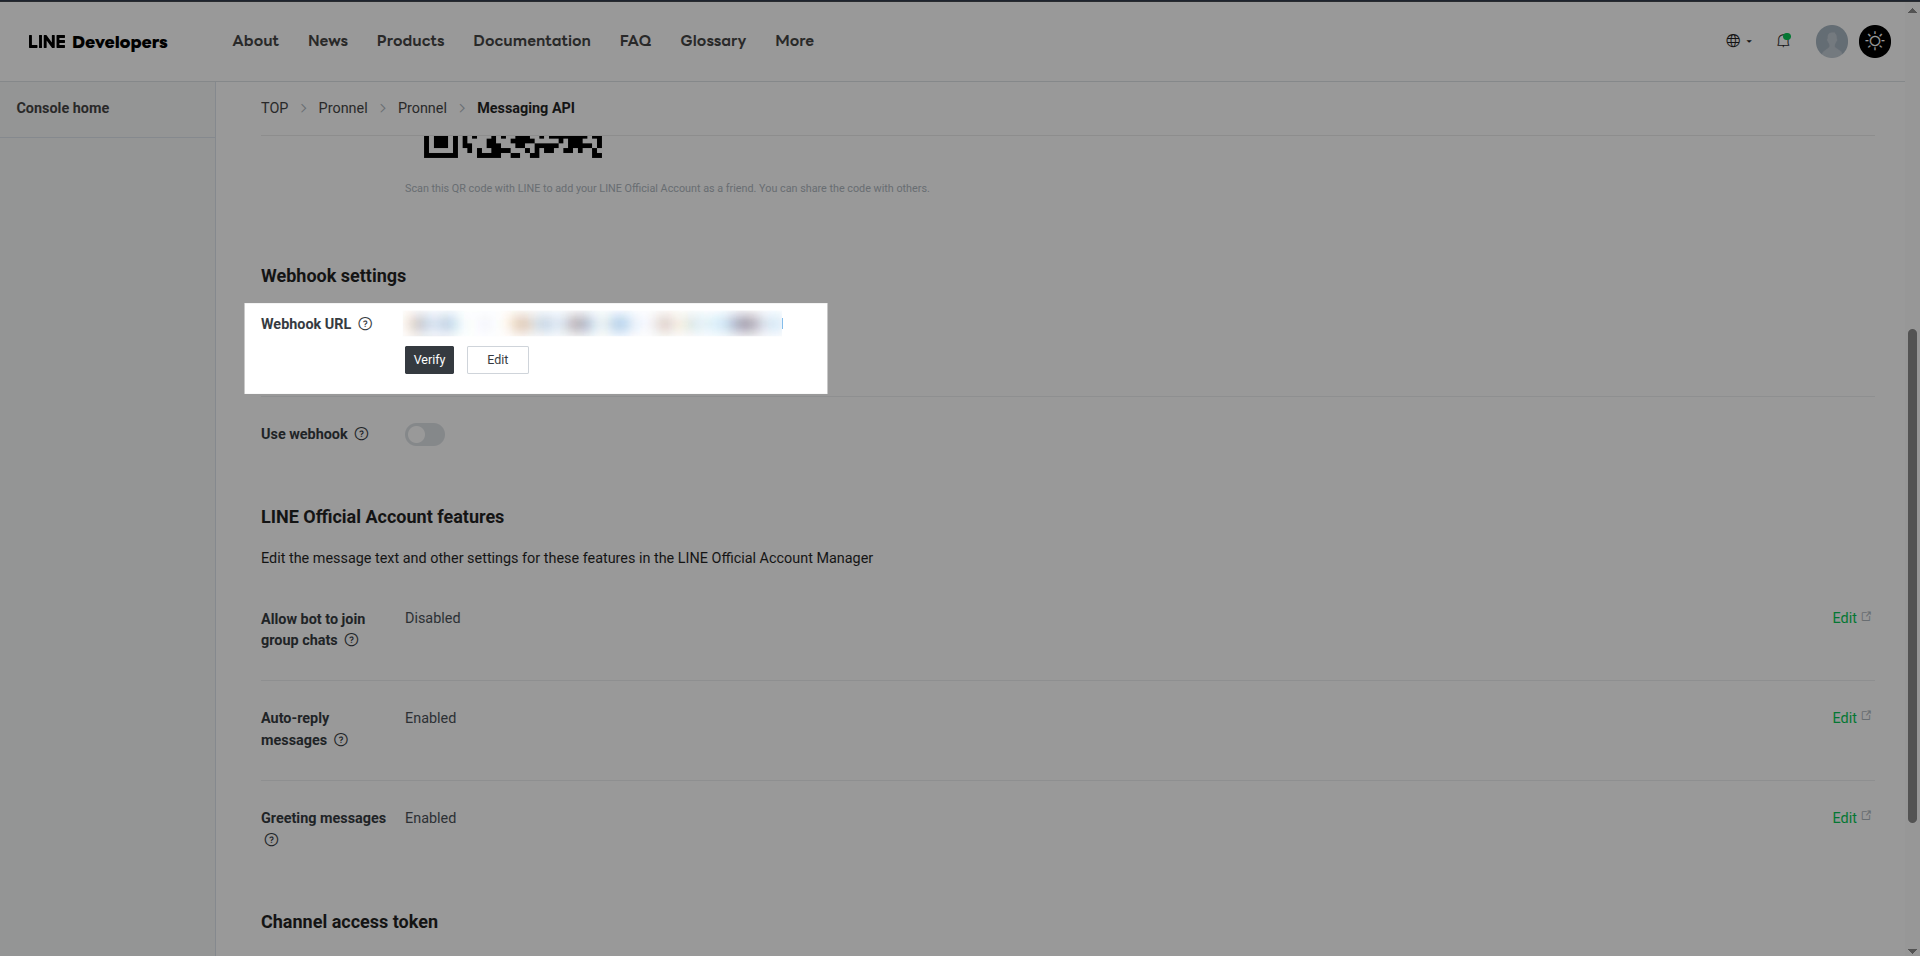
-
Verify and Enable Webhook: Click Update, then verify and enable the use of the webhook.
Completion
Congratulations! Your Line Business channel is now successfully linked with the Pronnel Board. Testing the integration is essential to ensure everything is working as expected. This setup will allow you to manage client enquiries and support more efficiently, keeping your business communications streamlined and organized.
Conclusion
Integrating Pronnel with your Line Business account is a simple yet effective way to improve client communication. By following these straightforward steps, you can ensure that your business is leveraging the best of both platforms, leading to improved client satisfaction and operational efficiency. Start today and experience the difference it can make in your client management strategy!
Frequently Asked Questions About Line Integration with Pronnel
What is Pronnel Integration with Line?
It connects your Line Business account with Pronnel to manage enquiries and support efficiently.
Why integrate Line with Pronnel?
To streamline client communication, organize enquiries, and enhance support management.
Is a Line Business account required?
Yes. It provides the APIs and settings needed for this integration.
How do I create a Line Business ID?
Log in to the Line Developer Console, provide your name and email, then follow prompts to create a provider.
What is a Messaging API channel and why is it needed?
It enables programmable messaging features and is required to integrate with Pronnel.
Where can I find Bot Basic ID, access token, and Channel secret?
In the Line Developer Console under Basic settings after creating the Messaging API channel.
How do I access Pronnel Lead Board settings?
Log in, open the Lead board, and click the Settings tab.
What info is needed in Pronnel settings?
Enter the Bot Basic ID, access token, and Line channel secret key from Line.
How do I obtain the webhook URL from Pronnel?
After connecting credentials in Pronnel, a webhook URL is generated for Line.
What is the webhook URL used for?
It establishes two-way communication for real-time event handling between Line and Pronnel.
How do I test the integration?
Send a message via your Line Business account and verify it appears correctly in the Lead board.
Where can I get help if I face issues?
Use Line and Pronnel support docs or contact their support teams.
What is Pronnel Integration with Line?
Pronnel Integration with Line is a process that connects your Line Business account with the Pronnel platform, allowing for efficient client inquiries and support management through Line.
Why should I integrate Line with Pronnel?
Integrating Line with Pronnel streamlines client communication, organizes inquiries, and enhances support management, making your business operations more efficient.
Is it necessary to have a Line Business account to use this integration?
A Line Business account is essential for this integration as it provides the APIs and settings required for the setup.
How do I create a Line Business ID?
To create a Line Business ID, log into the Line Developer Console, provide your name and email, and follow the prompts to make a new provider.
What is a Messaging API channel in Line, and why do I need it?
A Messaging API channel in Line allows for programmable communication features. Integrating with Pronnel is necessary to enable automated messaging and client interaction.
Where can I find the Bot Basic ID, access token, and Channel secret key in Line?
These can be found under the Basic settings tab in your Line Developer Console after creating your Messaging API channel.
How do I access the Pronnel Lead Board settings?
Log in to your Pronnel account, navigate to the Lead board, and click the settings tab to access these configurations.
What information do I need to enter in Pronnel settings for integration?
You need to enter the Bot Basic ID, token number, and Line secret key obtained from Line in the Pronnel settings.
How do I obtain the webhook URL from Pronnel?
After entering the necessary details and connecting your Line account in Pronnel settings, Pronnel will provide a webhook URL.
What is the purpose of the webhook URL in this integration?
The webhook URL establishes two-way communication between Line and Pronnel, enabling real-time data exchange and response handling.
How do I test if the integration is working correctly?
After completing the integration, send a message through your Line Business account and check if it is appropriately reflected and manageable in the Pronnel Lead board.
Where can I seek help if I encounter issues during integration?
For any challenges during the integration process, you can consult the support sections of both Line and Pronnel or reach out to their customer support teams for assistance.