Using Calendar View in Pronnel for Visual Task Scheduling
The Calendar View in Pronnel offers a clear and organized way to visualize your tasks and leads across days, weeks, or months. Ideal for managing deadlines, tracking due items, and scheduling upcoming work, this view helps ensure nothing falls through the cracks.
In this tutorial, we’ll guide you on how to access, utilize, and get the most out of Calendar View in Pronnel.
Step 1: Accessing the Calendar View
-
Open the Relevant Board:
Log in to your Pronnel account and go to the board where you want to view the calendar layout of your items.
-
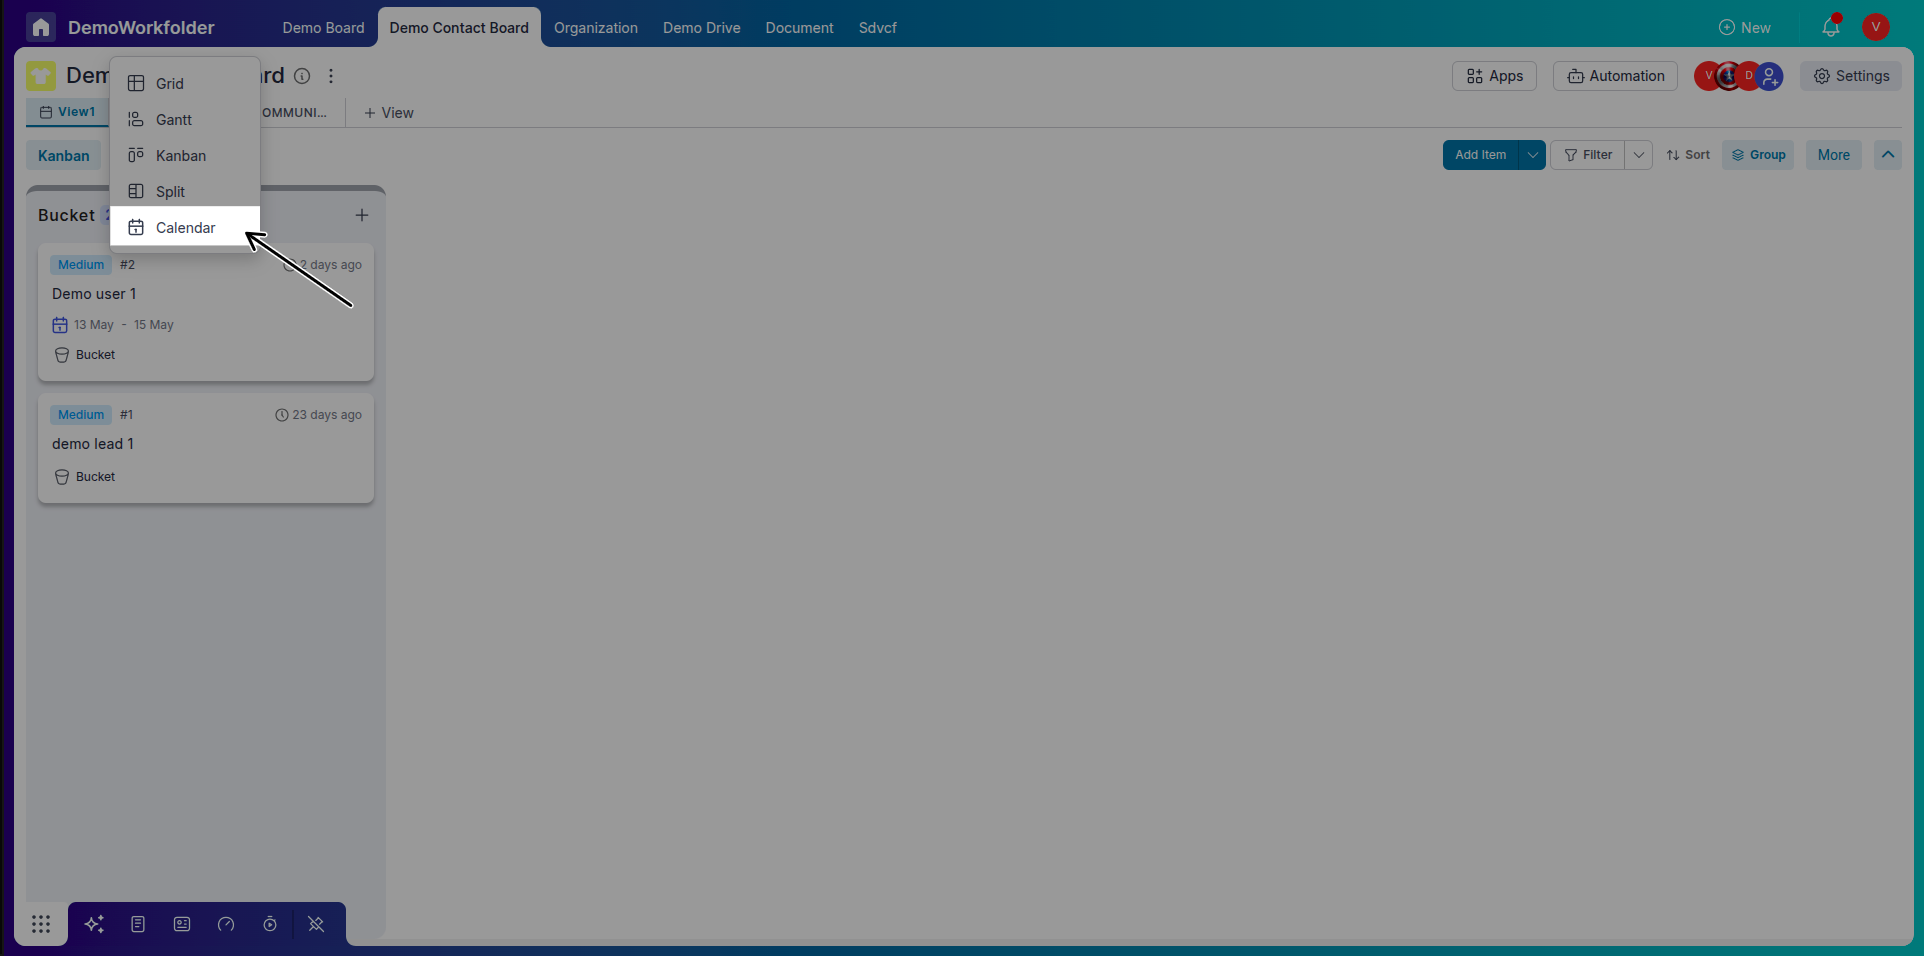
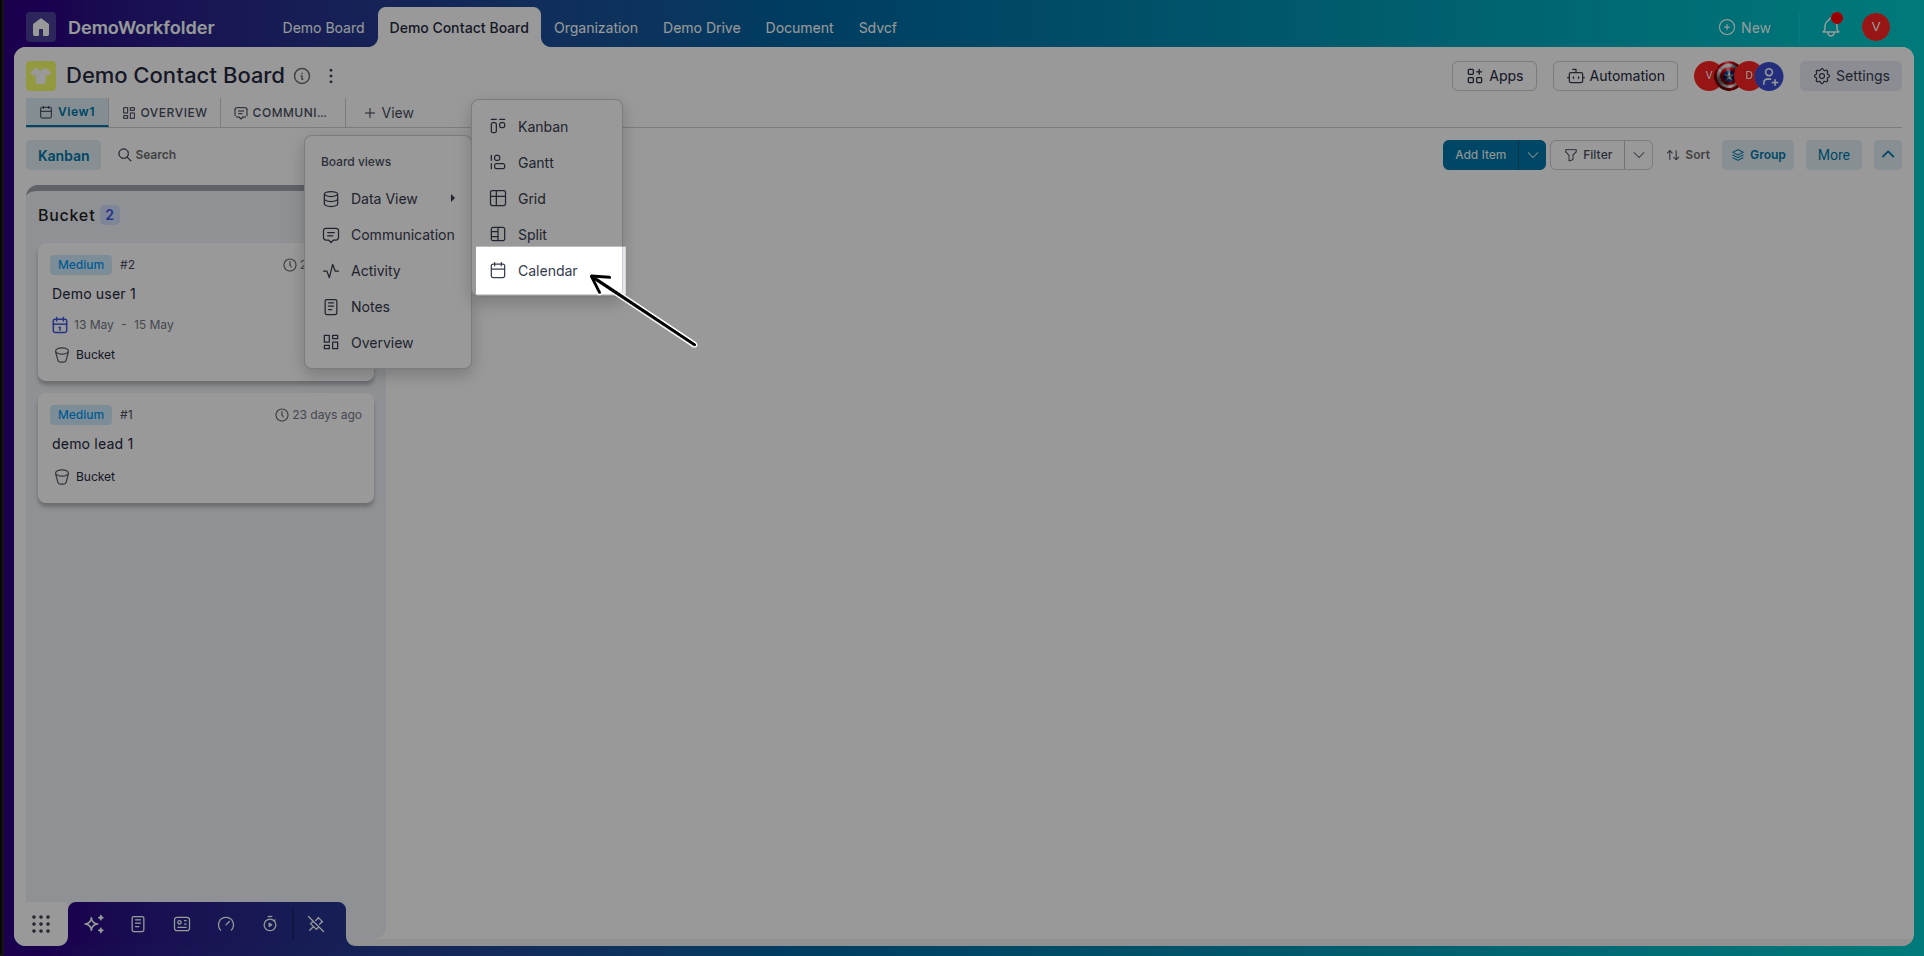
Select Calendar View:
From the top view selector, choose “Calendar” to switch to the calendar layout.
Step 2: Understanding Calendar Layout
-
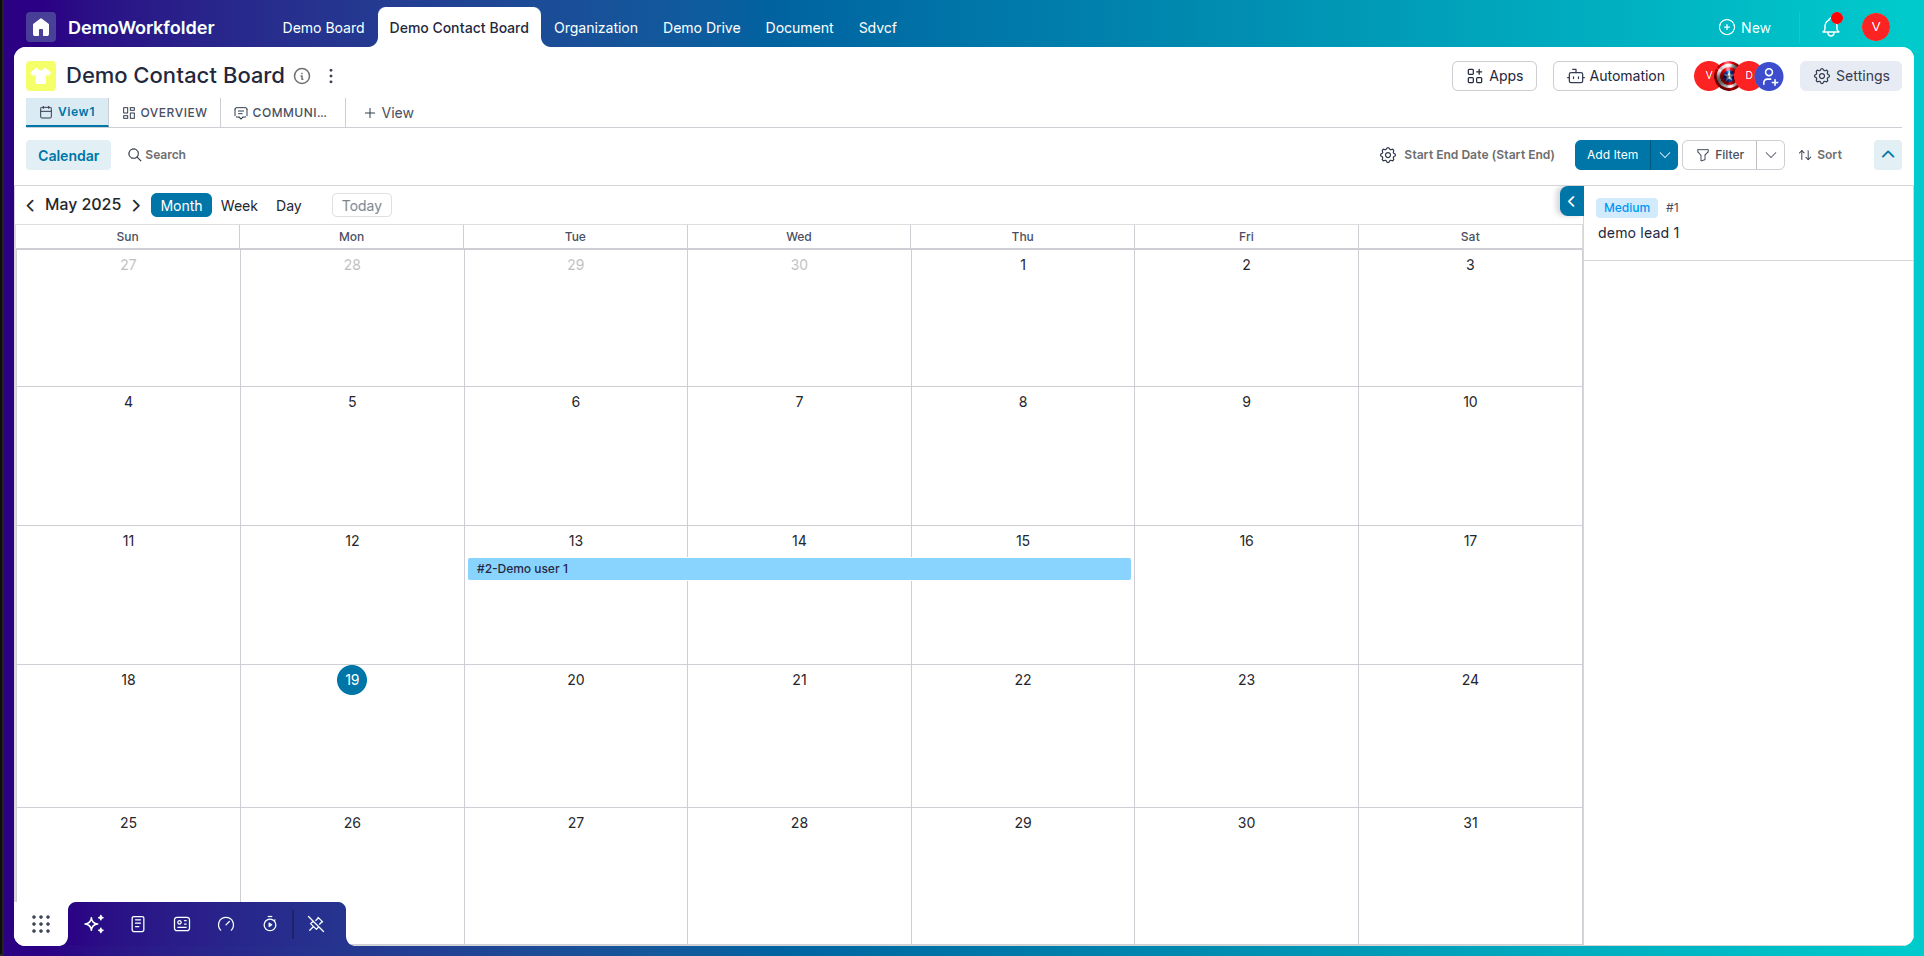
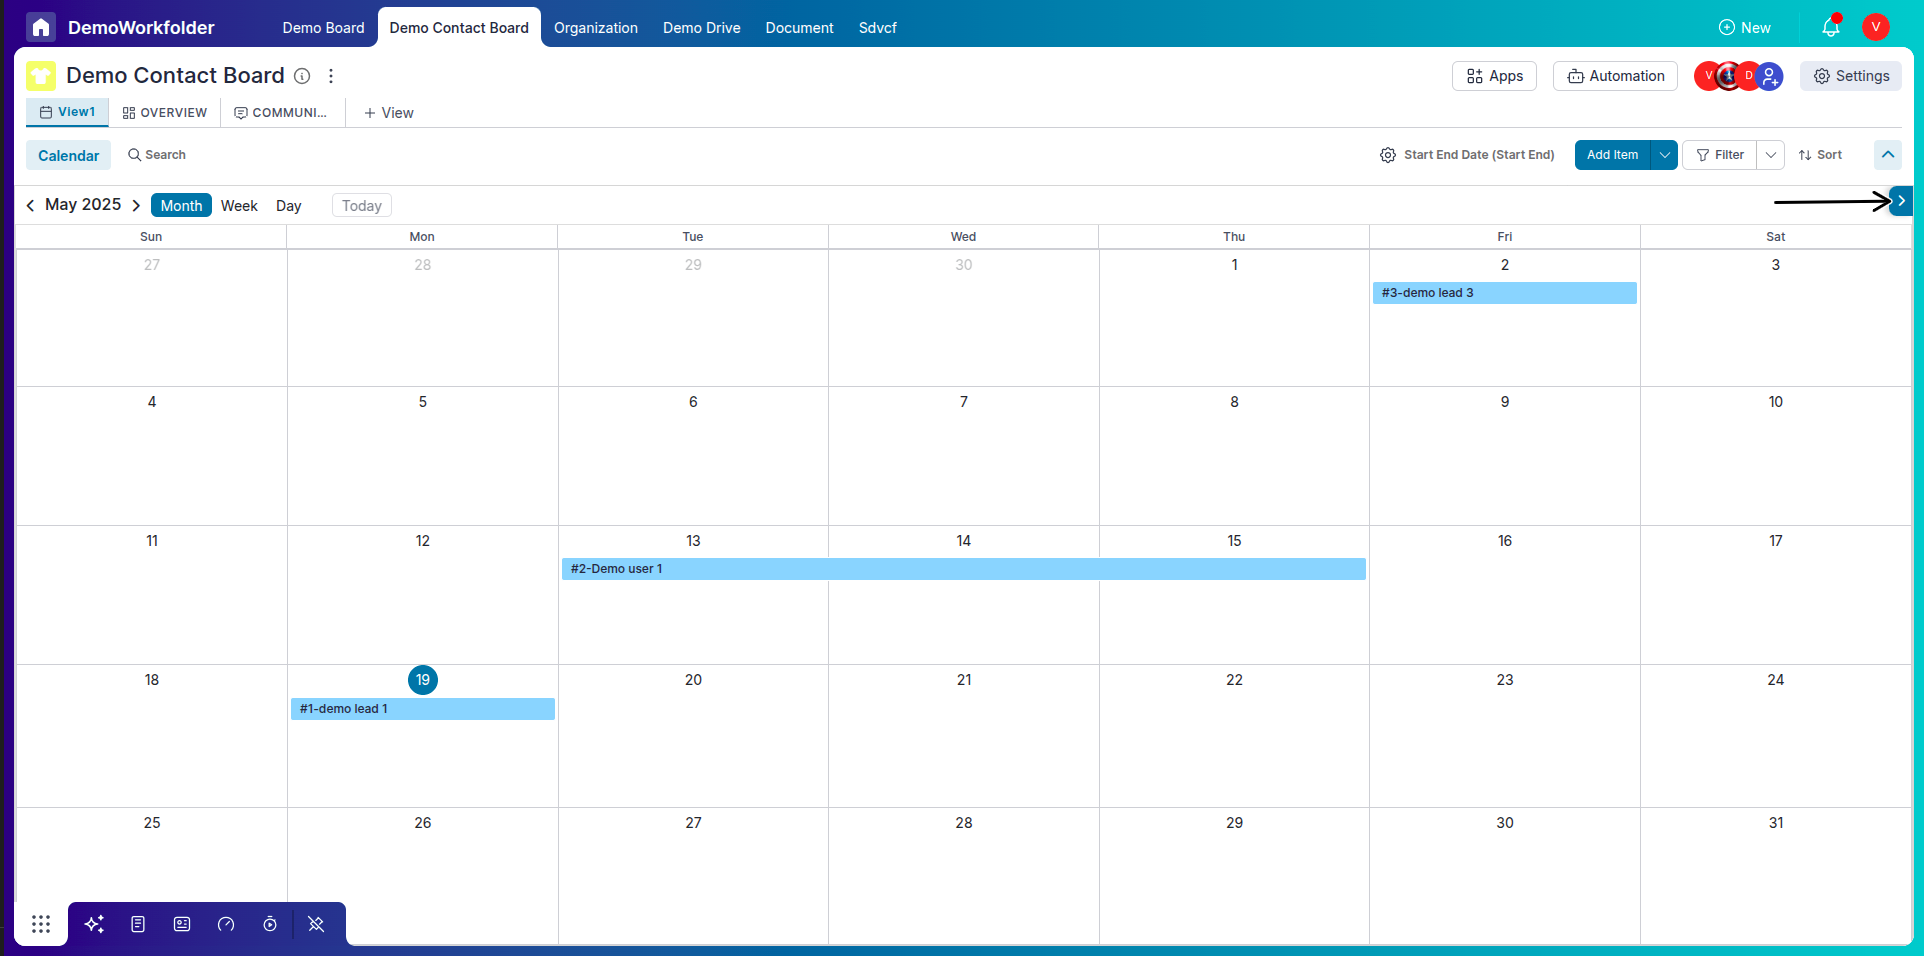
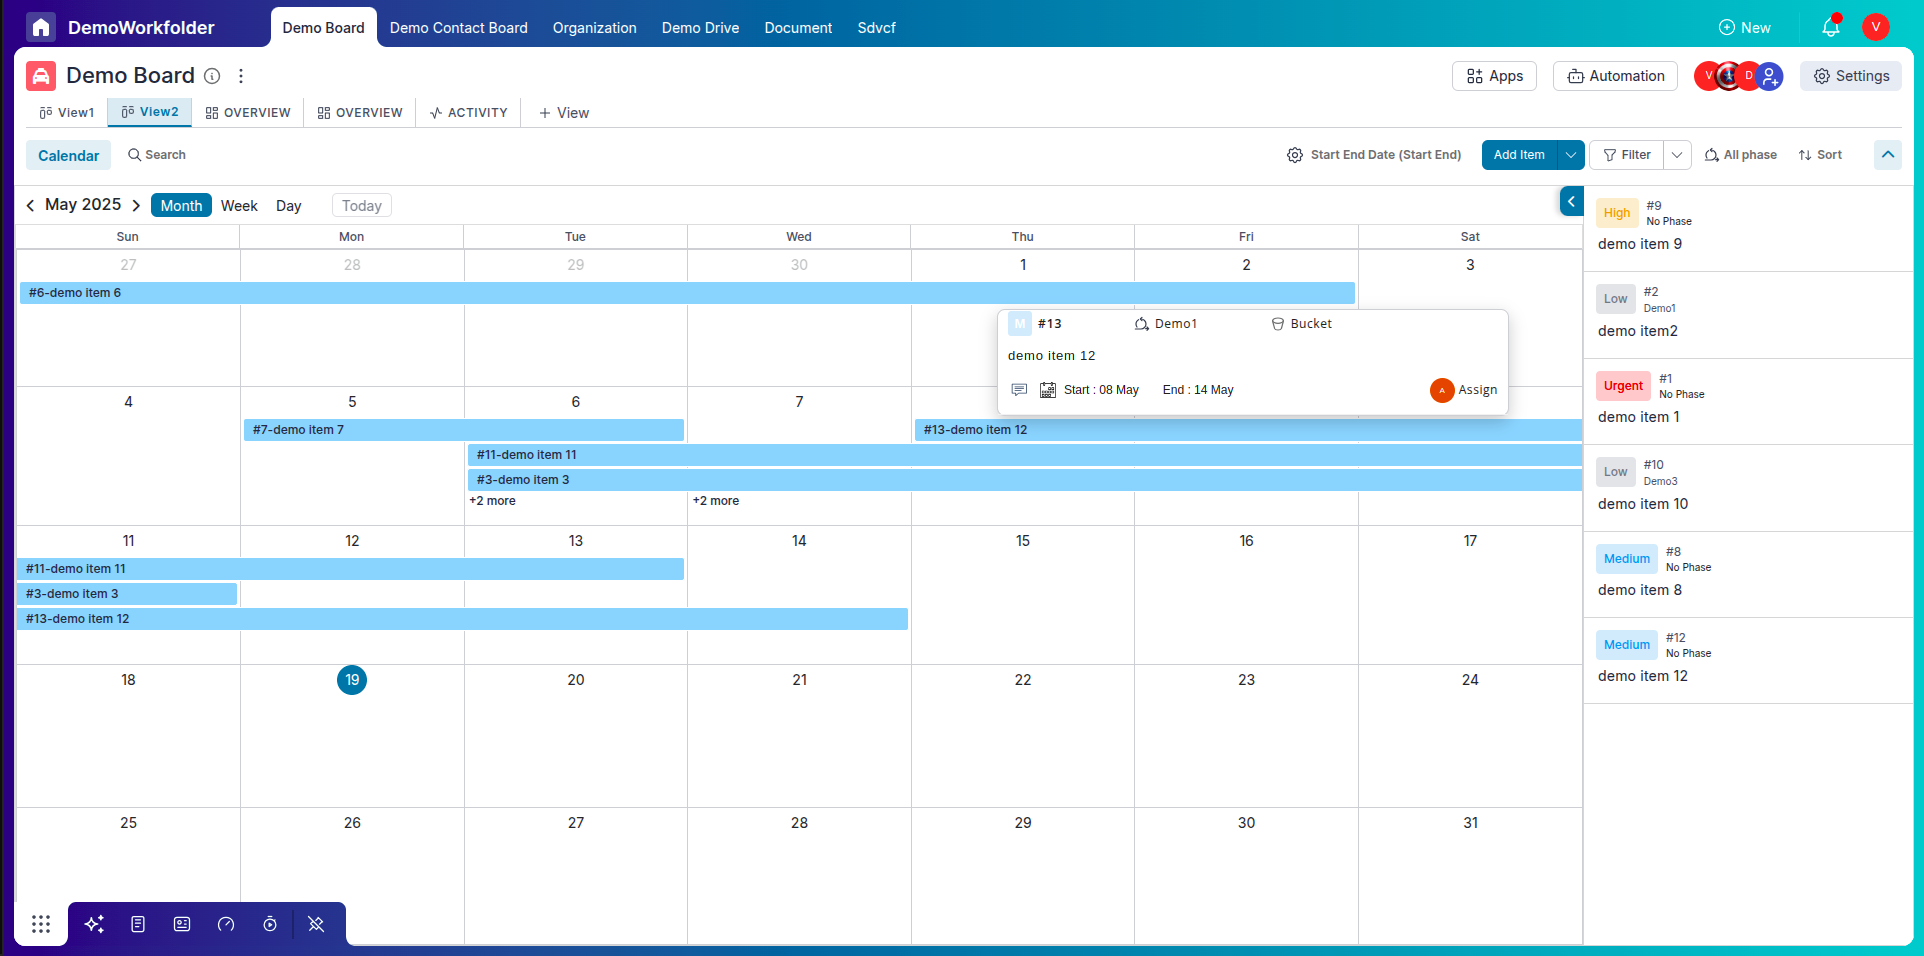
Month View
The Month view displays all items scheduled for the entire month. This format is great for planning and seeing the overall workload across weeks. Each item appears as a horizontal card stretched across its date range. For example, if a task is due over 3 days, the card will span across those 3 days in a horizontal bar-like layout.
-
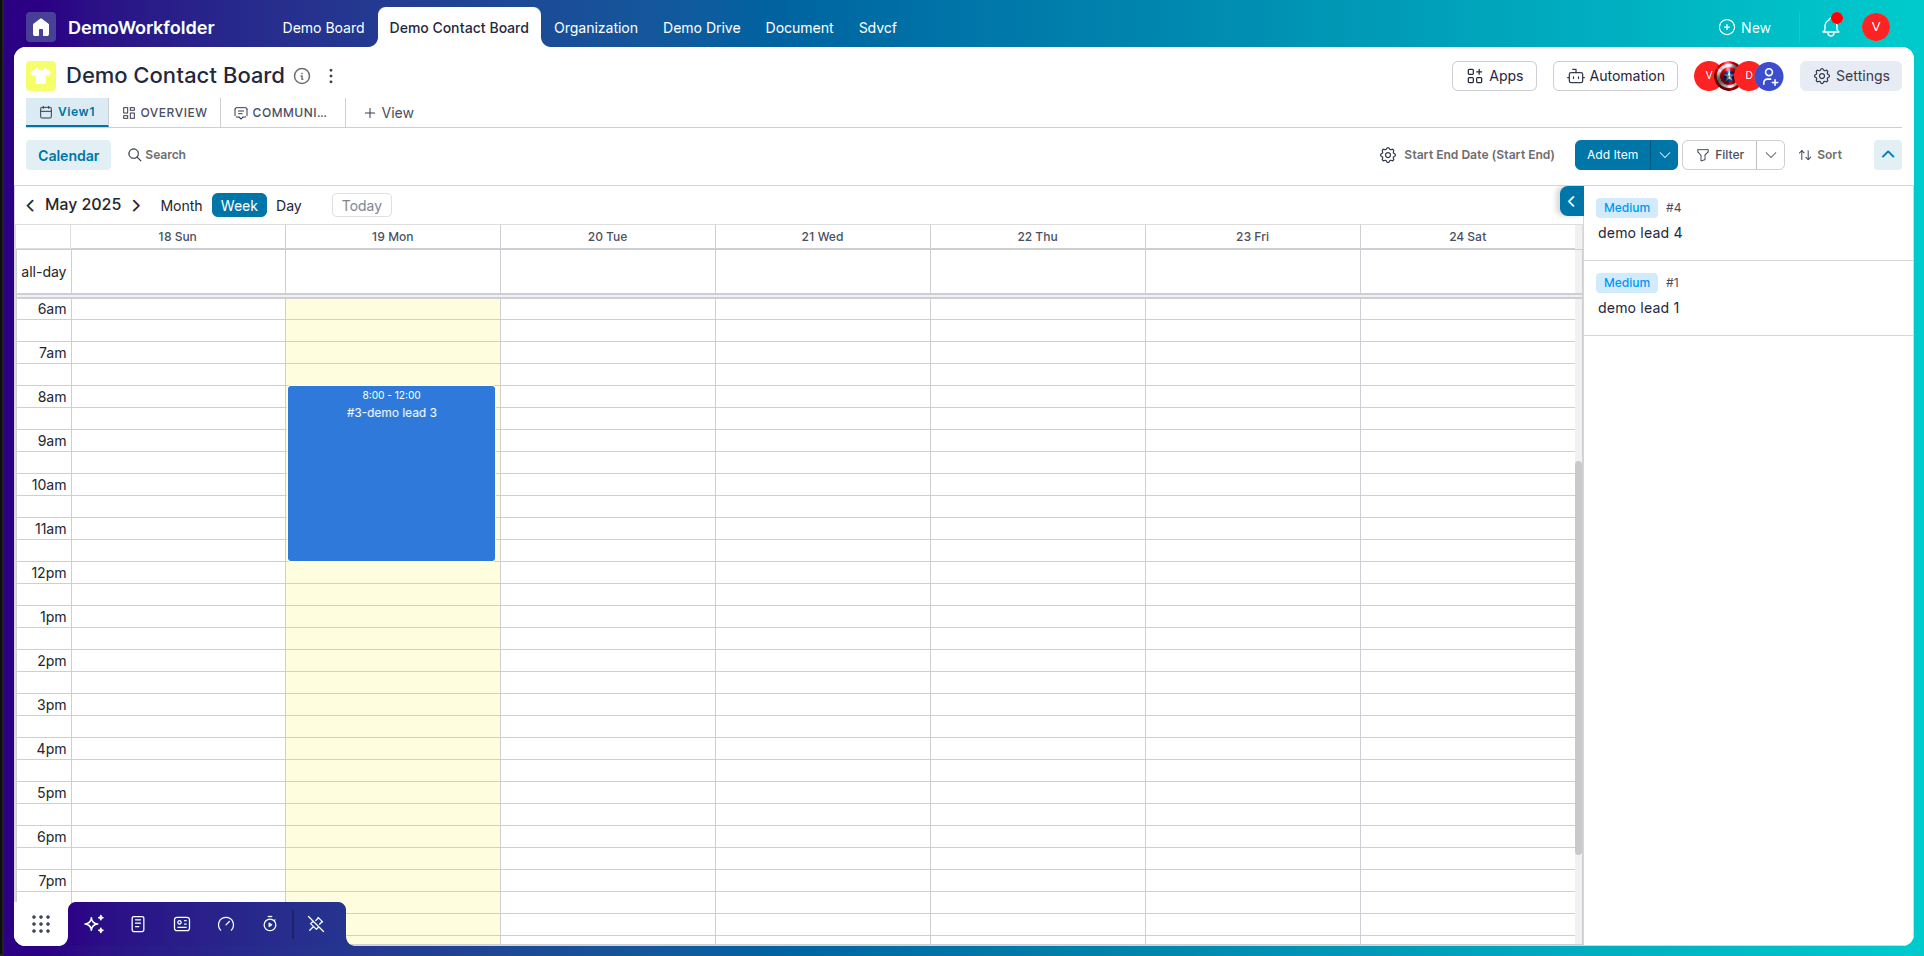
Week View
In the Week view, the calendar shows items organized by day and time across a 7-day week. Each day appears as a vertical column, and items are stacked accordingly. This is ideal for weekly sprint planning or short-term team scheduling. Unlike the Month view, leads are not stretched horizontally but appear as blocks per day.
-
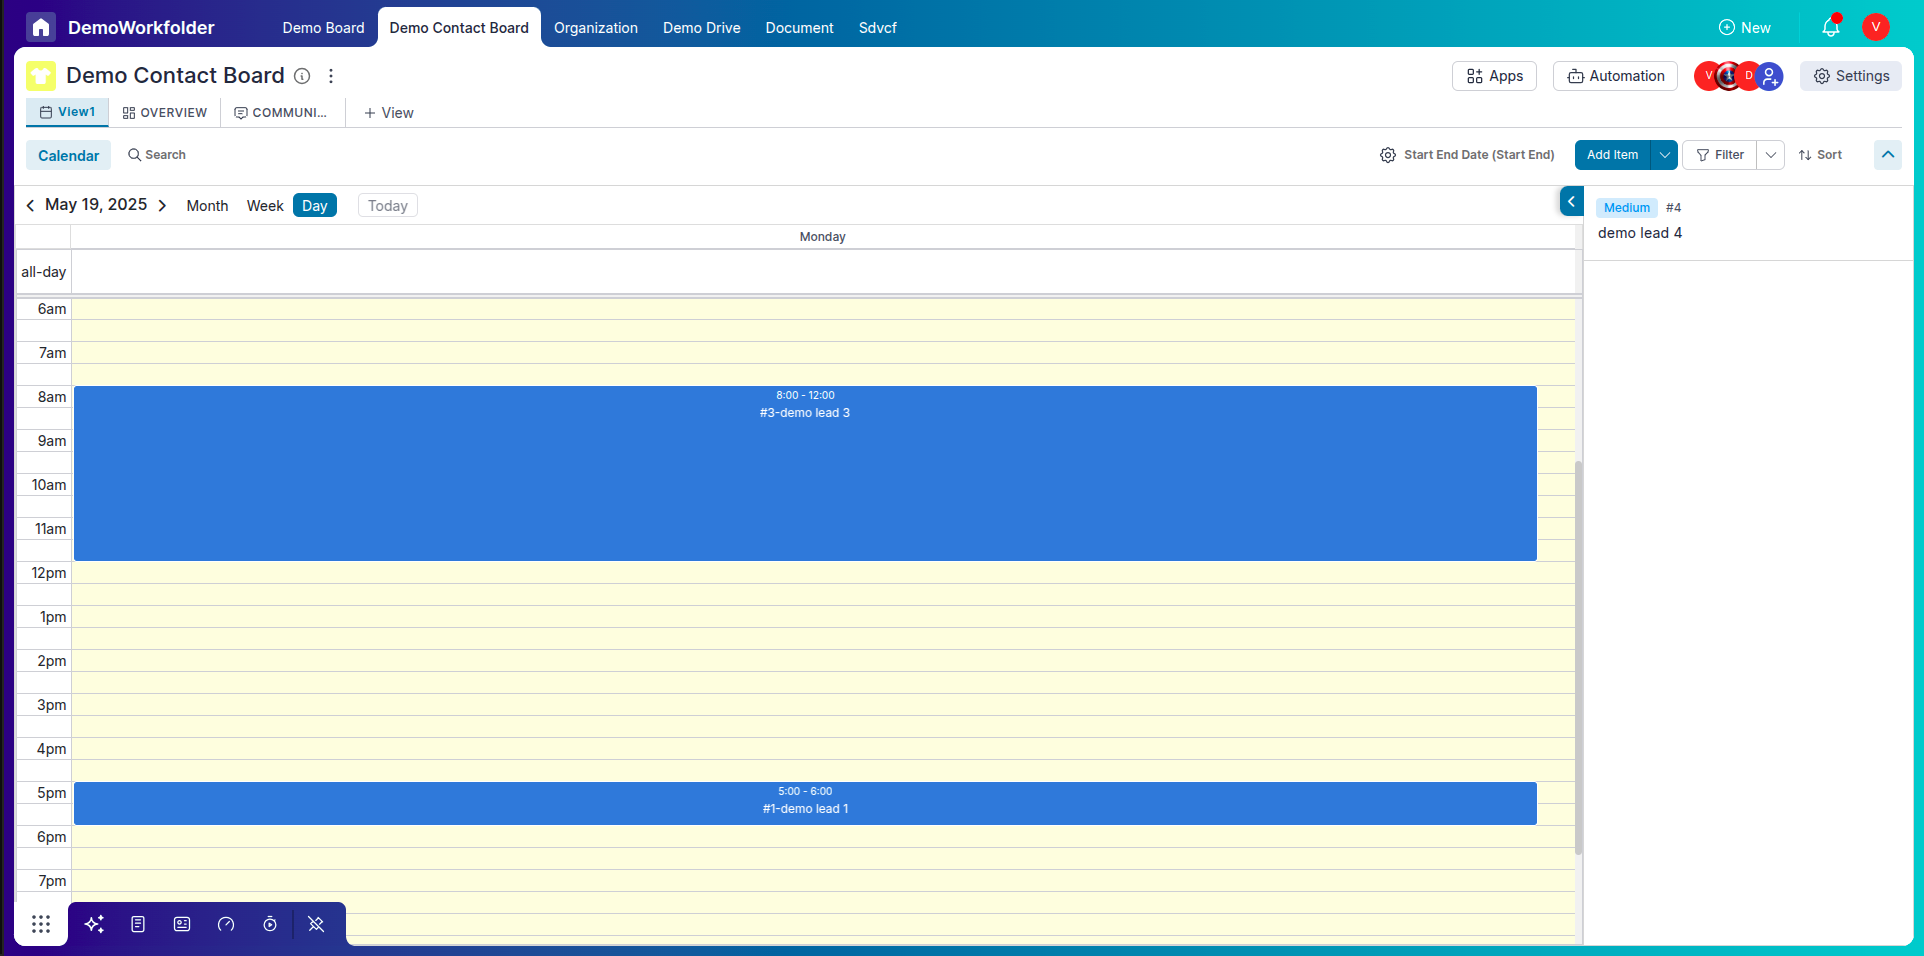
Day View
The Day view focuses on a single day, showing a timeline by the hour. This helps in planning specific appointments or meetings. Tasks appear in a vertical list, mapped to their specific time slots (if any) or at the top as all-day tasks. It is perfect for a detailed breakdown of your daily agenda.
Step 3: Adding & Editing Tasks in Calendar
-
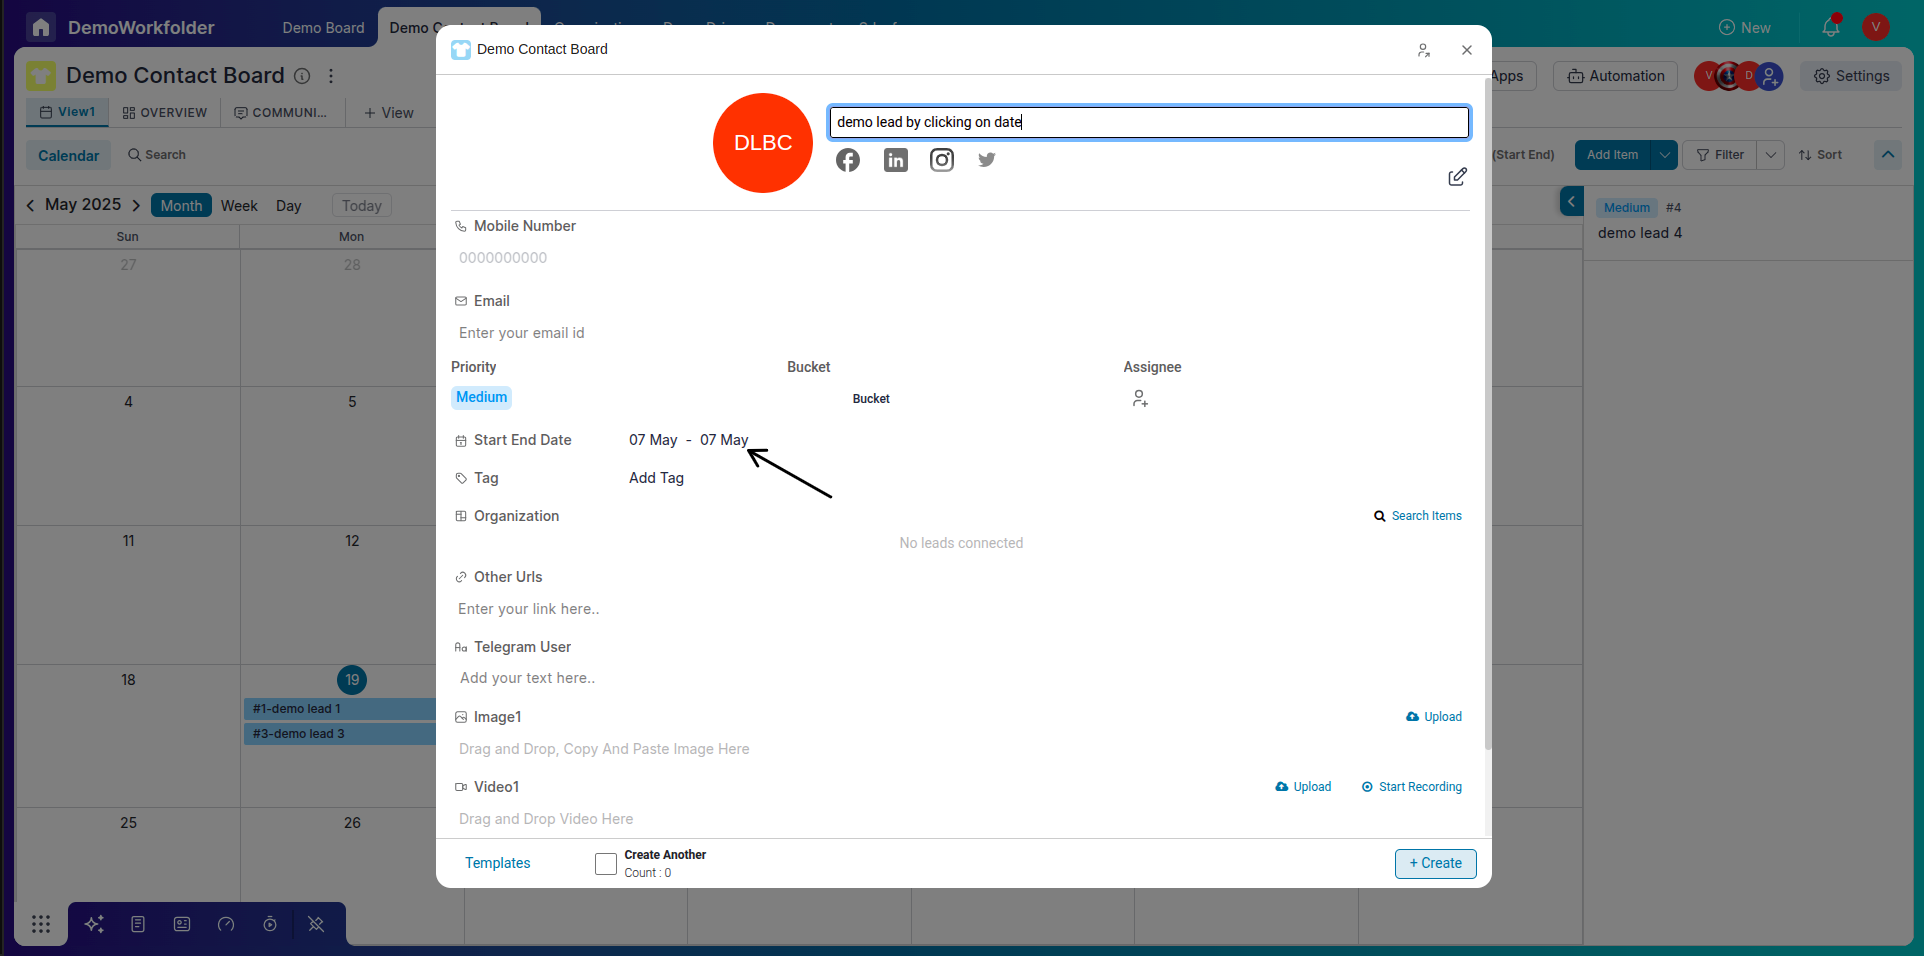
Create from the Calendar:
Click on a date cell in the calendar to quickly create a new item with that pre-filled start end date.
-
Drag & Drop to Reschedule:
Move items by dragging them to different dates. The item's due date updates automatically based on the new position.
Step 4: Filtering and Adjusting View
-
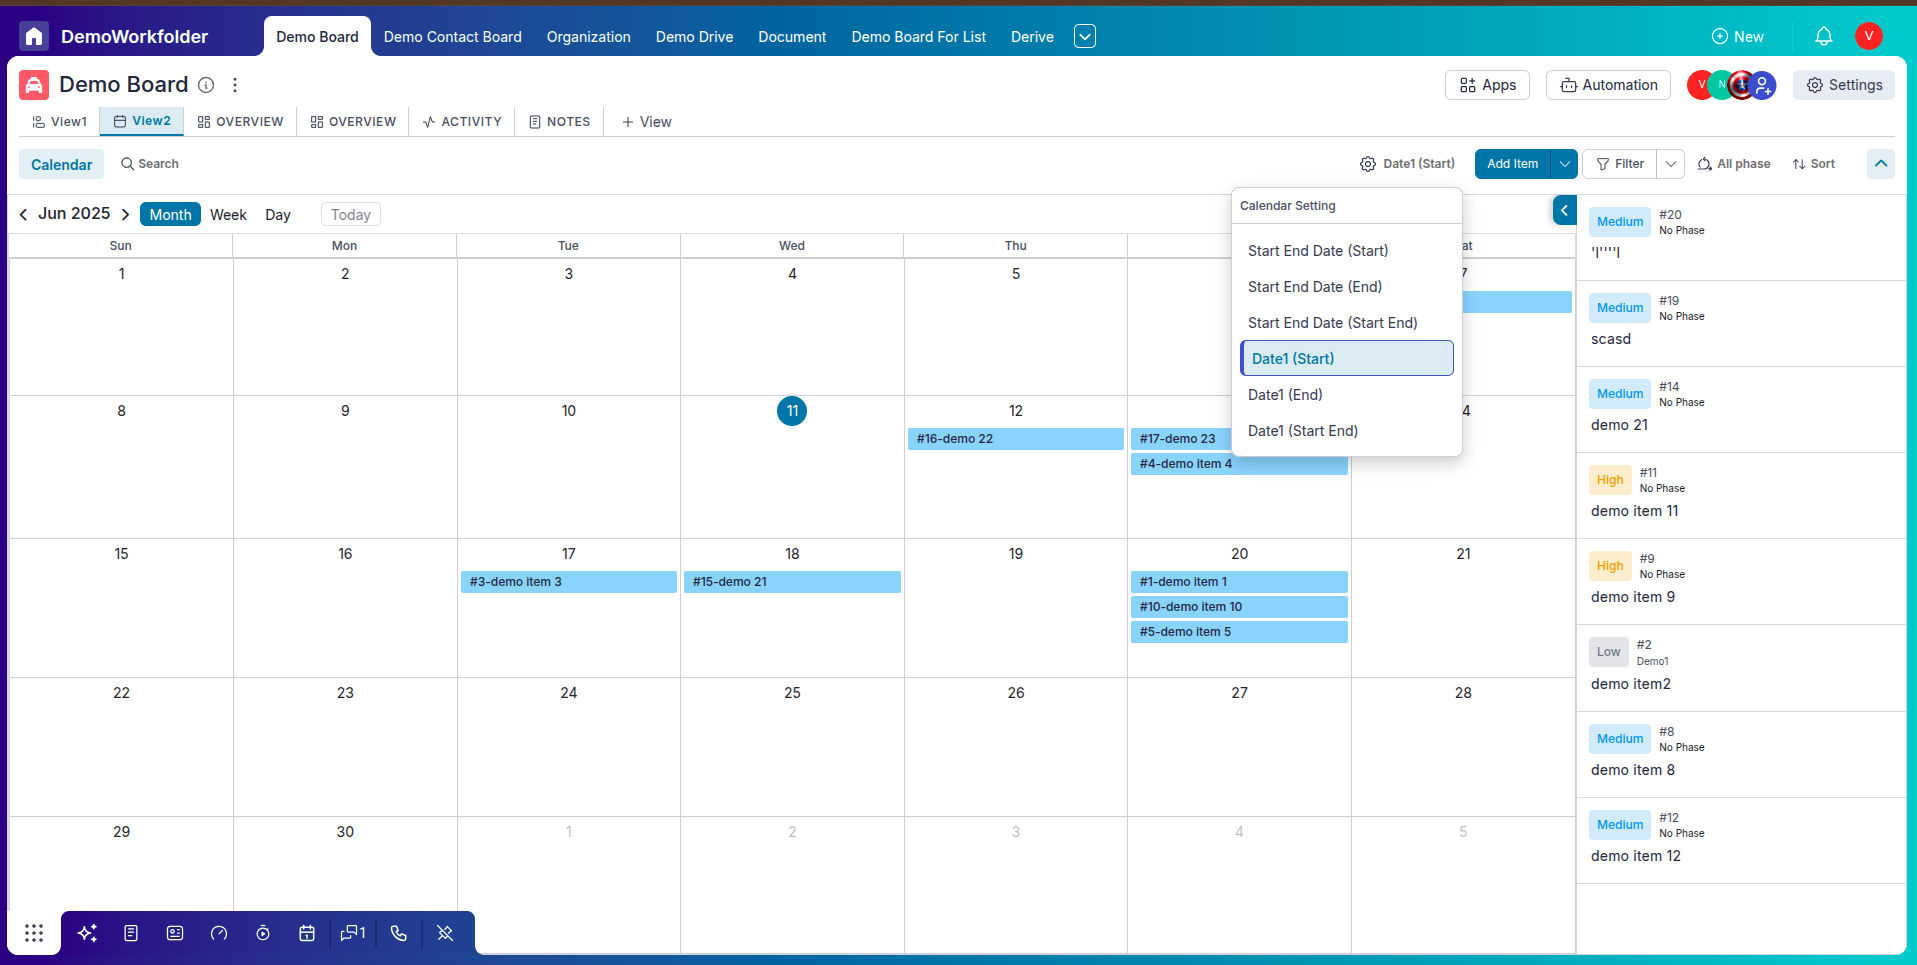
Filtering and Auto-Population in Calendar View
The Calendar View offers powerful filtering options to help you manage date-driven workflows. You can filter items based on attributes like Start Date, End Date, or any other custom date fields you've added to your board.
If an attribute has End Date enabled, it will also appear in the filter dropdown. When creating a new item by clicking on a calendar date, the corresponding date field is automatically populated—saving time and reducing manual input.
Use the Choose Field option to determine which date attribute drives the calendar and the split view. For instance, if you select an attribute with an End Date, only those items with that attribute filled will show up in the calendar and in the Split View panel.
-
Hide/Show Side Panel:
You can collapse or expand the side panel to adjust your workspace. Hiding it gives more room for the calendar, especially helpful when viewing in Month or Week mode.
Step 5: View Item Summary on Hover
-
Quick Glance at Details:
When you hover over an item in the Calendar View, a tooltip appears showing a quick summary of that item’s key details like title, due date, and assigned user. This helps you understand the context without needing to open the full item panel.
Conclusion:
The Calendar View in Pronnel makes deadline tracking and task scheduling easy and intuitive. Whether you're managing a sales pipeline, project timeline, or content schedule, the visual layout helps you see what’s coming up and what’s due. Use filters, drag-and-drop, and multiple view modes to tailor the experience to your workflow.
Frequently Asked Questions About Calendar View in Pronnel
How do I access Calendar View?
Open any board and select “Calendar” from the view selector at the top.
Can I create tasks from the calendar?
Yes. Click any date to create a new item with that date pre-filled.
What determines item placement?
Start and End Date fields. With both set, items span the range; with one, they appear on that date.
Can I drag and drop to reschedule?
Yes. Drag items to new dates to update scheduling instantly.
What modes are available?
Month (horizontal spans), Week (vertical columns), and Day (hourly timeline).
Can I filter items?
Yes. Filter by assignees, tags, buckets, Start/End Date, or custom date fields.
Do date/status changes sync automatically?
Yes. Calendar reflects updates in real time.
Is Calendar available on all boards?
Available when boards have date-type fields like End Date or Due Date.
Can I customize card appearance?
Core layout is fixed; colors and key details reflect current item values.
Can I use it for lead management?
Yes. Plan follow-ups, meetings, and date-driven activities for leads.