Google My Business Chat Integration with Pronnel: In-Depth Tutorial
Integrating Google My Business Chat with Pronnel is a strategic move to streamline customer interactions directly from your Google My Business listing. This comprehensive tutorial guides you through each step of the process.
Accessing the Business Communication Developer Console
Navigate to the Developer Console
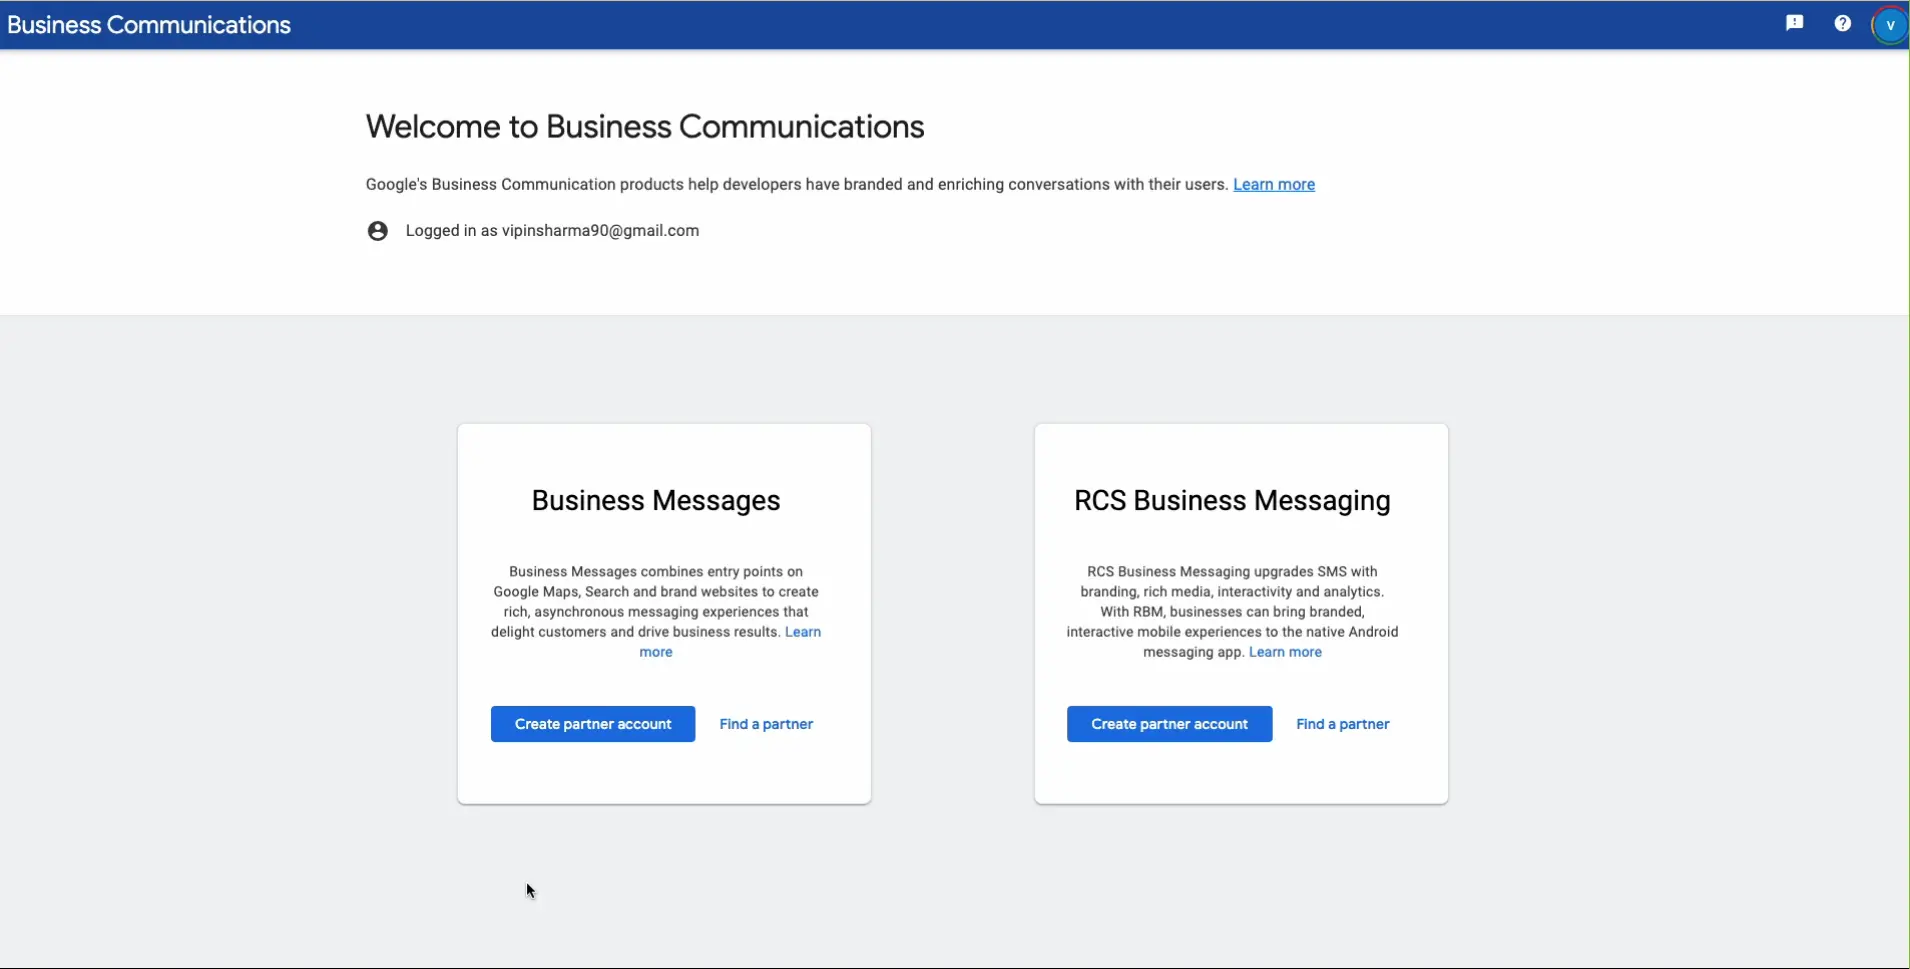
Open your web browser and go to the Google Business Communication Developer Console.
Creating a Partner Account
On the main page of the console, find and click on the 'Business Messages' section.
Select the option to create a new partner account.
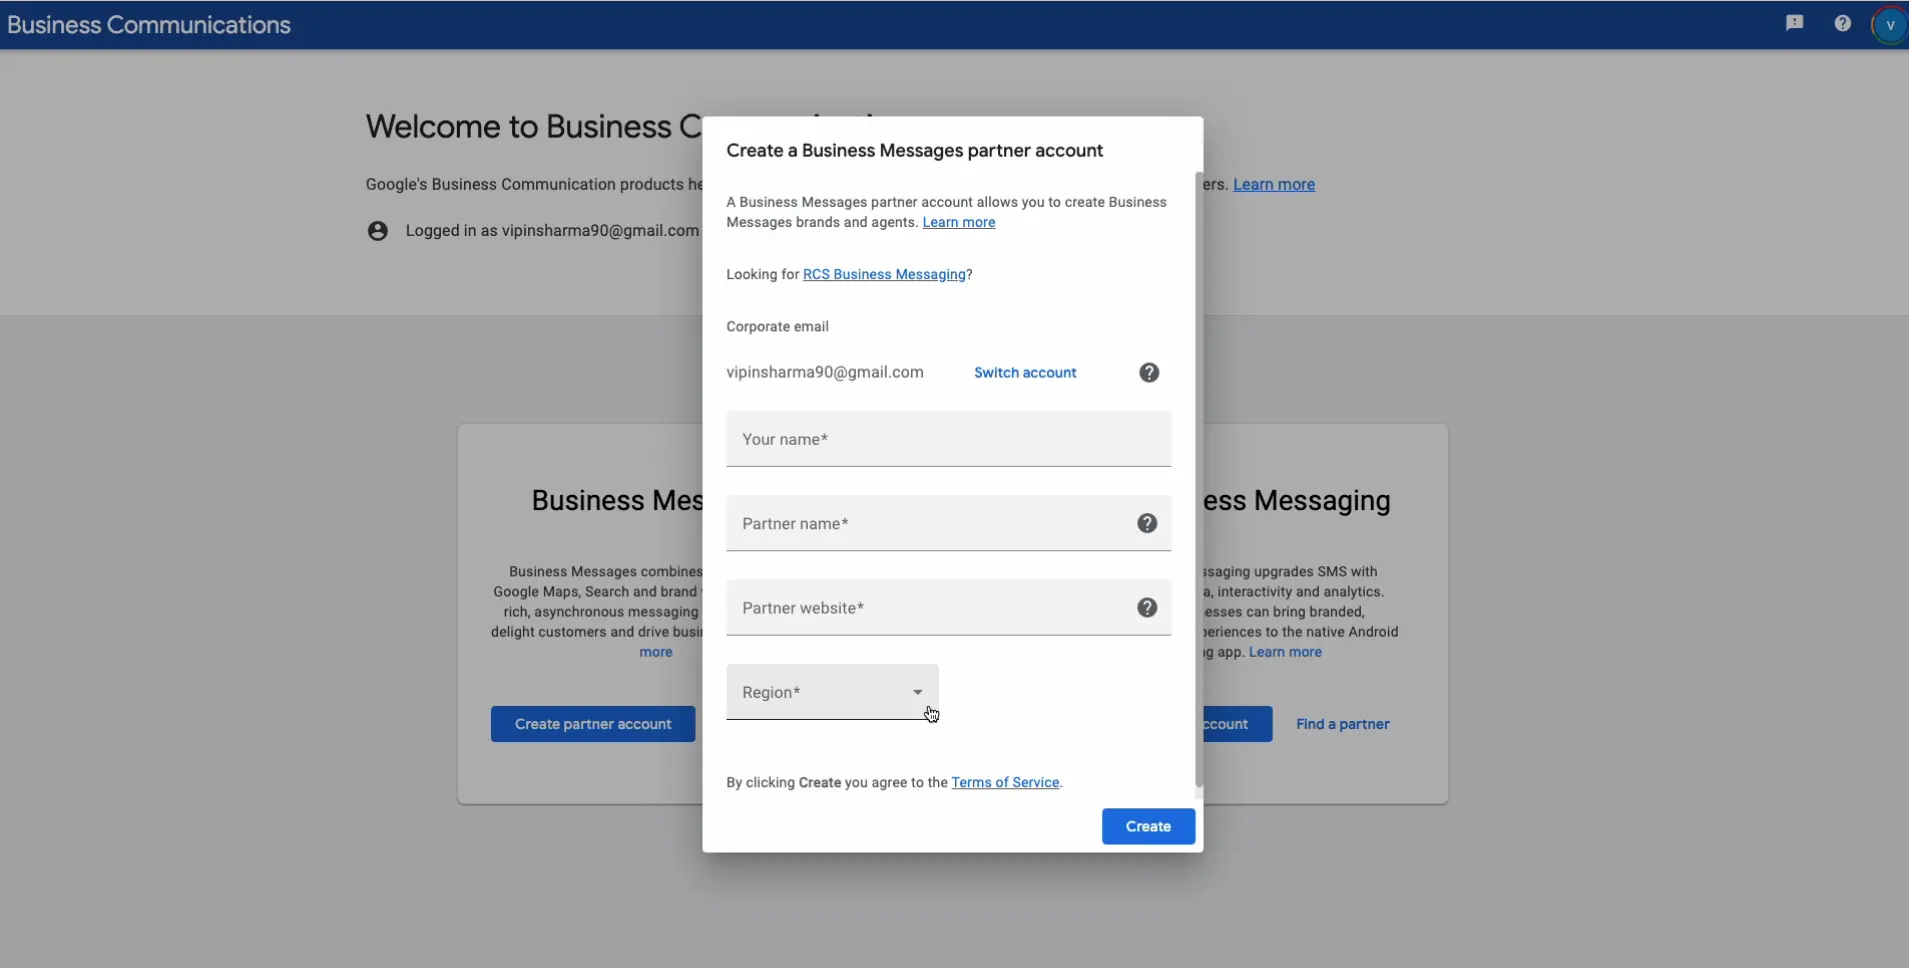
Filling in Partner Account Details
You will be prompted to fill in several details. Start with your name and company's name, which will serve as the 'partner's name'.
Next, input your partner's website URL and select your geographical region from the dropdown menu.
Submit these details to proceed.
Setting Up Your Partner Account
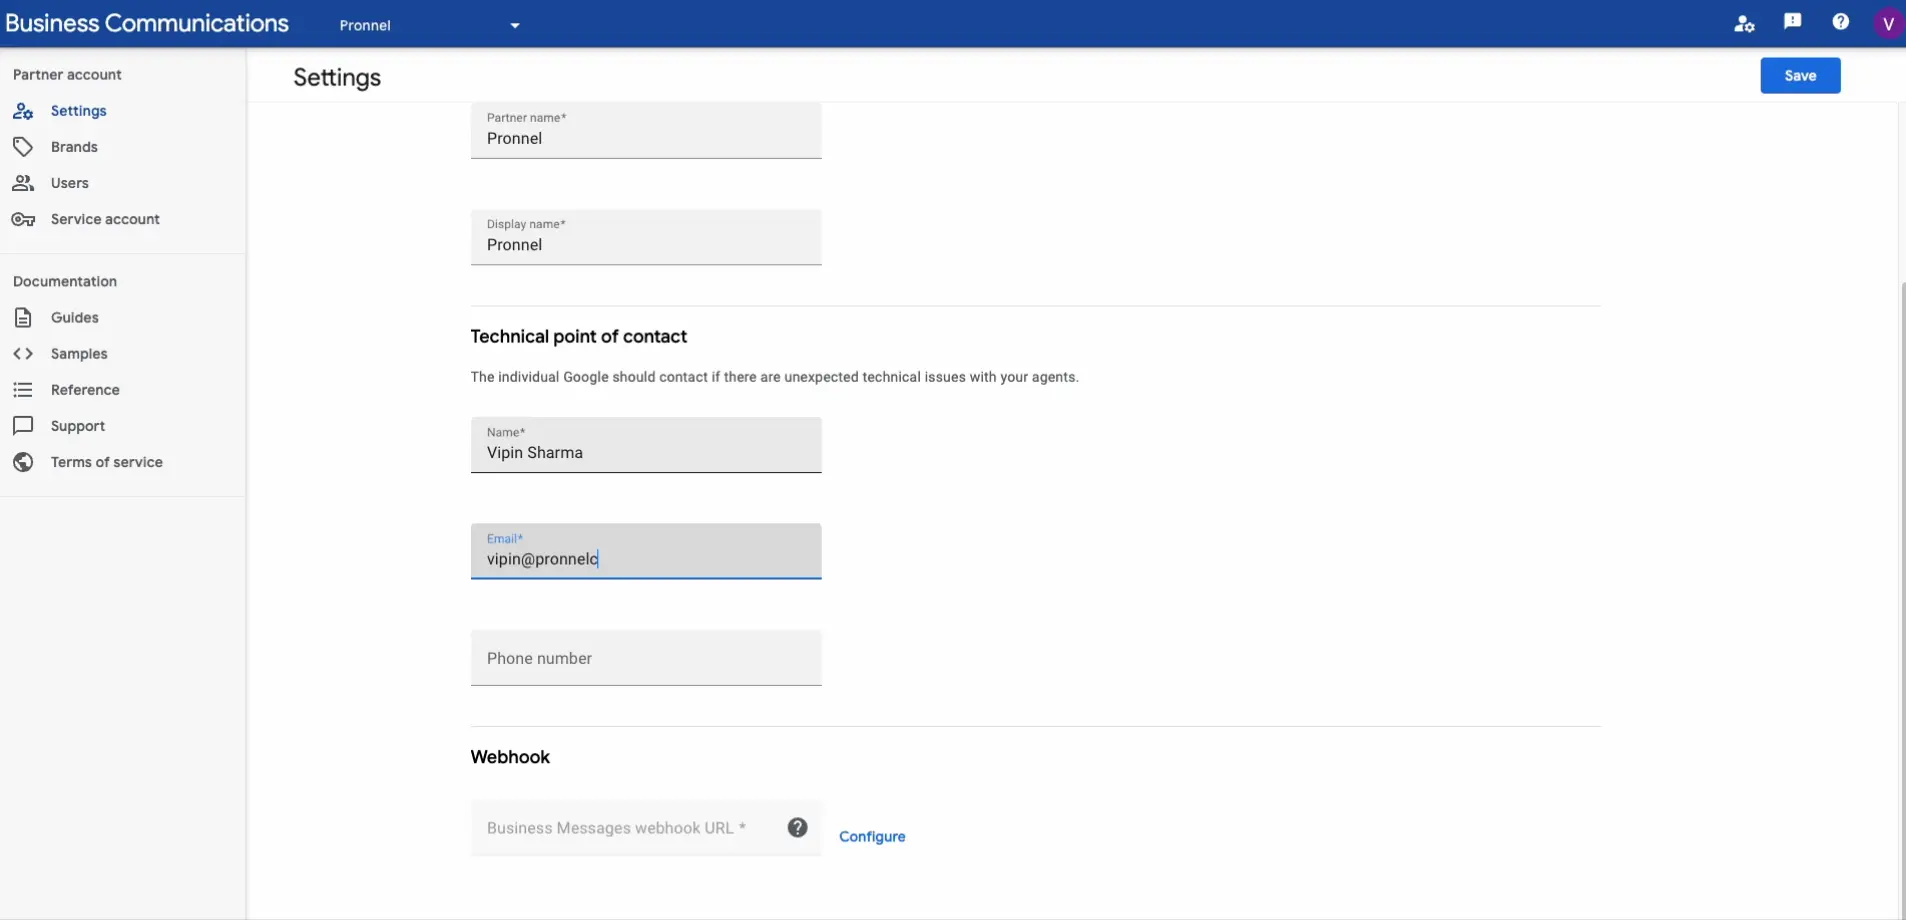
Adding a Technical Point of Contact
Once your partner account is created, the next step is to add a Technical Point of Contact (POC).
-
Click on the 'Partner Account Settings'. Here, you will enter the information of the technical point of contact( POC), who is responsible for managing Google business communication.
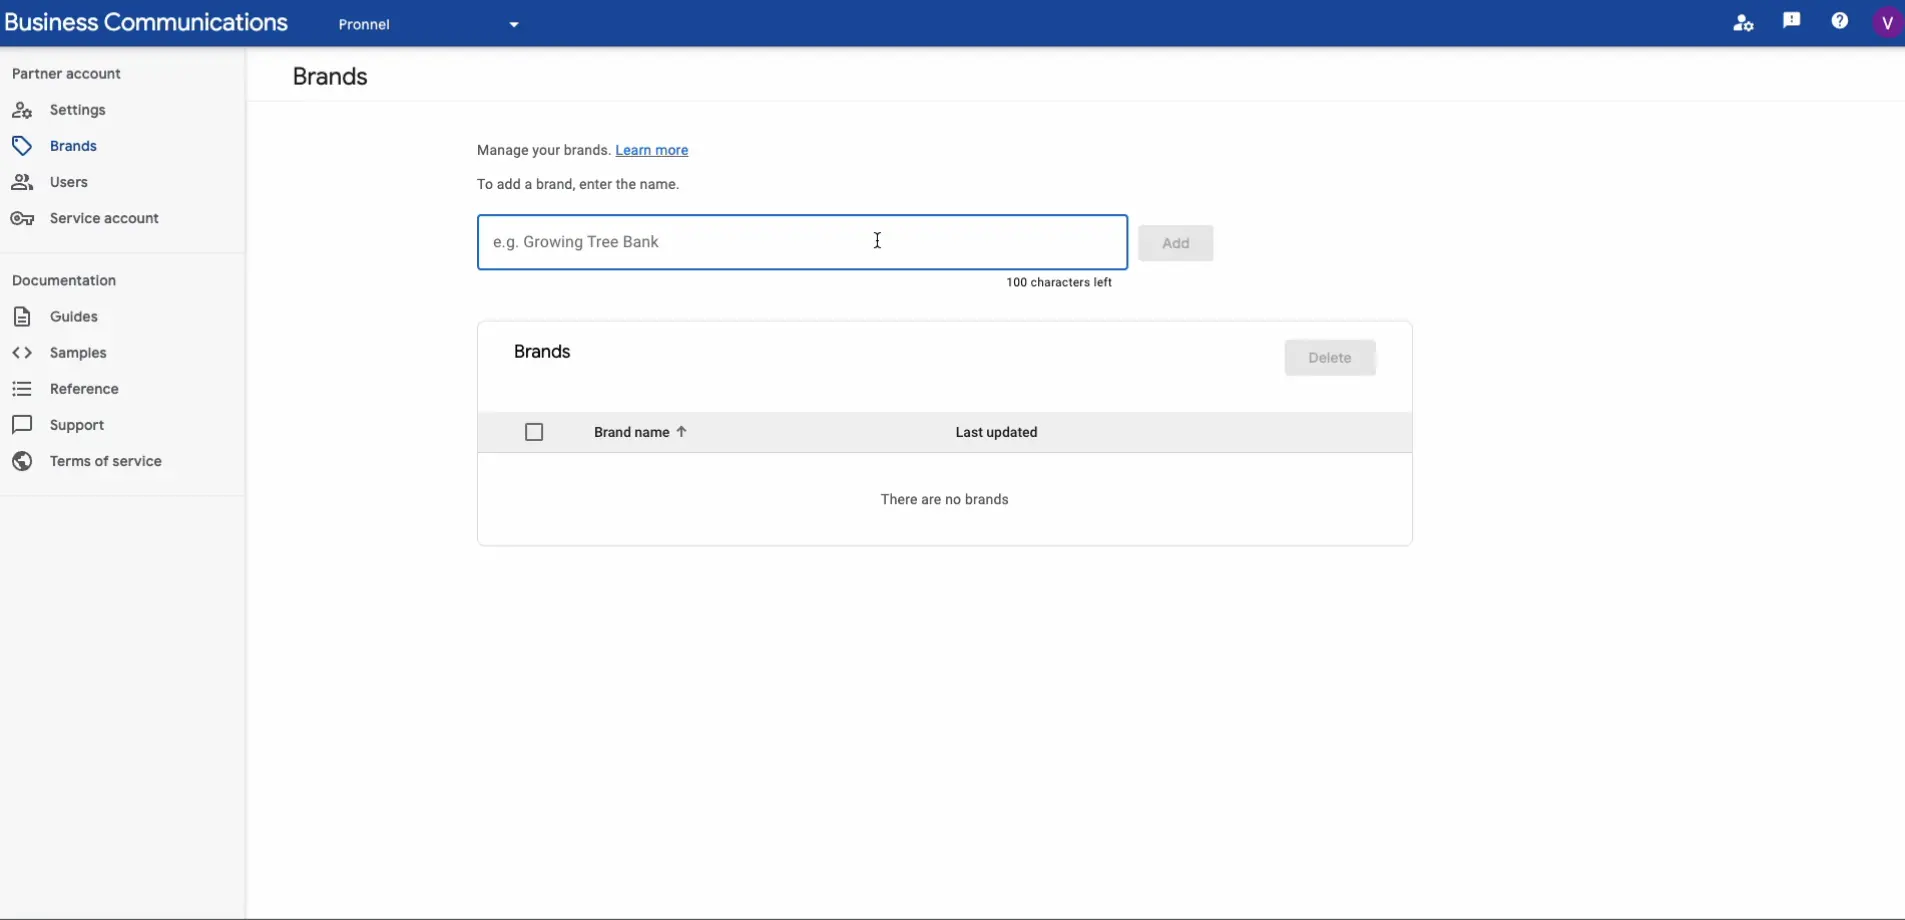
Adding Your Brand
In the Partner account settings' left navigation menu, click 'Brands'.
-
Enter your Brand name in the provided field. Remember, this can differ from the name you used for the partner account.
User Management
Go to the 'Users' tab in the left side menu.
-
You can add users by entering their email addresses and assigning roles, either as a Manager or a Reader.
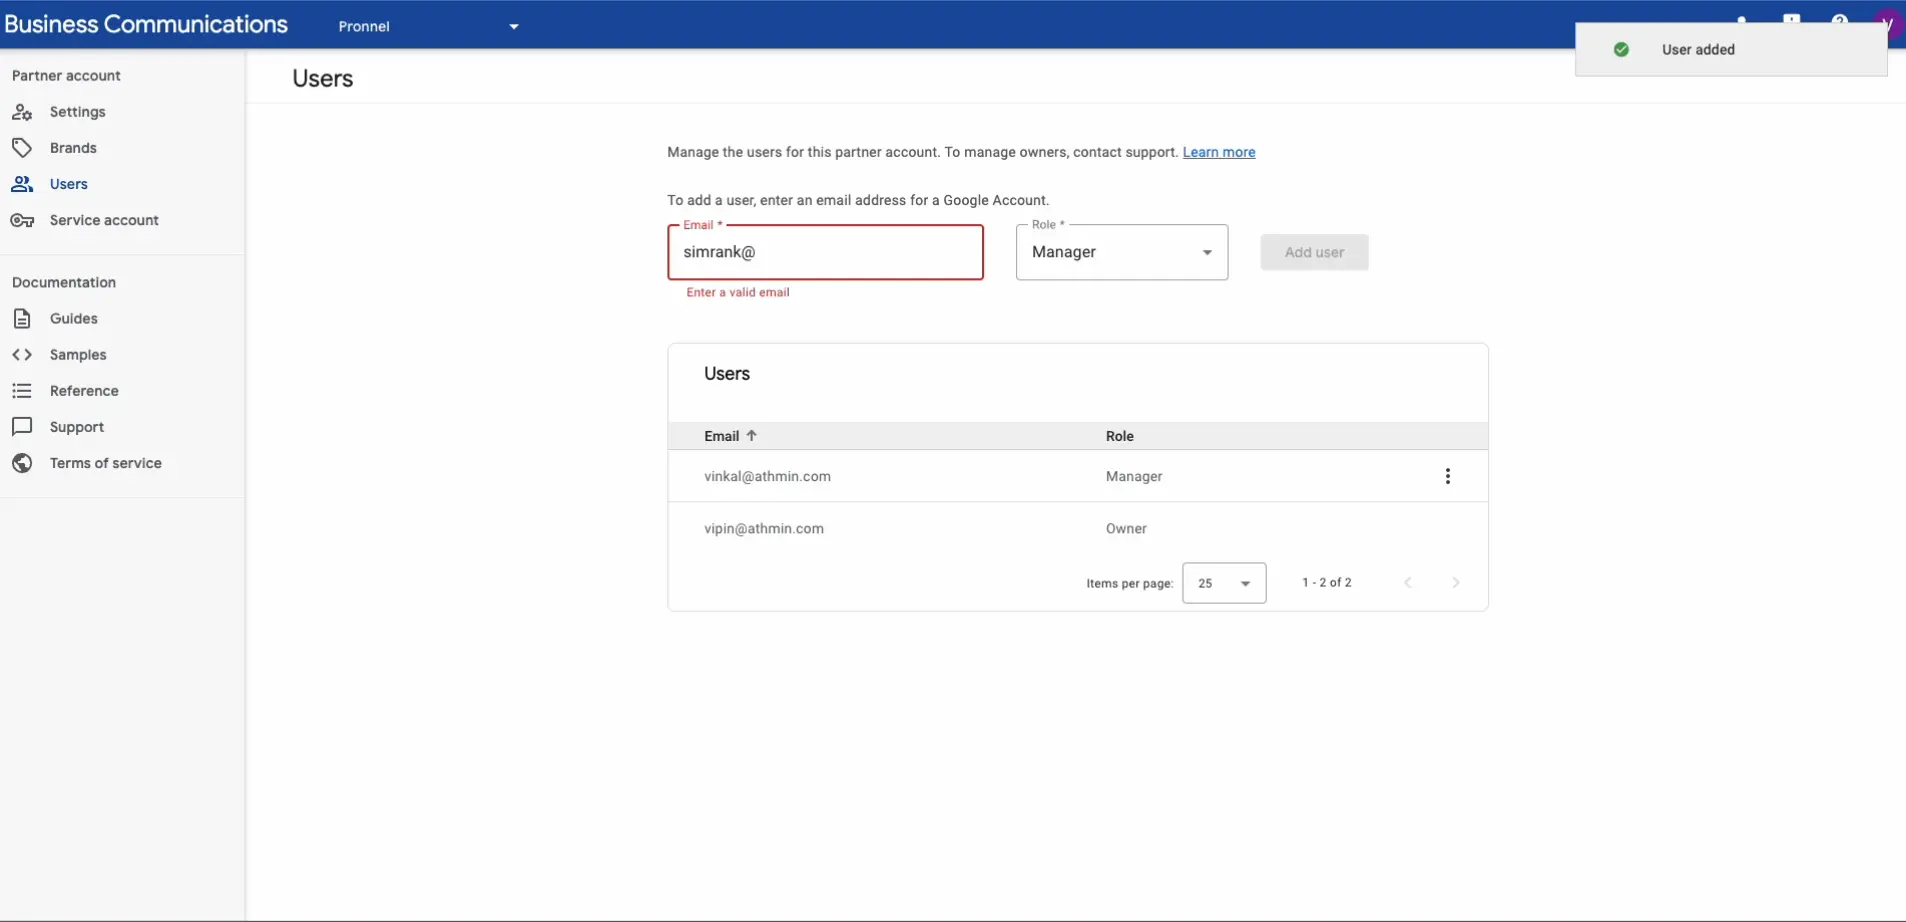
You can skip to avoid adding users to your Partner account.
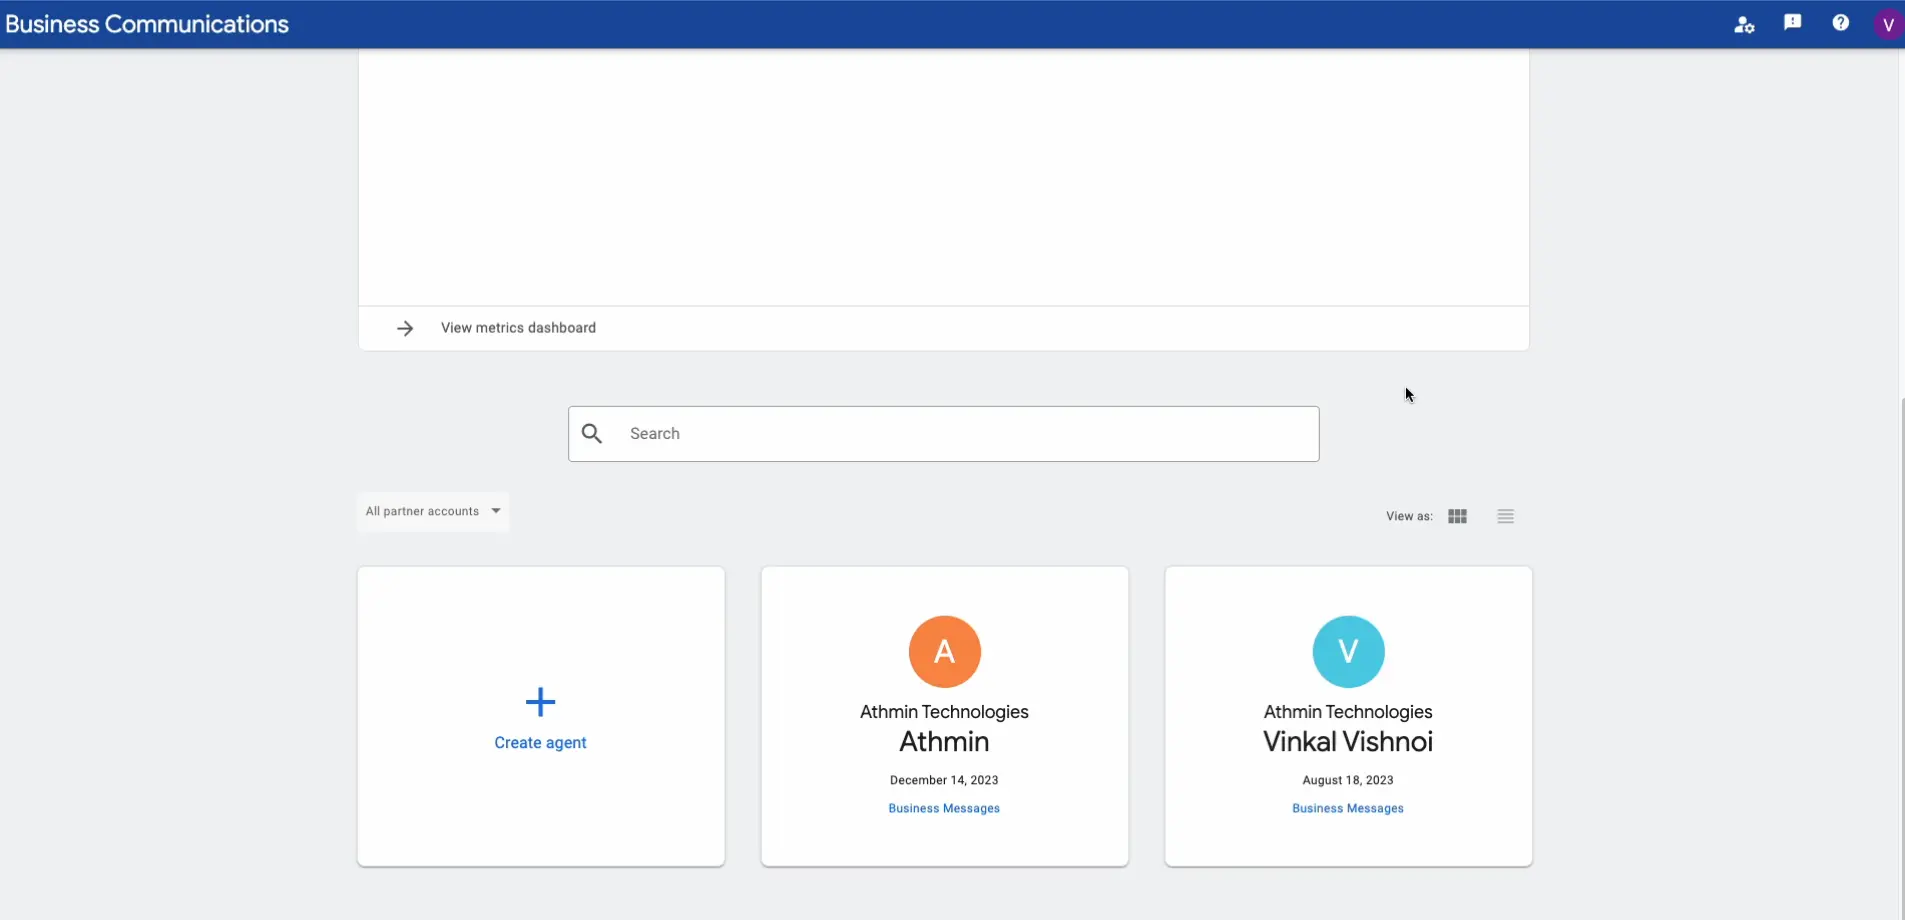
Creating and Configuring Agents
Agent Creation
Return to the homepage of the Business Communication Developer console.
-
Locate and click on the 'Create Agent' button. This will open a form for entering your Agent's information.
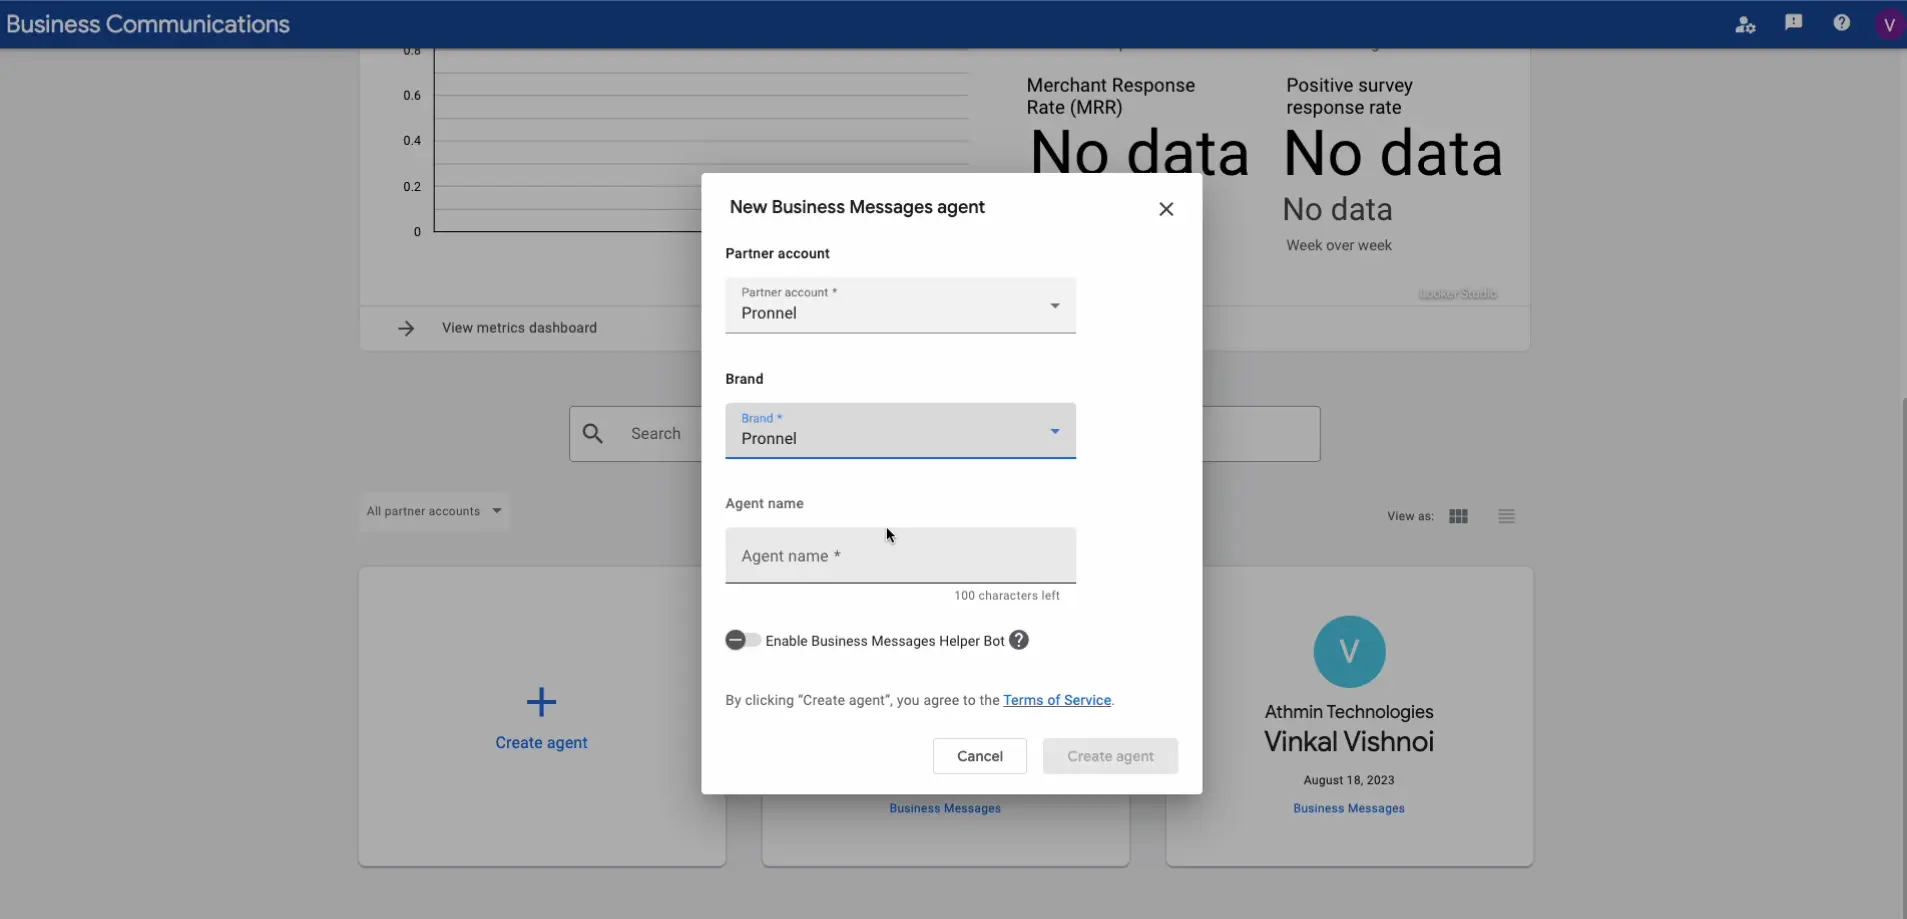
Agent Configuration
-
Fill in the Agent details, including the Partner Account, Brand and the Agent Name. The Agent's Name is significant as it is what customers will see during interactions.
-
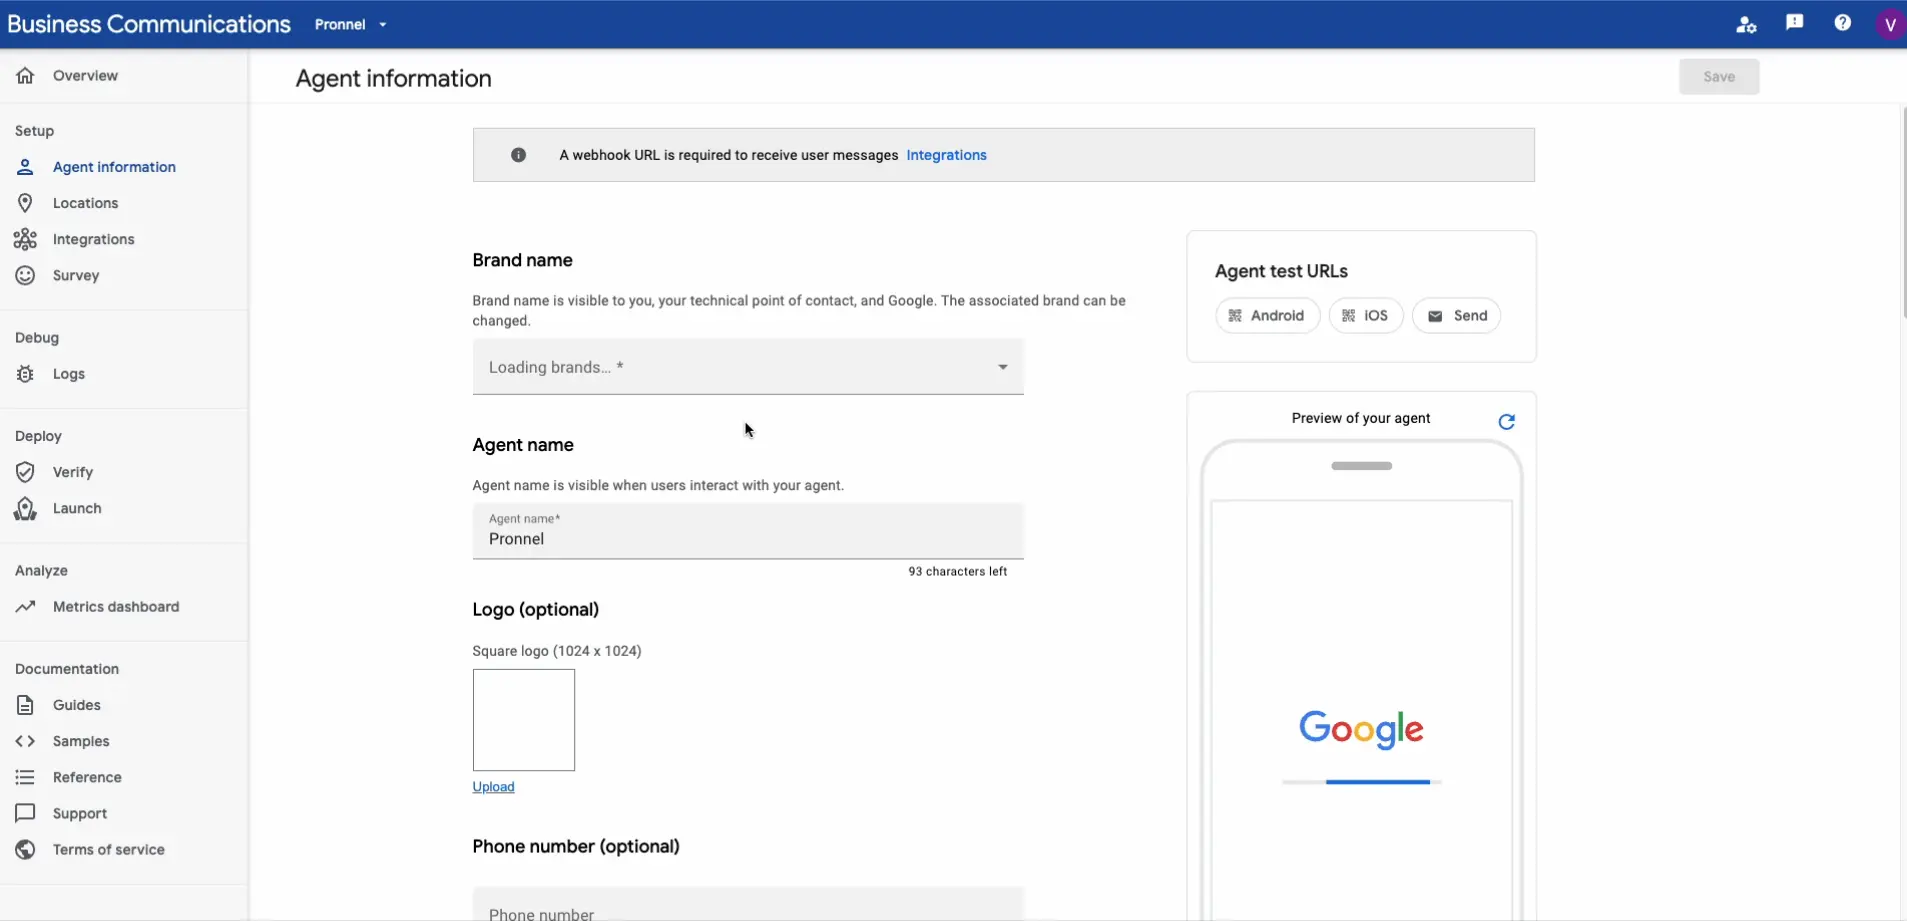
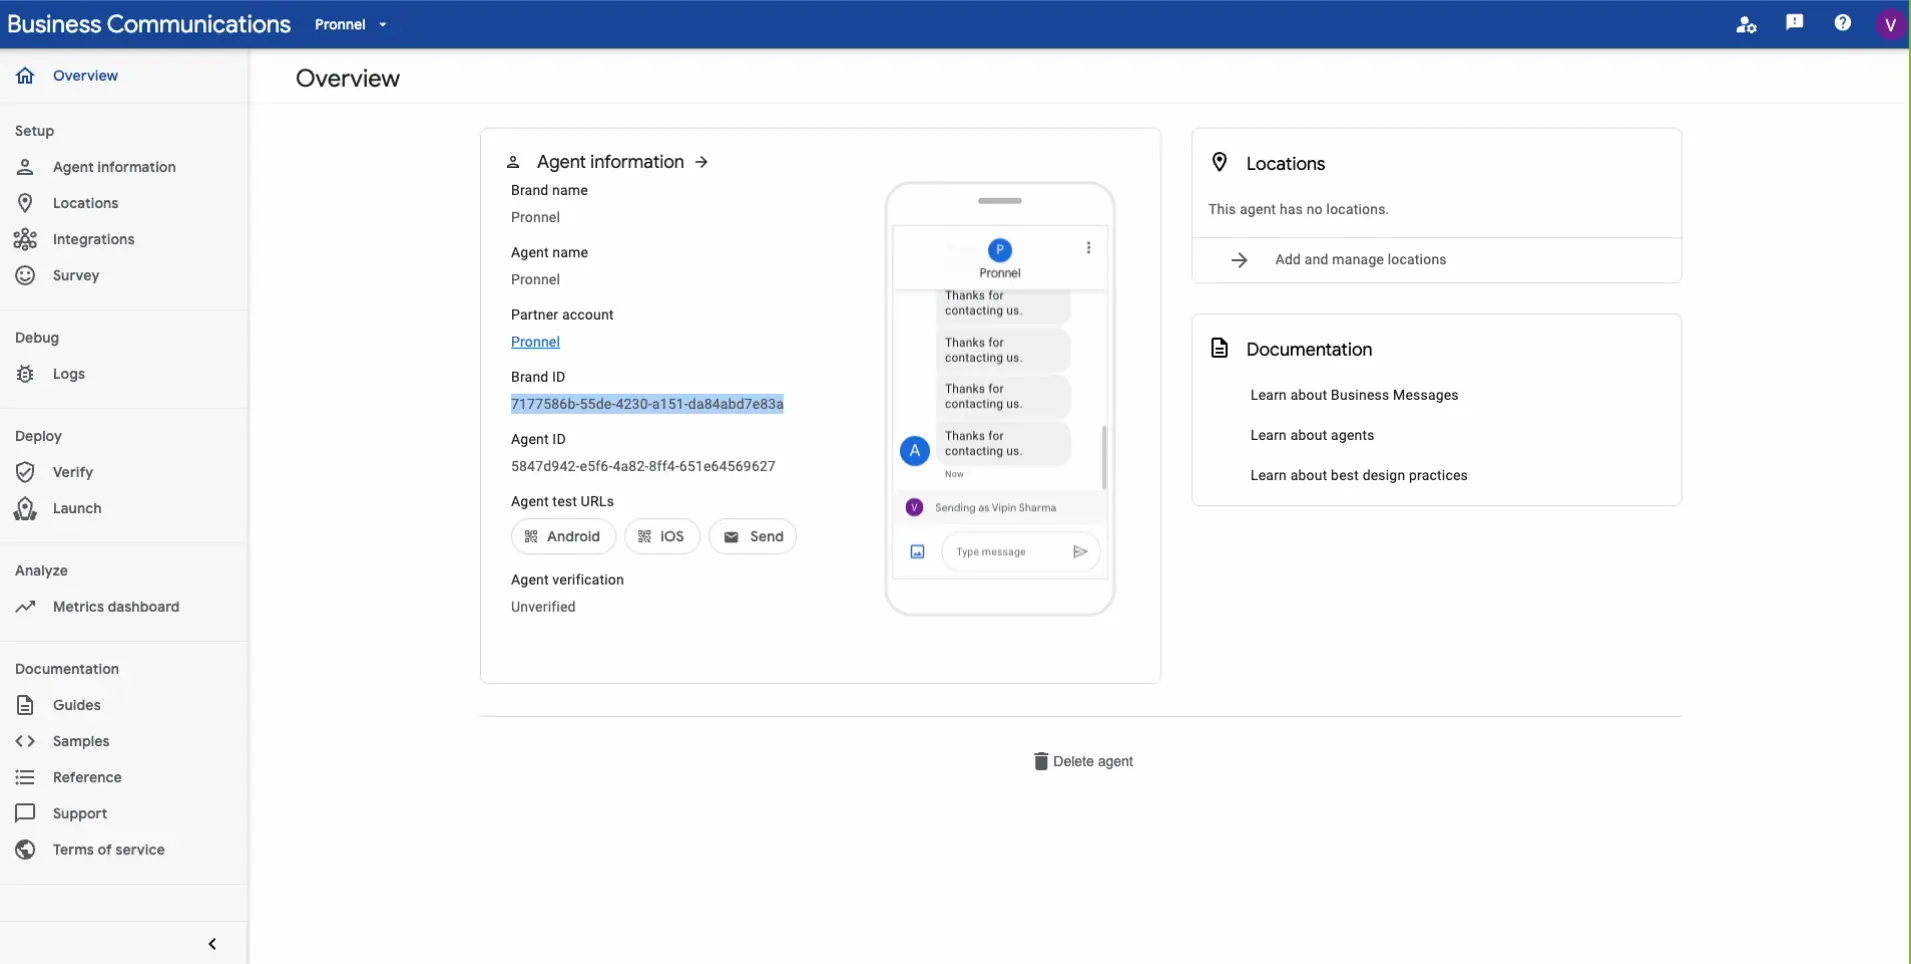
After creating an agent, you'll see a card displaying the Agent's name on the console's homepage. Click on this card to access the Agent information screen.
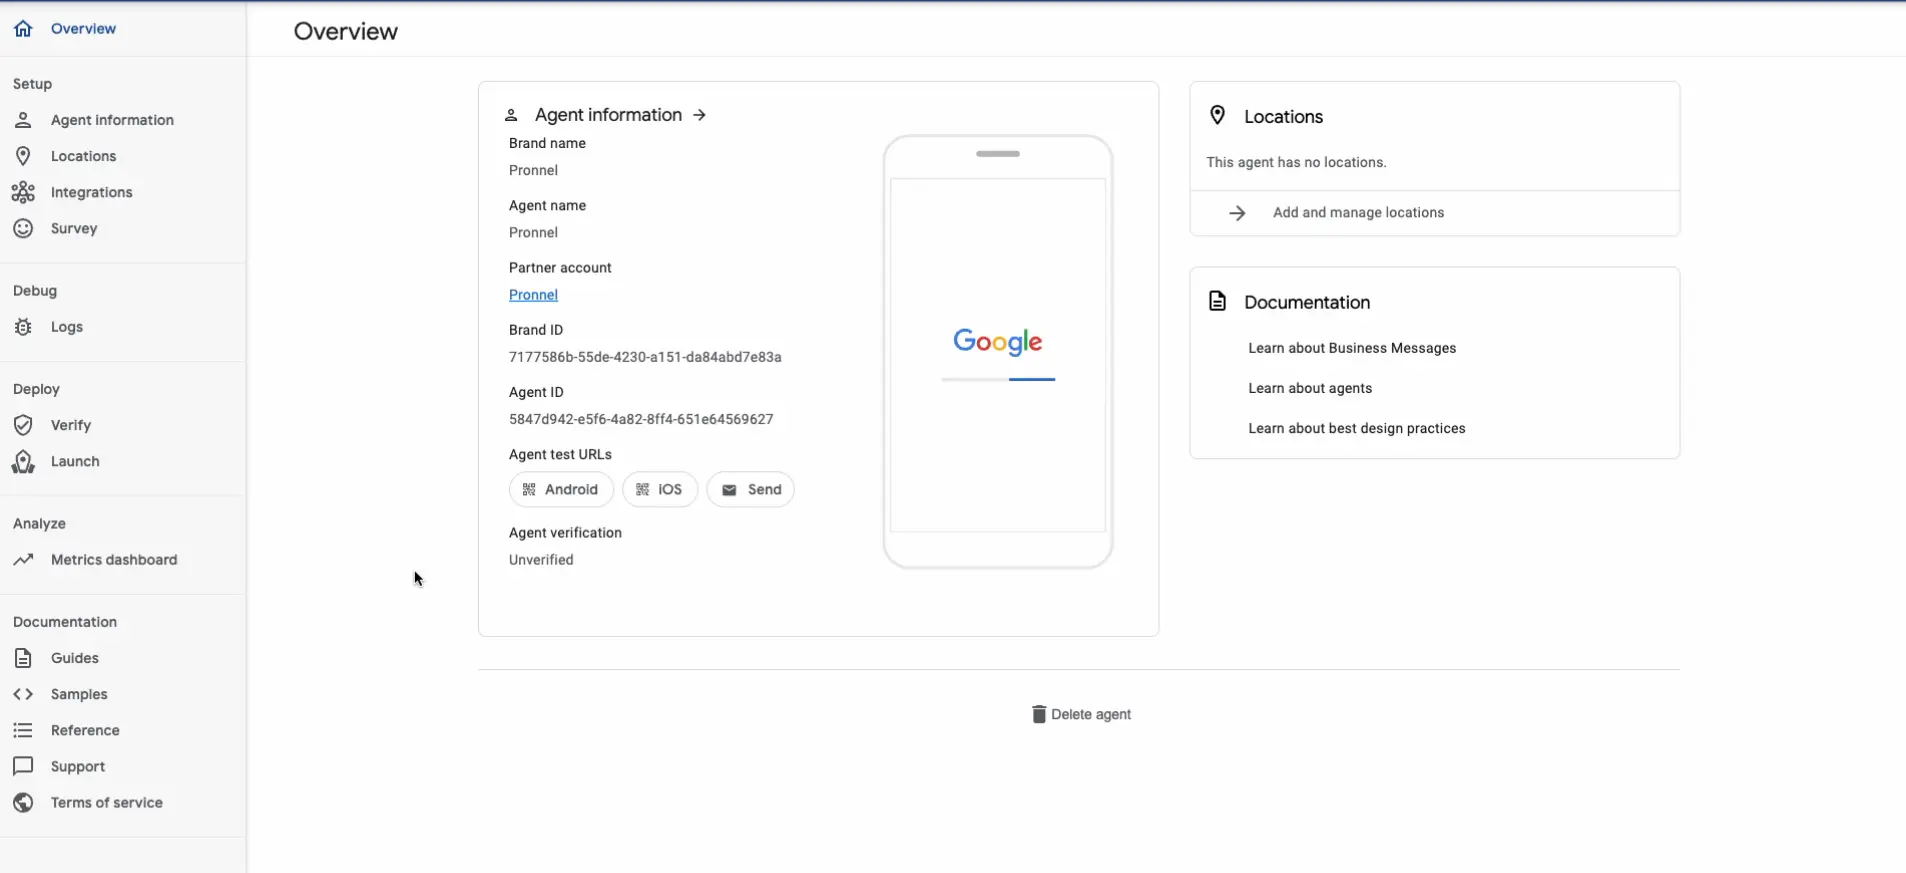
Here, you can add a logo, an Agent phone number, and an Agent ID. While these are optional, they can be beneficial for branding and identification purposes.
-
Enter the domain associated with your Agent. Also, provide a phone number that will be used for conversations initiated from non-local entry points, essentially overriding default numbers.
Provide the URL of the 'Contact Us' page from your website. This will be a direct link for customers to reach out to you.
Choose your preferred methods of communication by selecting appropriate checkboxes like Email and Web chat. Select at least one option from the list, including Emails, FAQs, Phone, Twitter, Web Chat, and WhatsApp.
Enter the message that will be automatically sent as a first response when a customer initiates a chat. This is your opportunity to make a great first impression.
Optionally, you can set a message that will be sent when no agent is available online, informing the customer of non-availability and providing alternative contact options.
Add a link to your privacy policy from your website. This is crucial for transparency and building trust with your customers.
Set Primary Interactions to 'Human only' to indicate that human agents primarily handle interactions.
Ensure the setting is marked as 'Always available' to indicate continuous service availability.
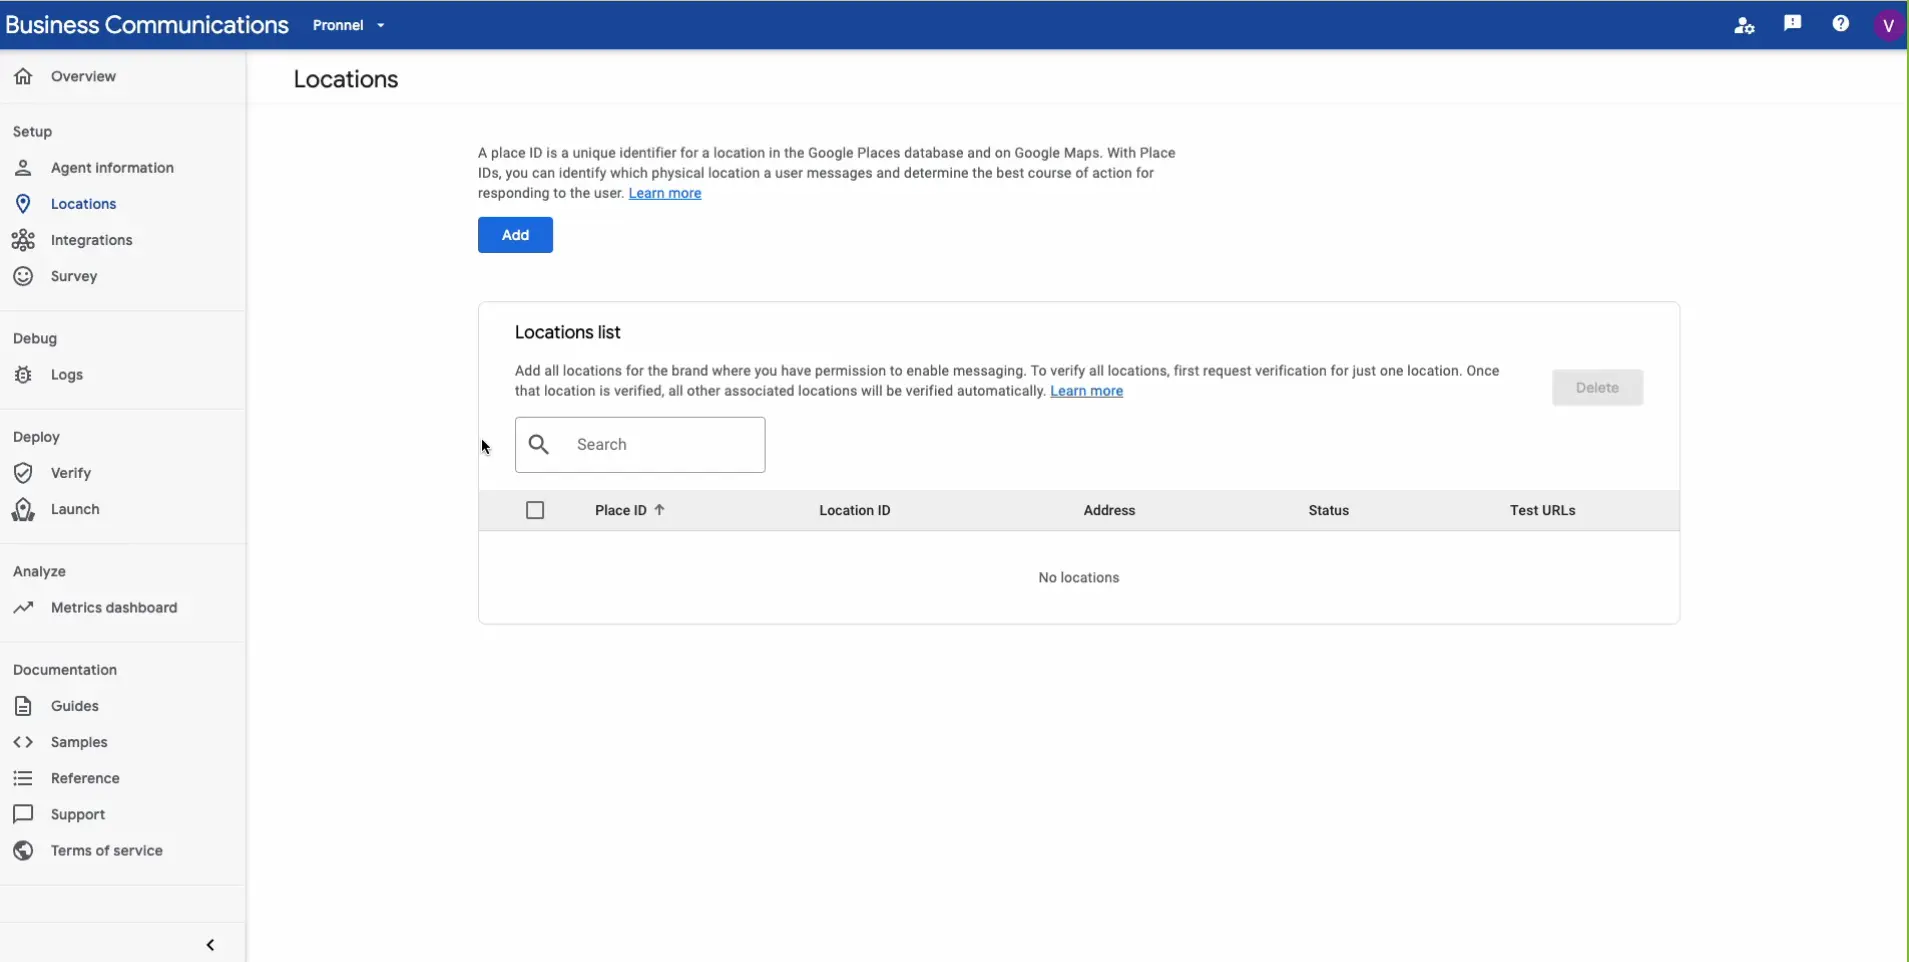
Verifying Business Location
Location Verification
-
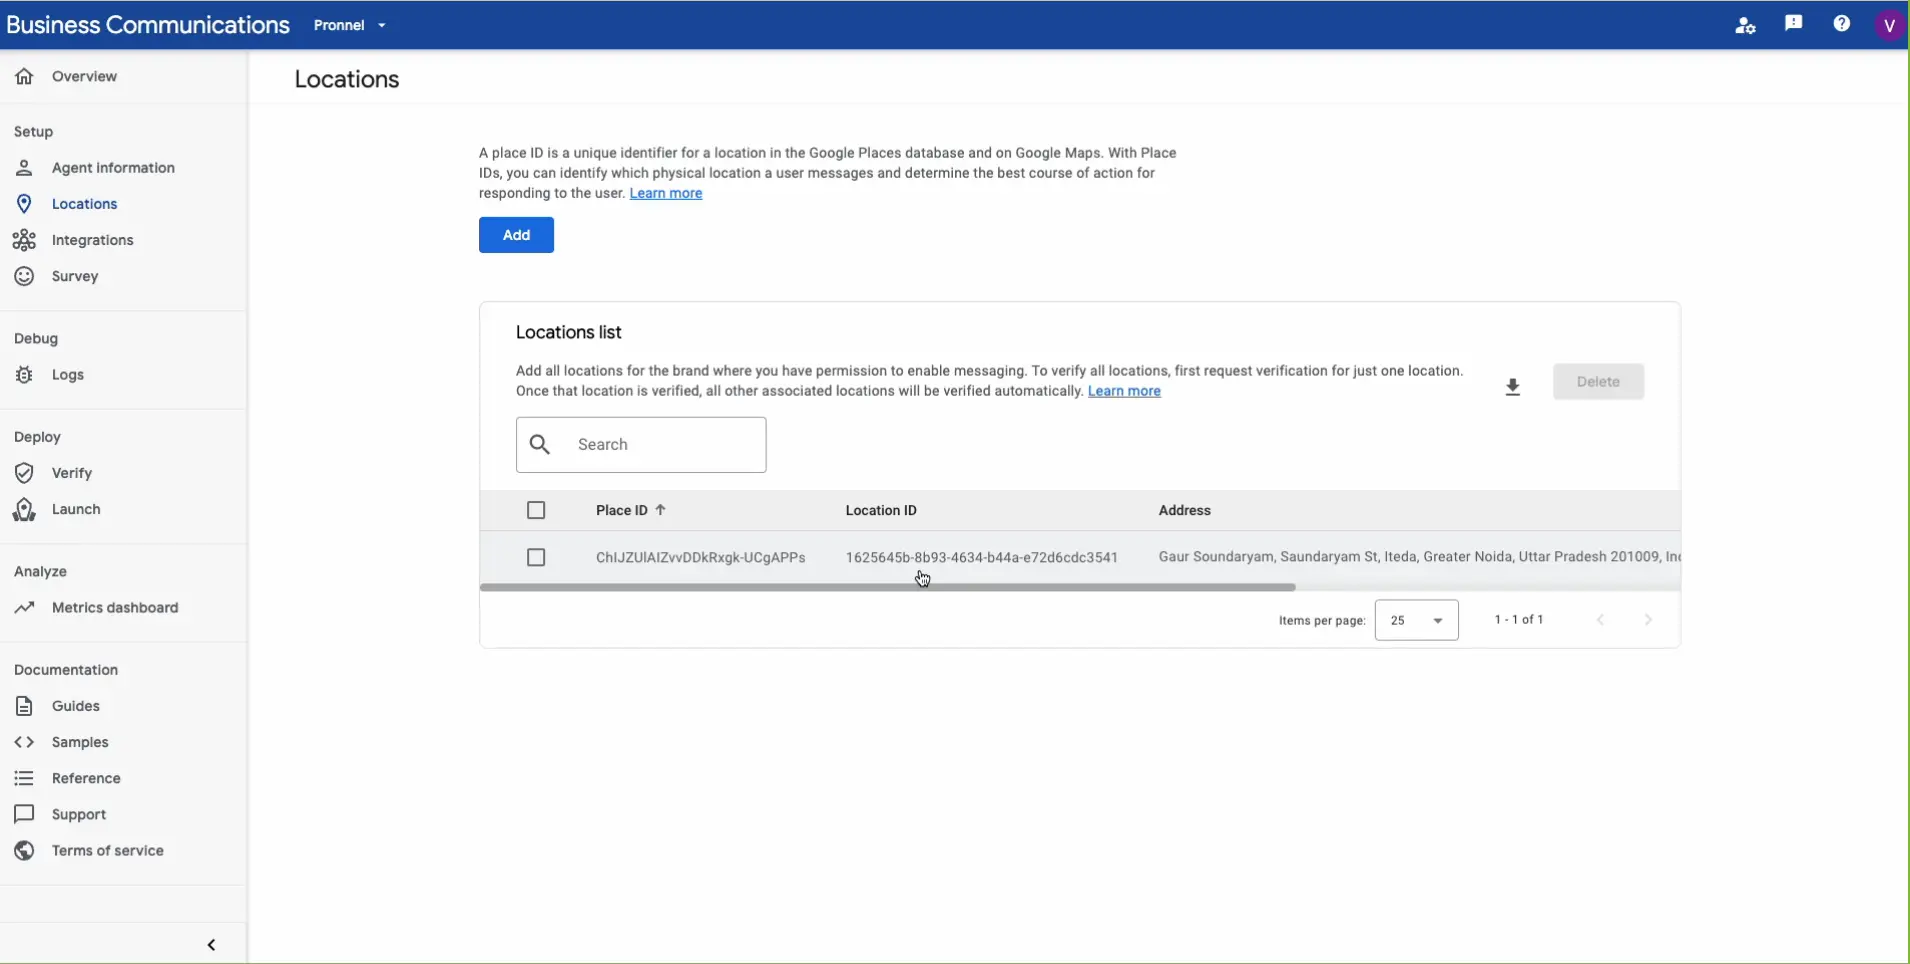
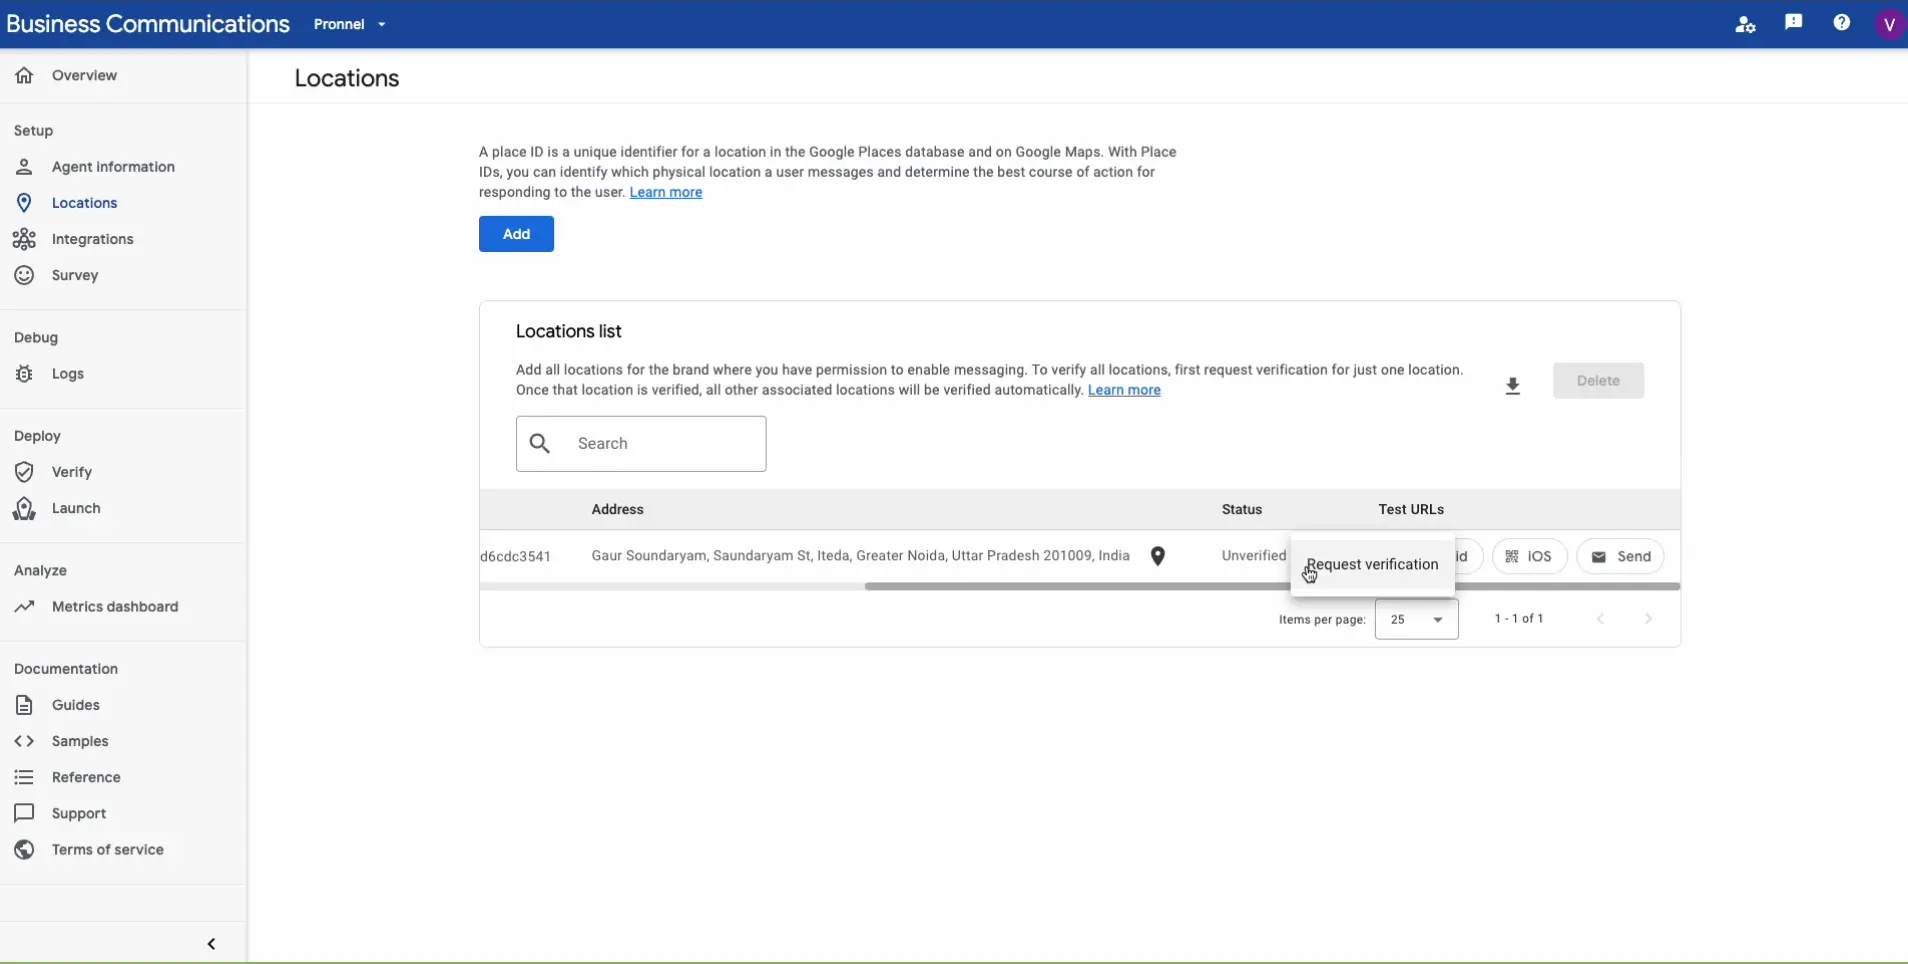
In the Agent information page, navigate to the 'Locations' tab.
-
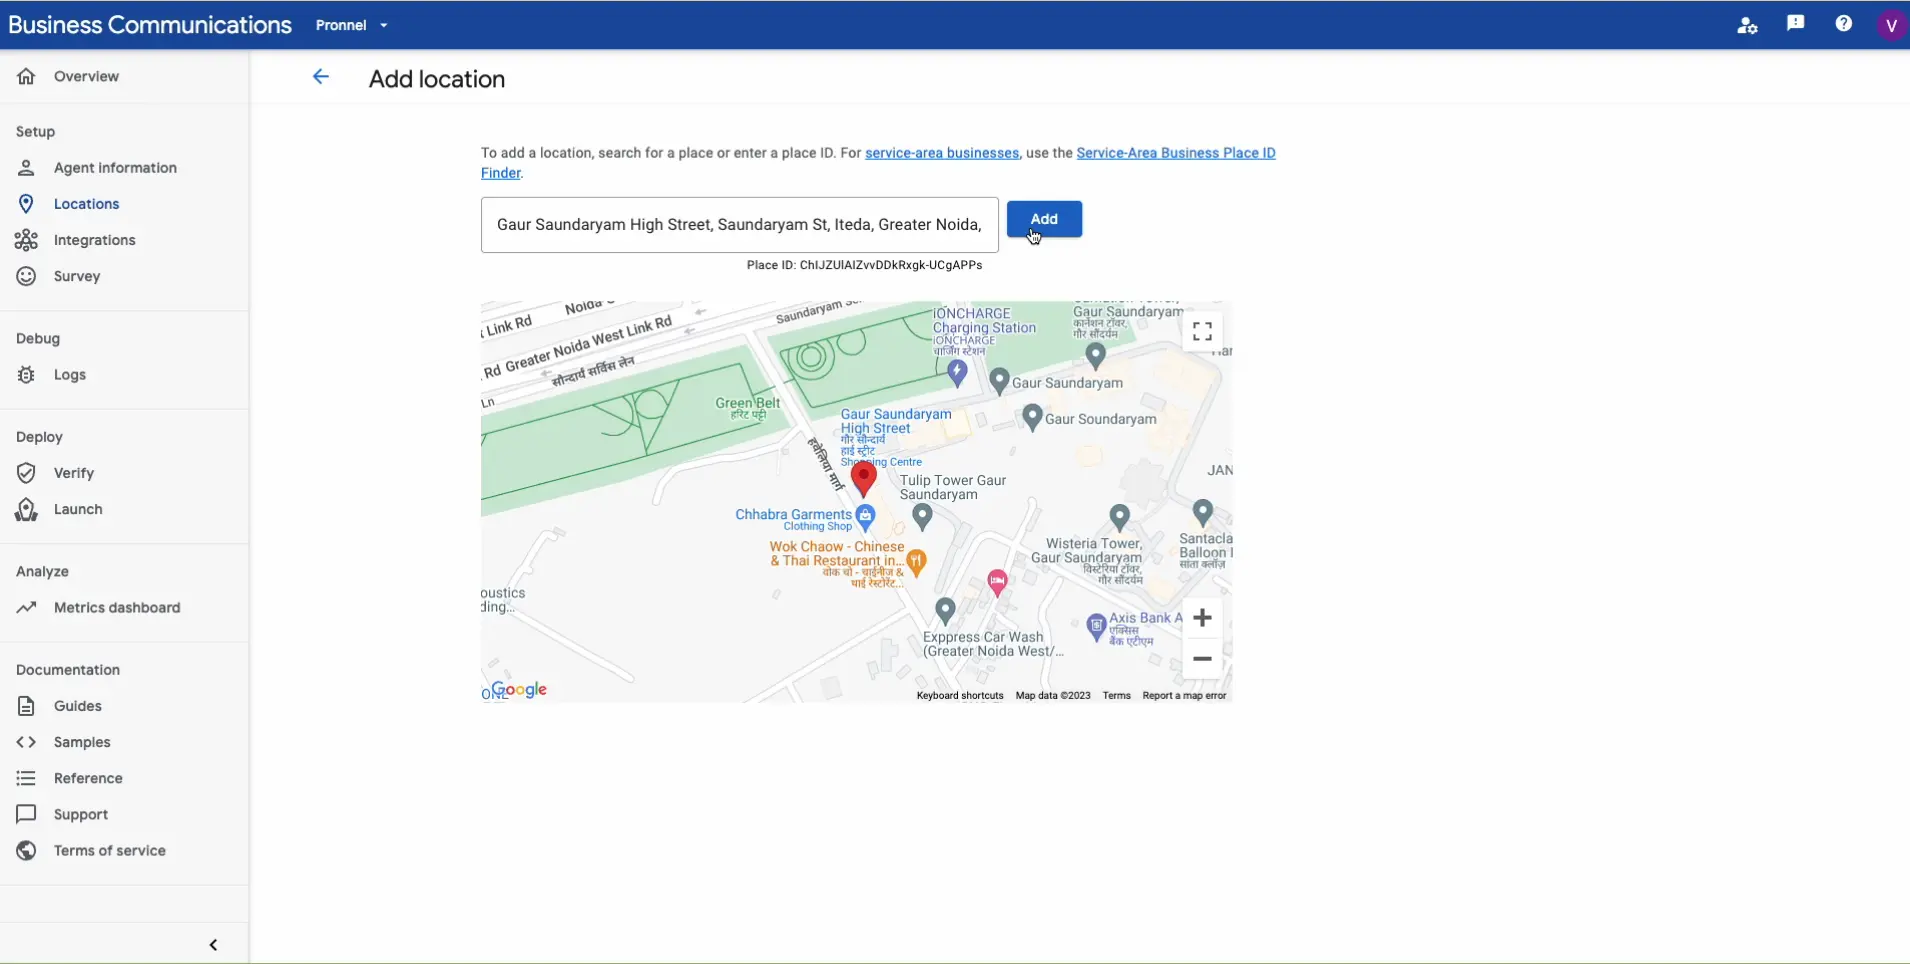
Search for your verified business. If your business is verified with Google, it should appear in the search results.
-
Select your company and click on 'Verify'. If you've selected the correct company, verification should be immediate.
Preparing for Pronnel Integration
Gathering Necessary Details
Before setting up Pronnel, you must collect key details: Agent ID, Token number, Brand ID, and Client Email.
-
Agent ID and Brand ID are available on the Agent detail page.
-
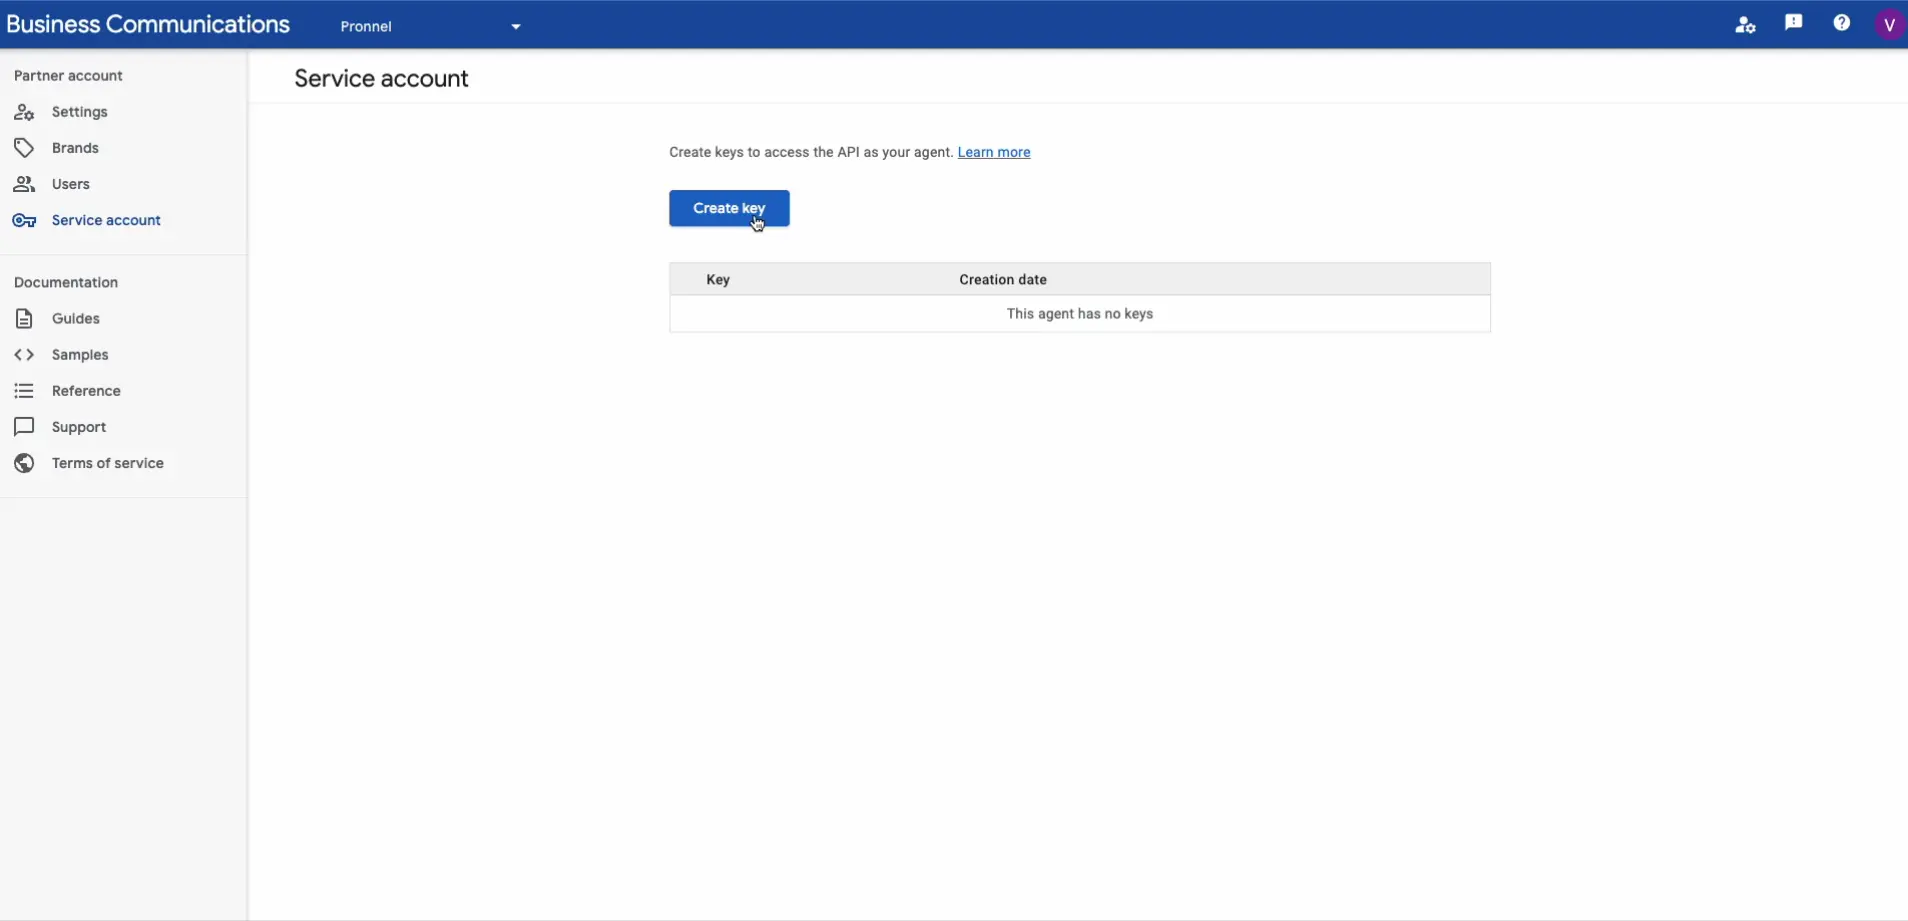
To get the Token number and Client Email, create a Service Account on the console.
-
Go to 'Partner Settings' and click on 'Service Accounts'.
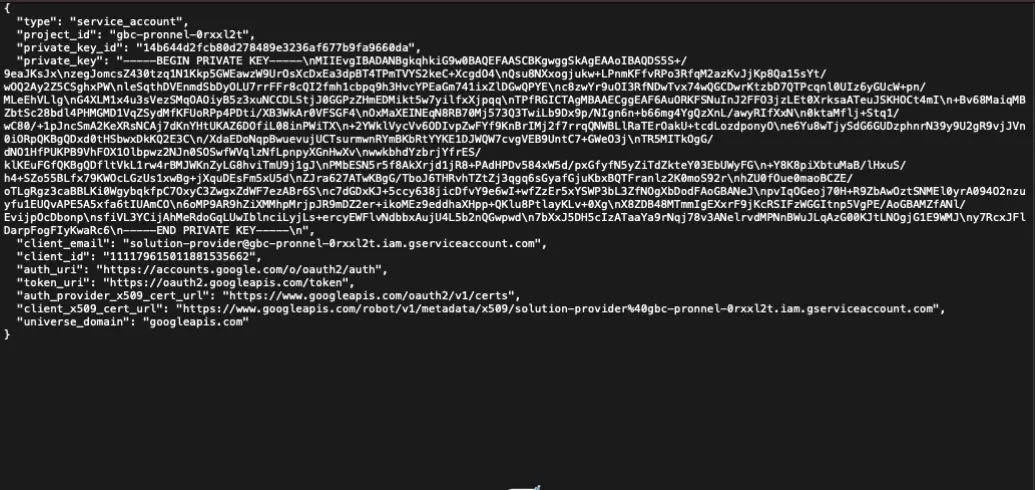
-
Create a Key here. When prompted, download the key file and open it with a text editor to find your Private Key (Token number) and Client Email.
Setting Up Pronnel
Prerequisite
The board in which you want to configure the communication channel of Google business chat must be connected with at least one contact type of board.
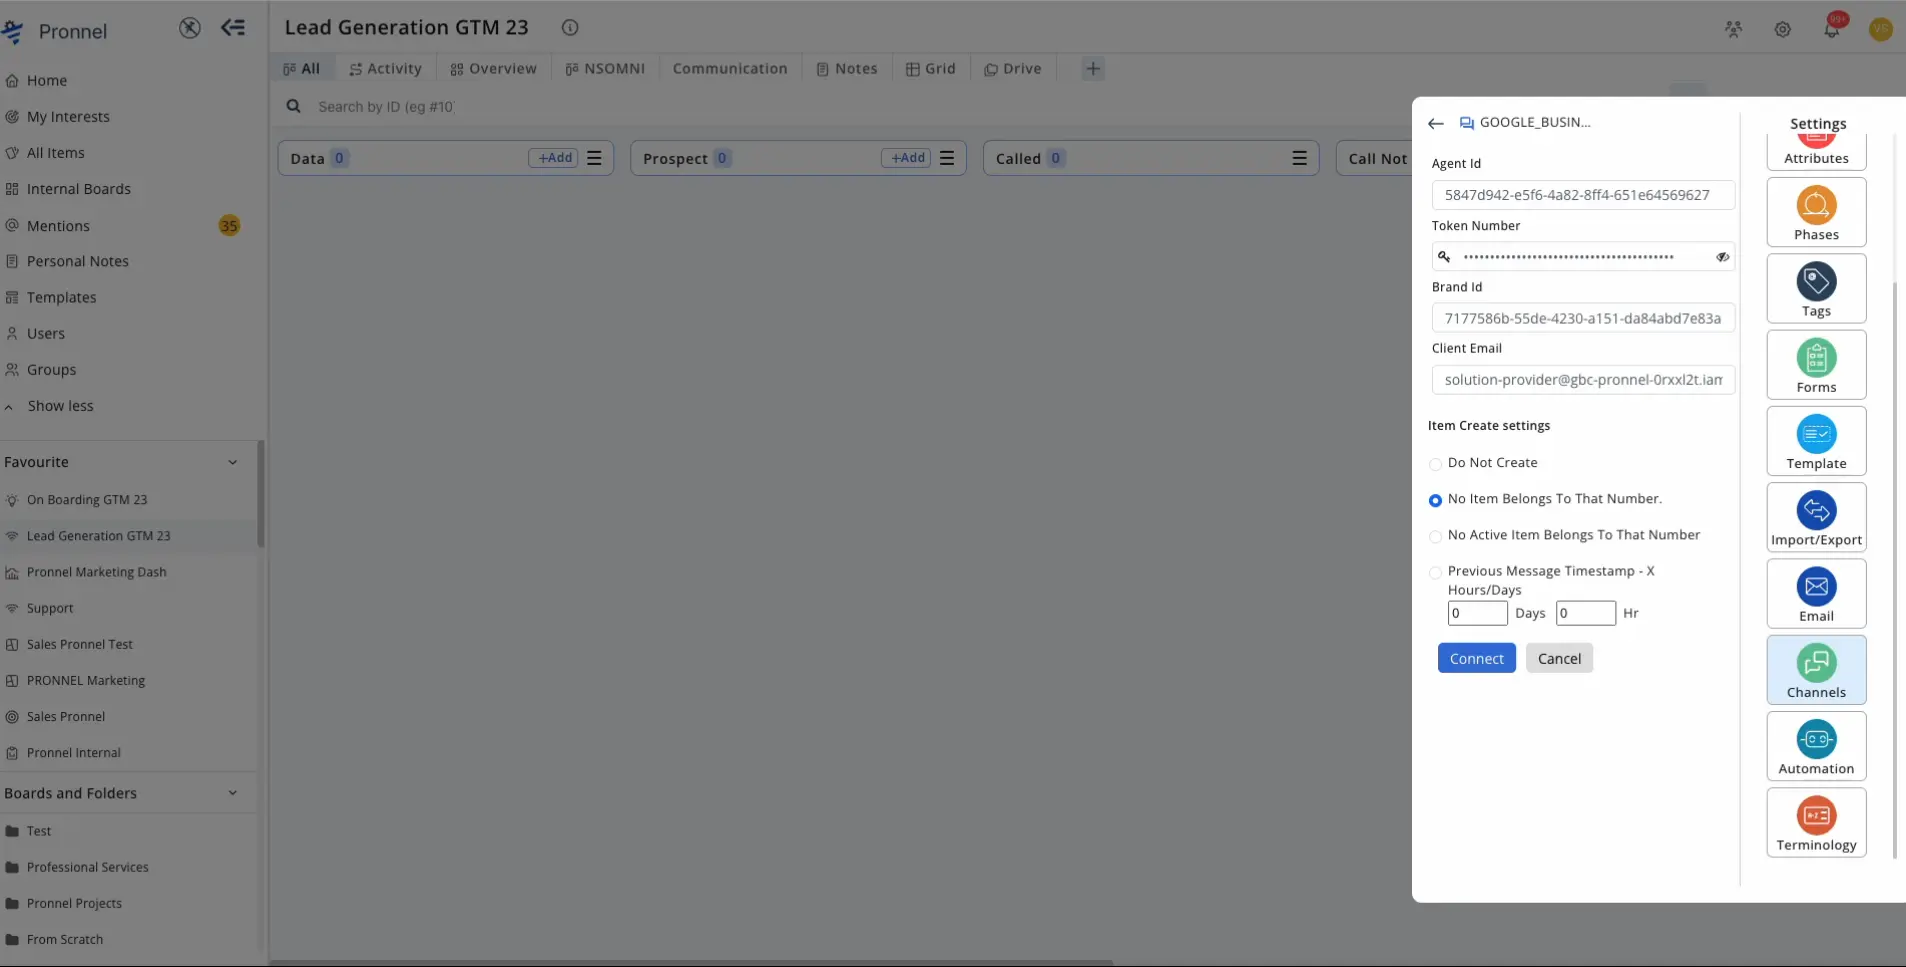
Configuring Pronnel
Open the board, which is ready for communication integration as mentioned in the Prerequisite.
-
Go to the settings, click 'Communication' and add a new communication channel such as Google Business Messages.
-
Enter the Agent ID, Brand ID, Client Email, and Token number (Private Key) you gathered earlier.
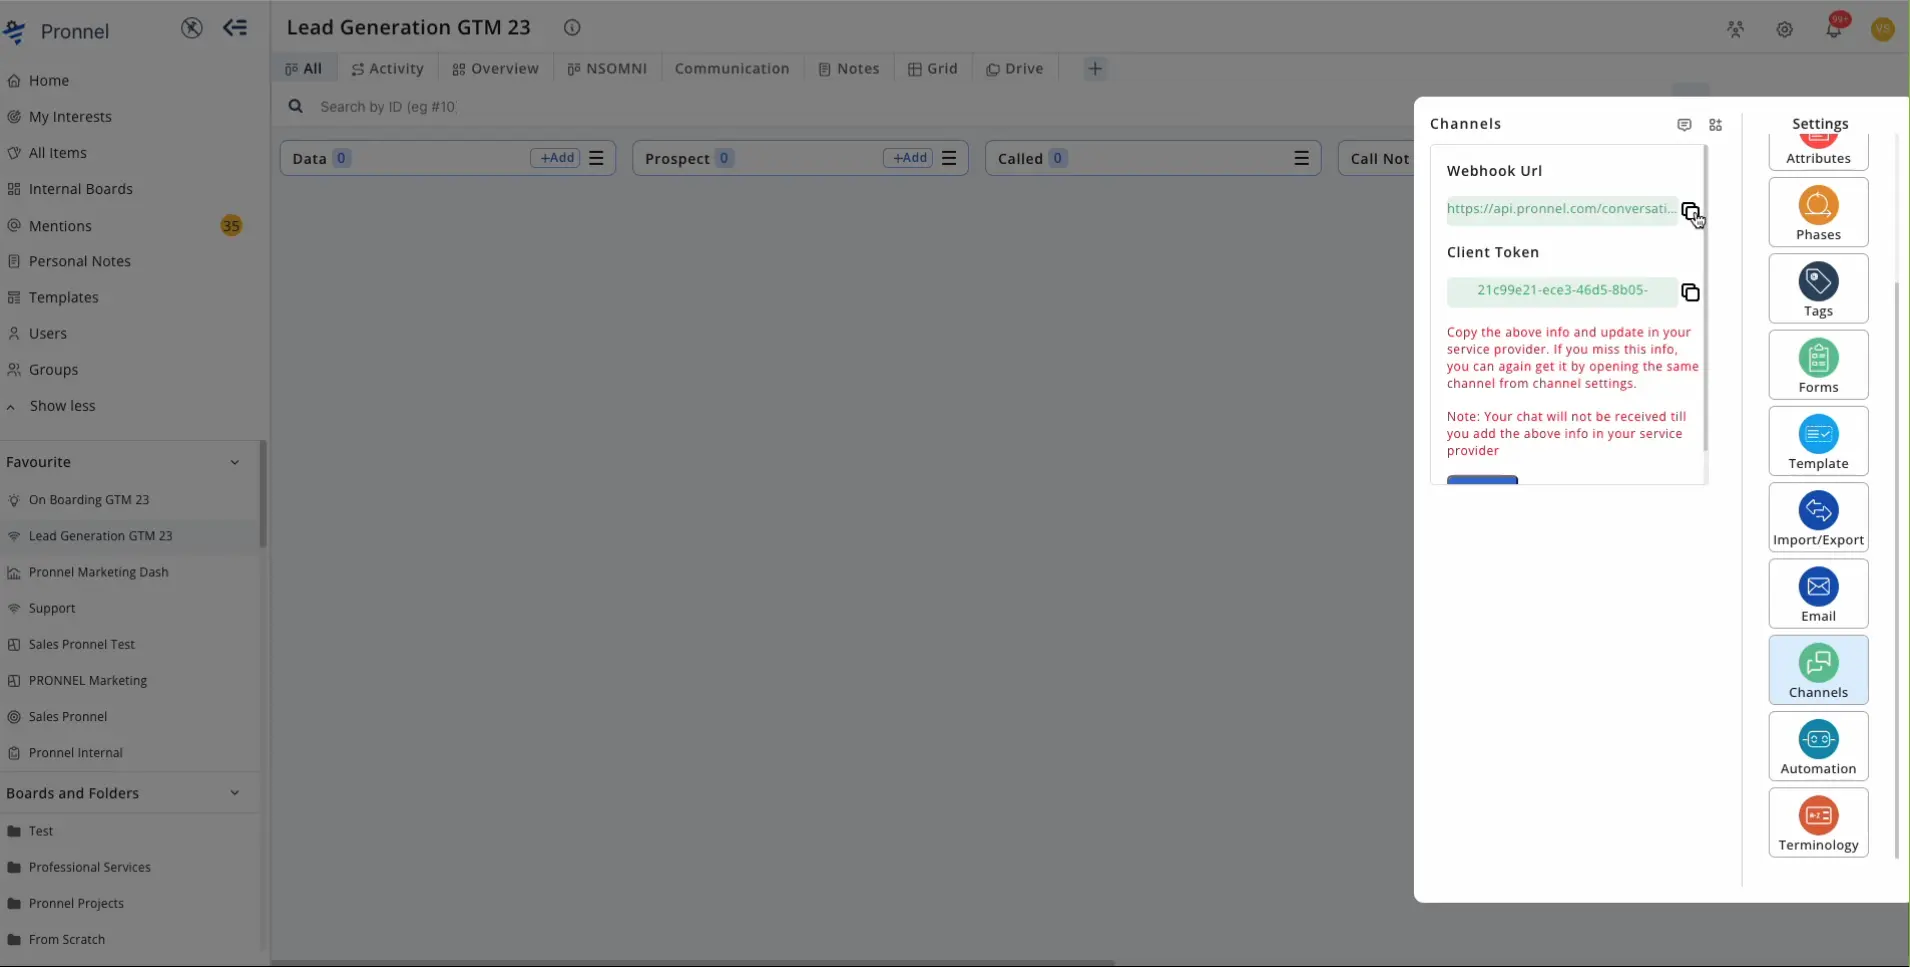
Obtaining Webhook Details from Pronnel
-
Once connected, Pronnel will provide a Webhook URL and Client token. Note these down, as you will need them for the next step.
Configuring Webhook in the Developer Console
Webhook Configuration in Partner Account Settings
Return to the Business Communication Developer console.
-
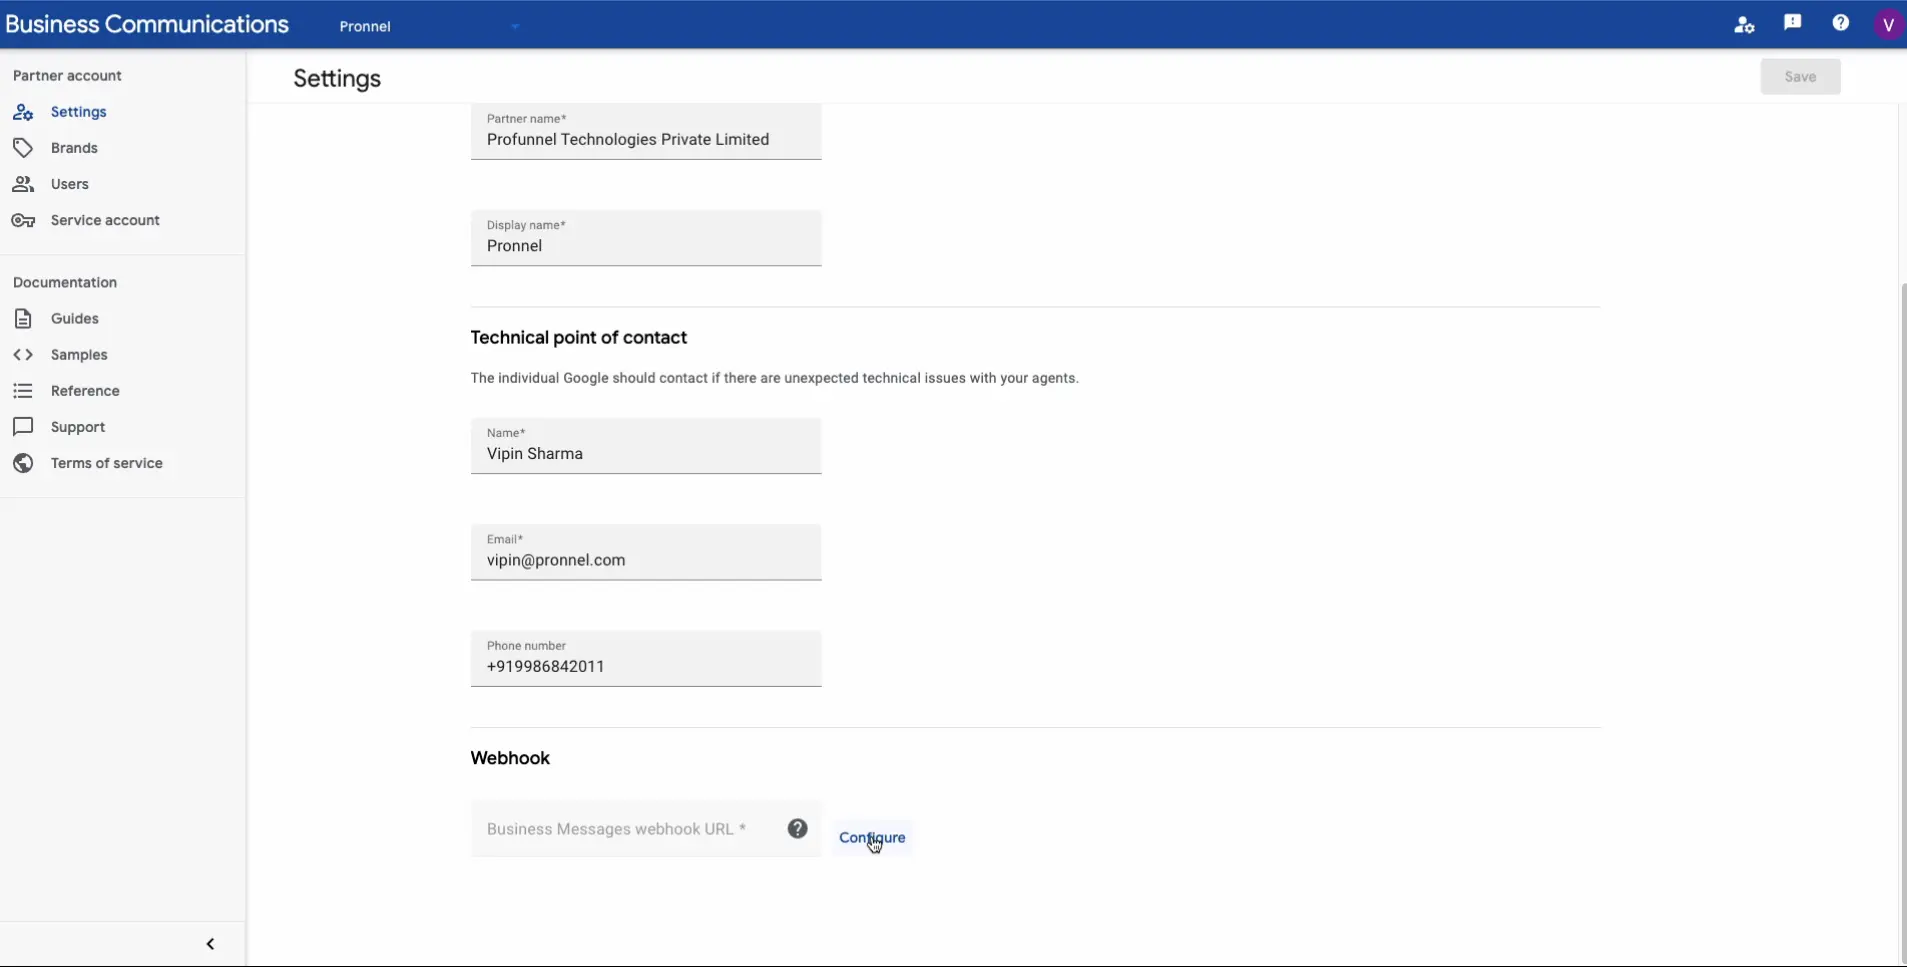
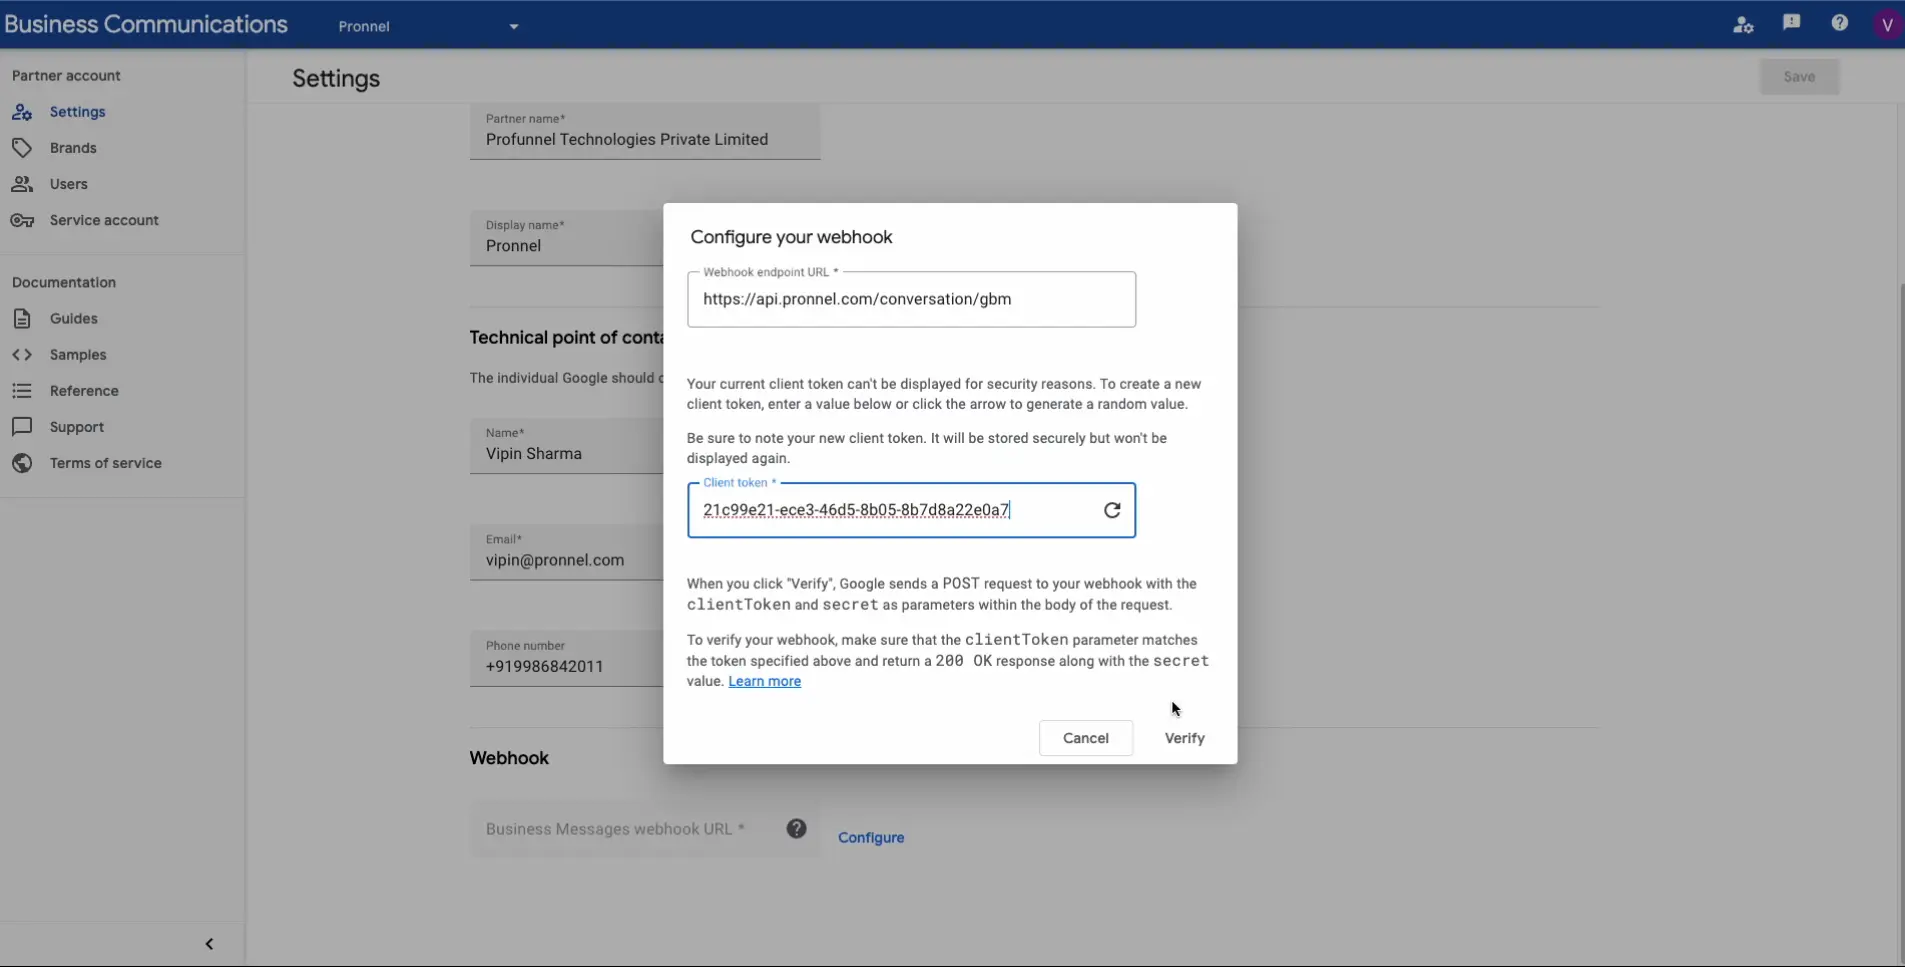
In 'Partner Account Settings', navigate to the bottom of the page to configure the Webhook.
-
Enter the Webhook URL endpoint and Client token that you received from Pronnel.
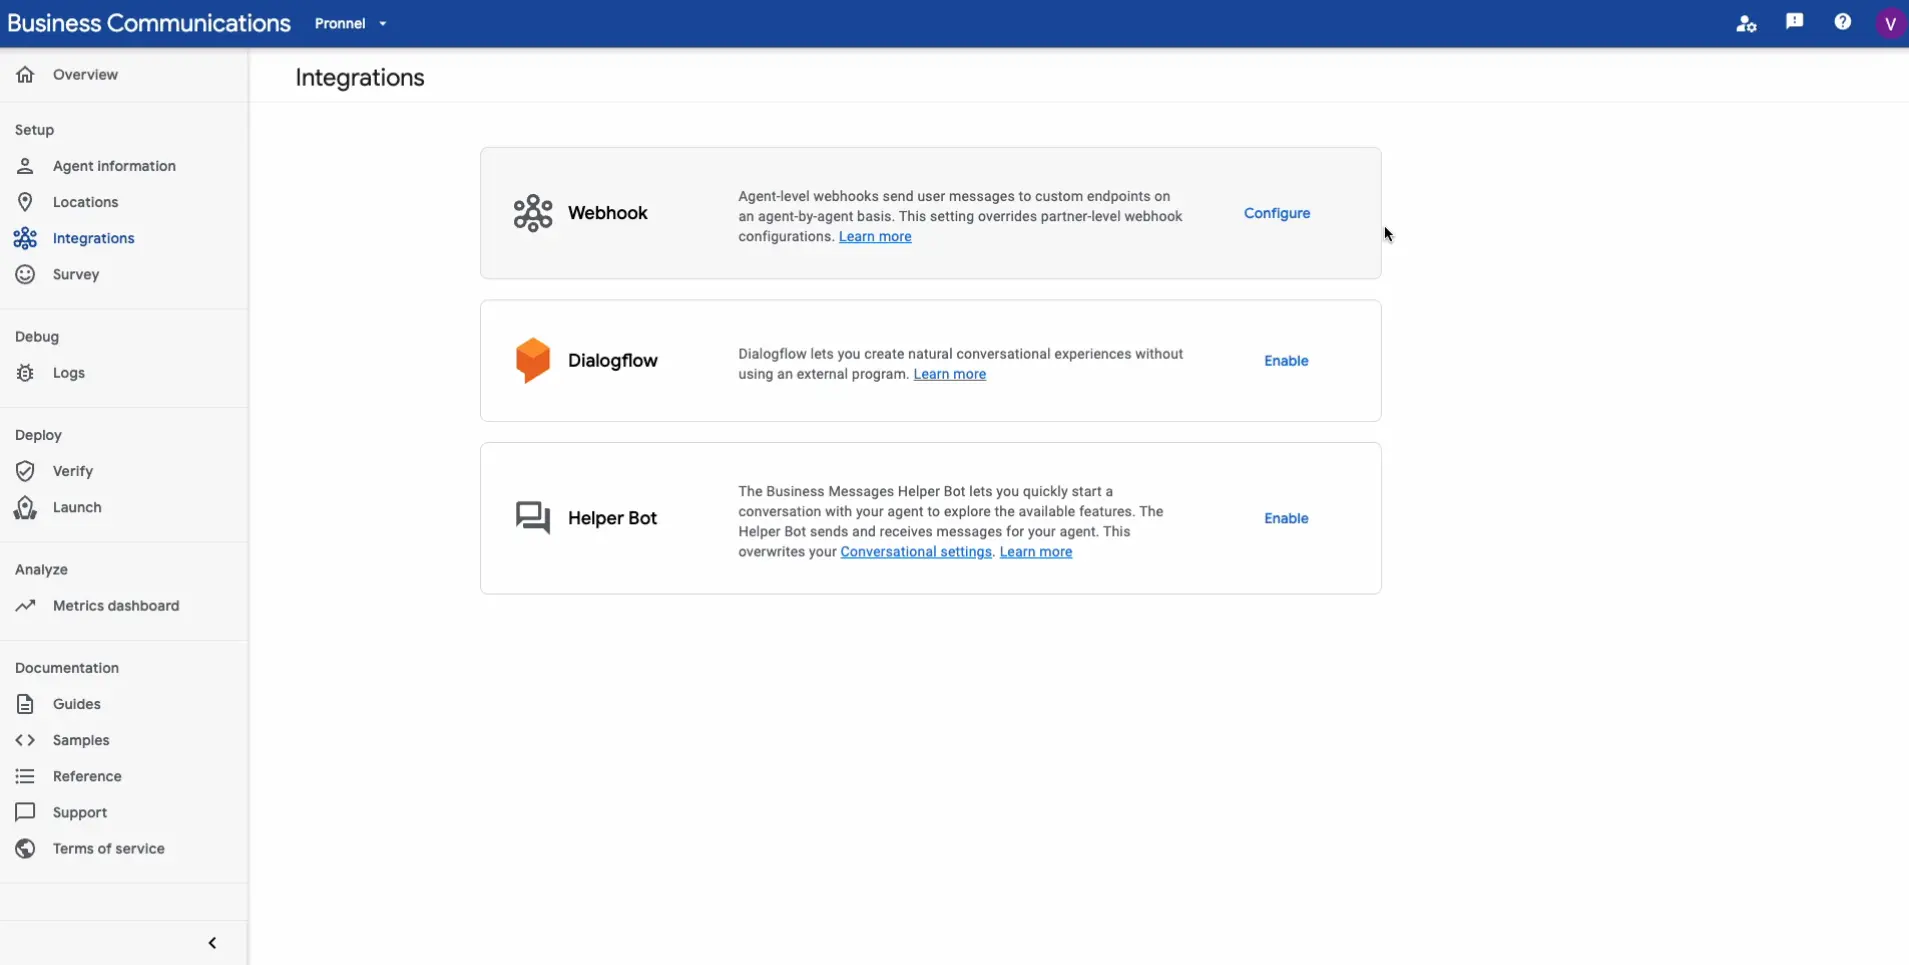
Webhook Configuration in Agent detail page
-
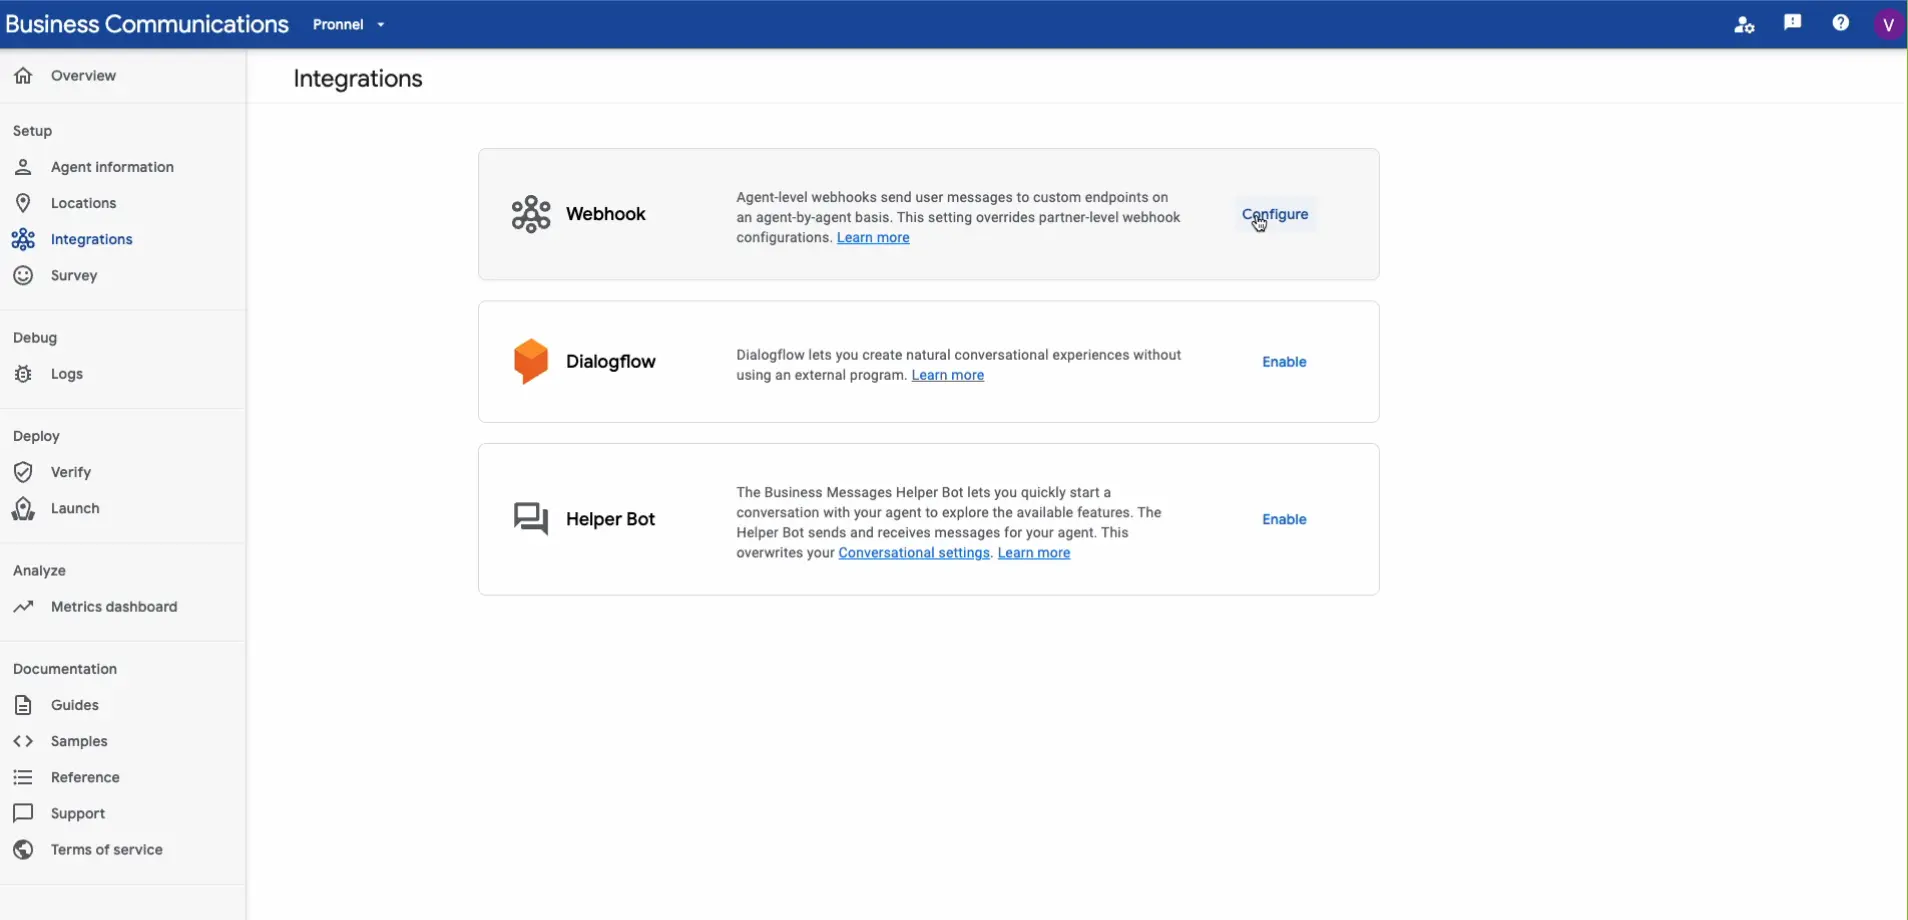
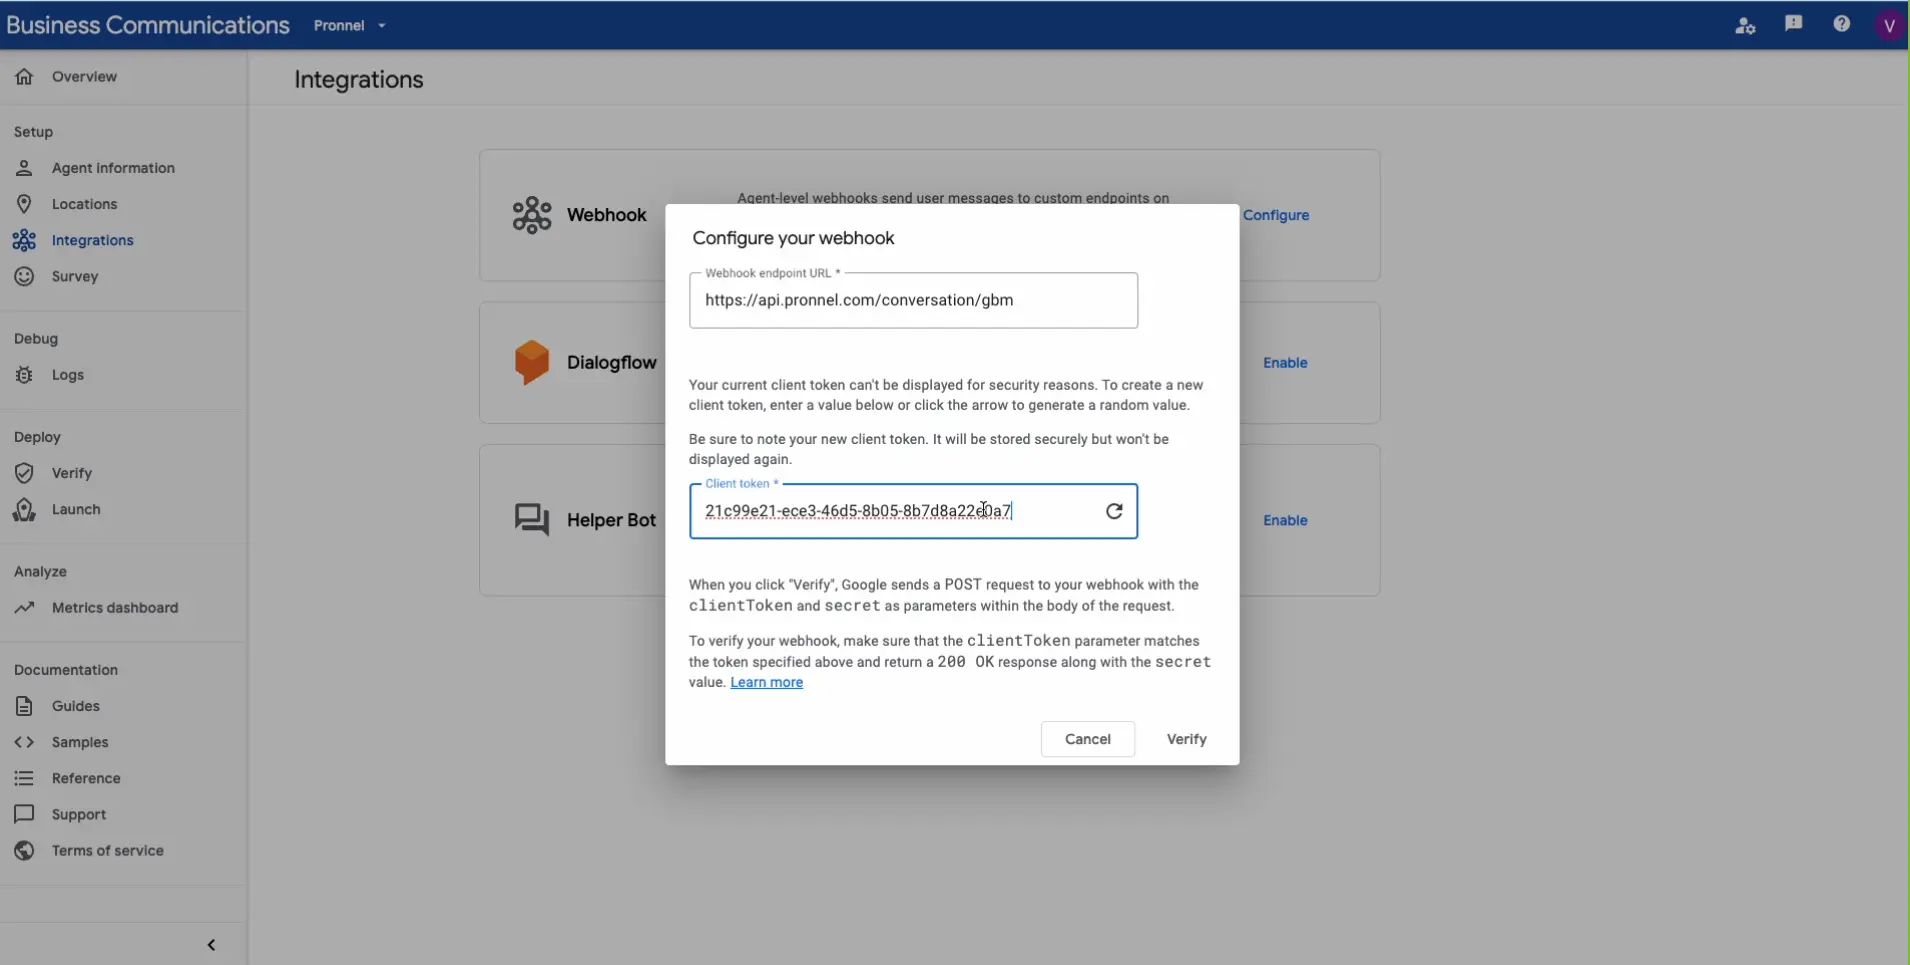
Go to the 'Integrations' section on the Agent detail page.
-
Enter the Webhook URL and Client token details obtained from Pronnel.
-
Verify these details to ensure the integration is successful.
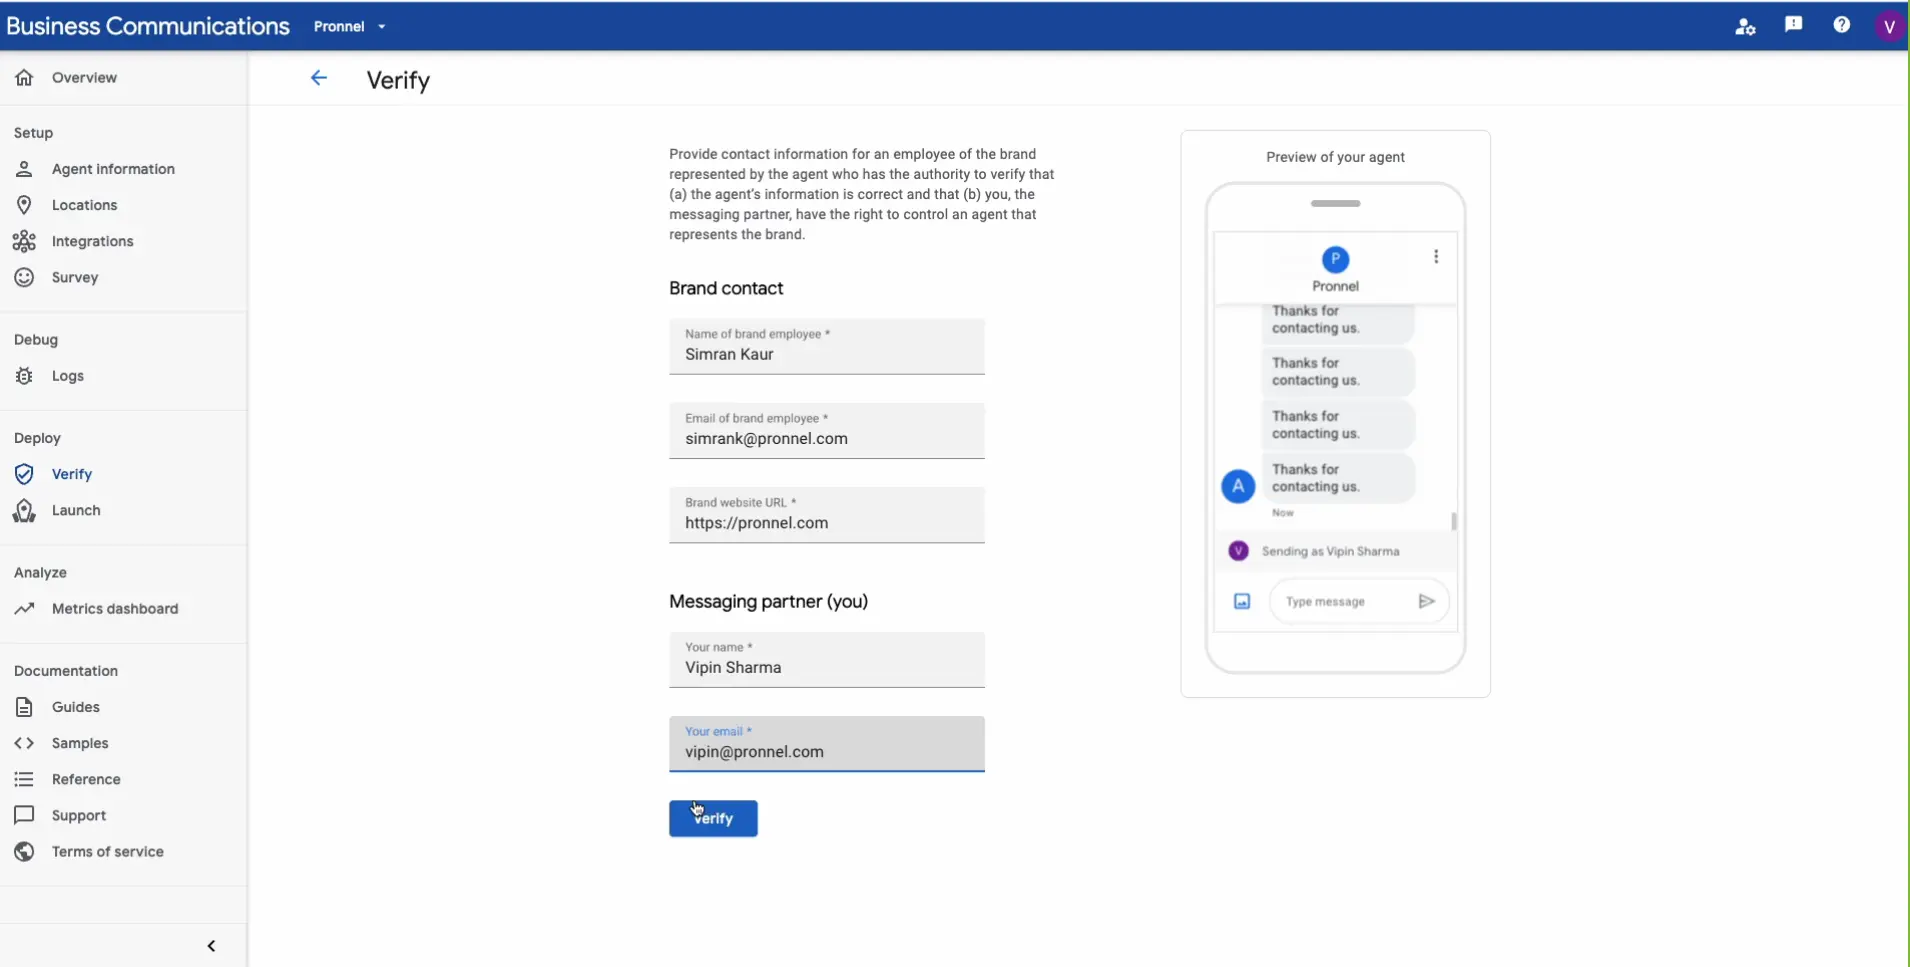
Verify and Launching
Verify Agent
-
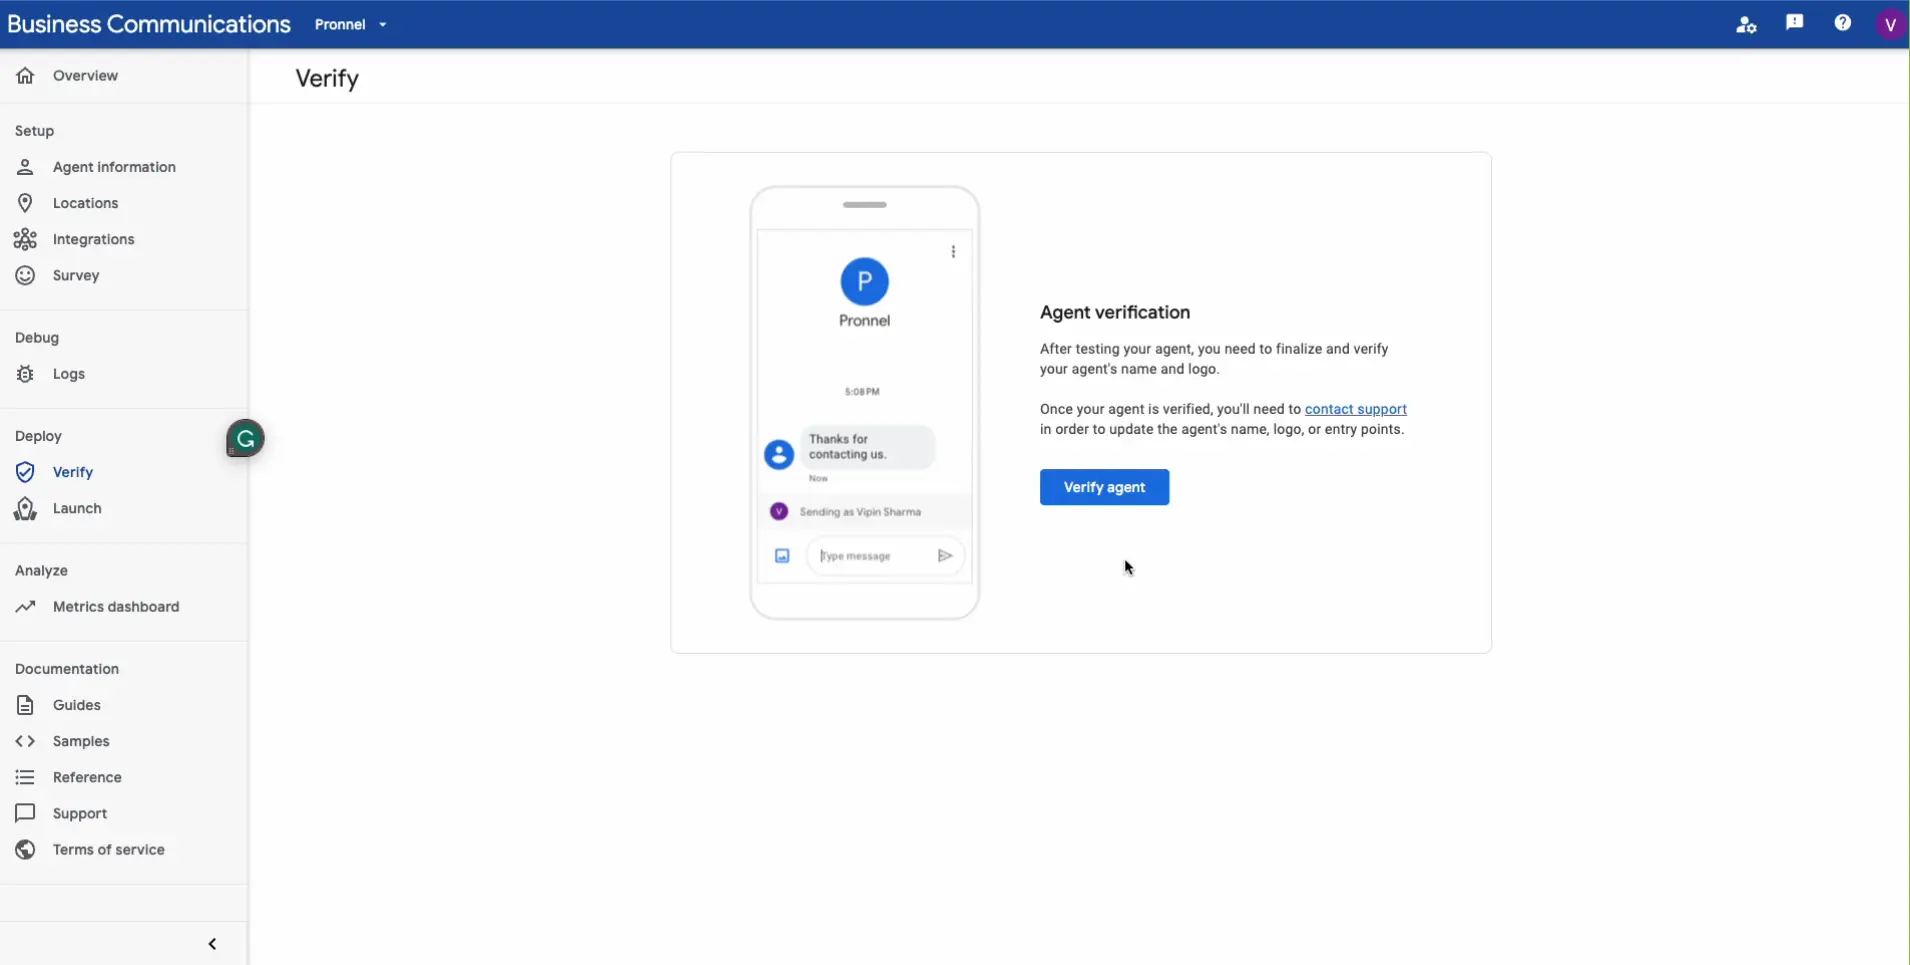
Go to the Verify tab in the left menu of the agent detail page.
-
Verify it, enter the brand contact, email of the brand employee and website URL along with messaging partner details like name and email address.
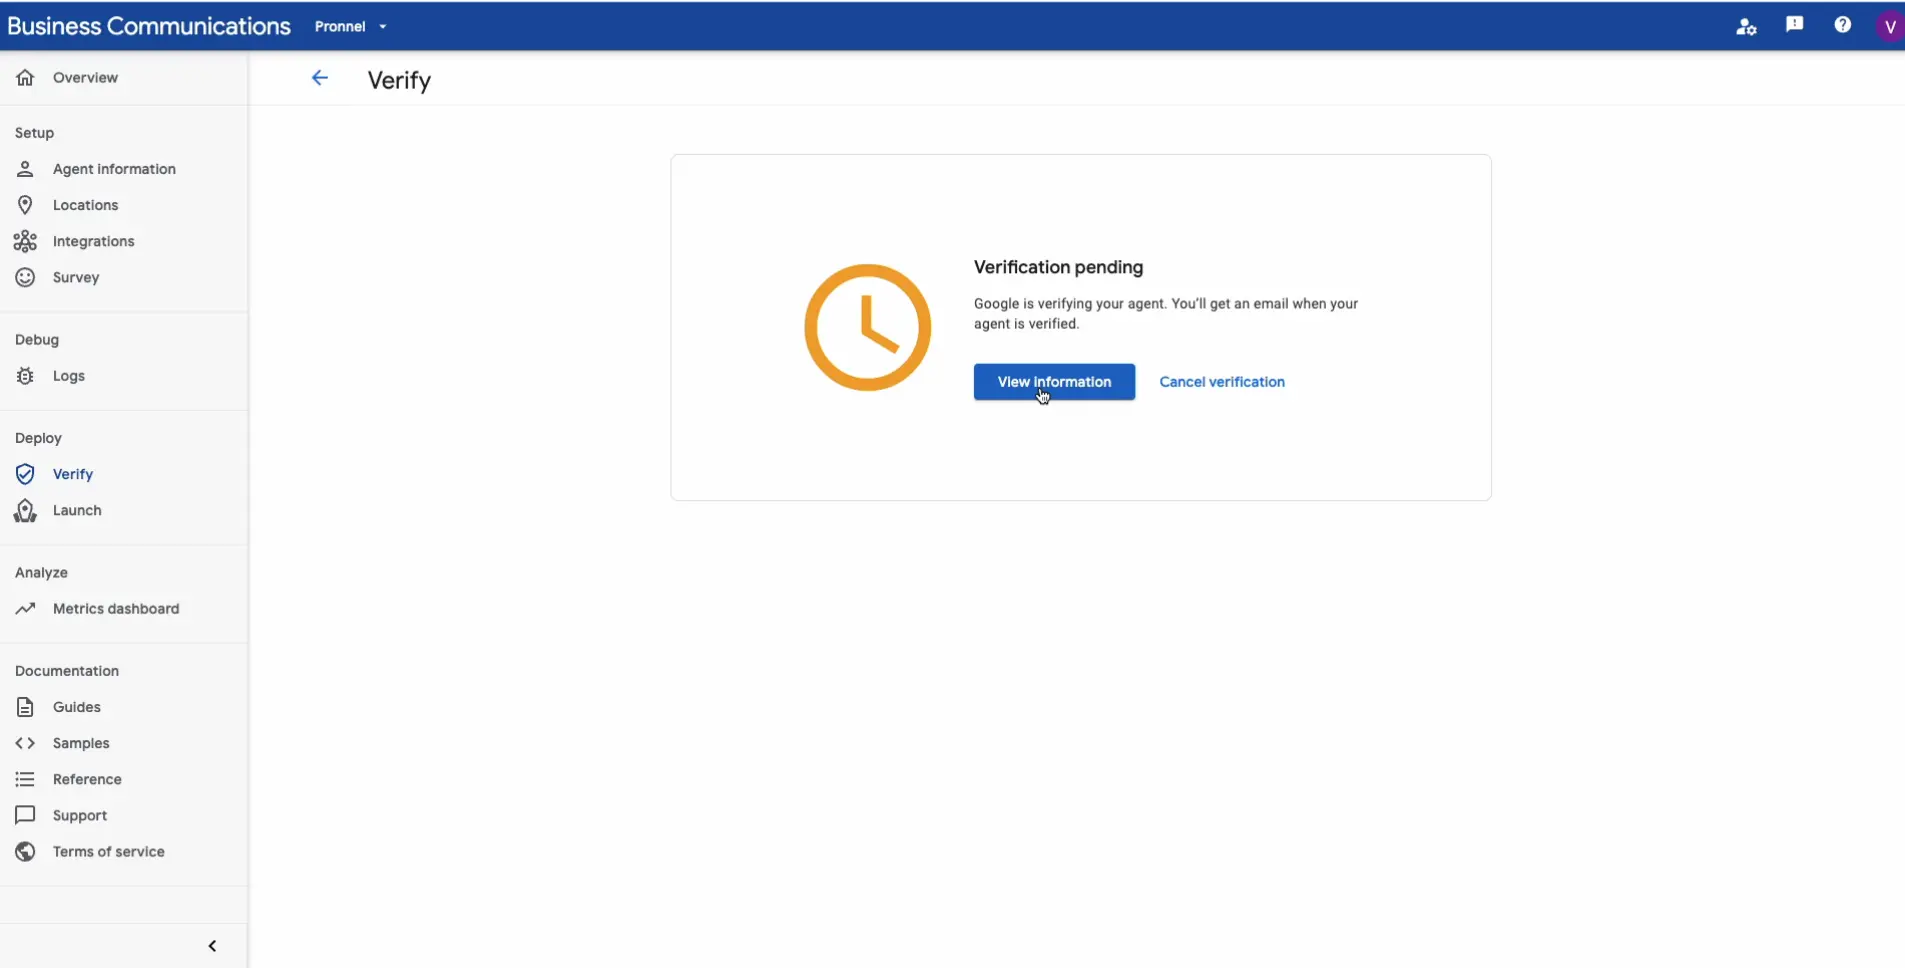
Launching Your Agent
-
After verification from the Google side, launch your Agent. This will make the chat option available when customers search for your business on Google Maps.

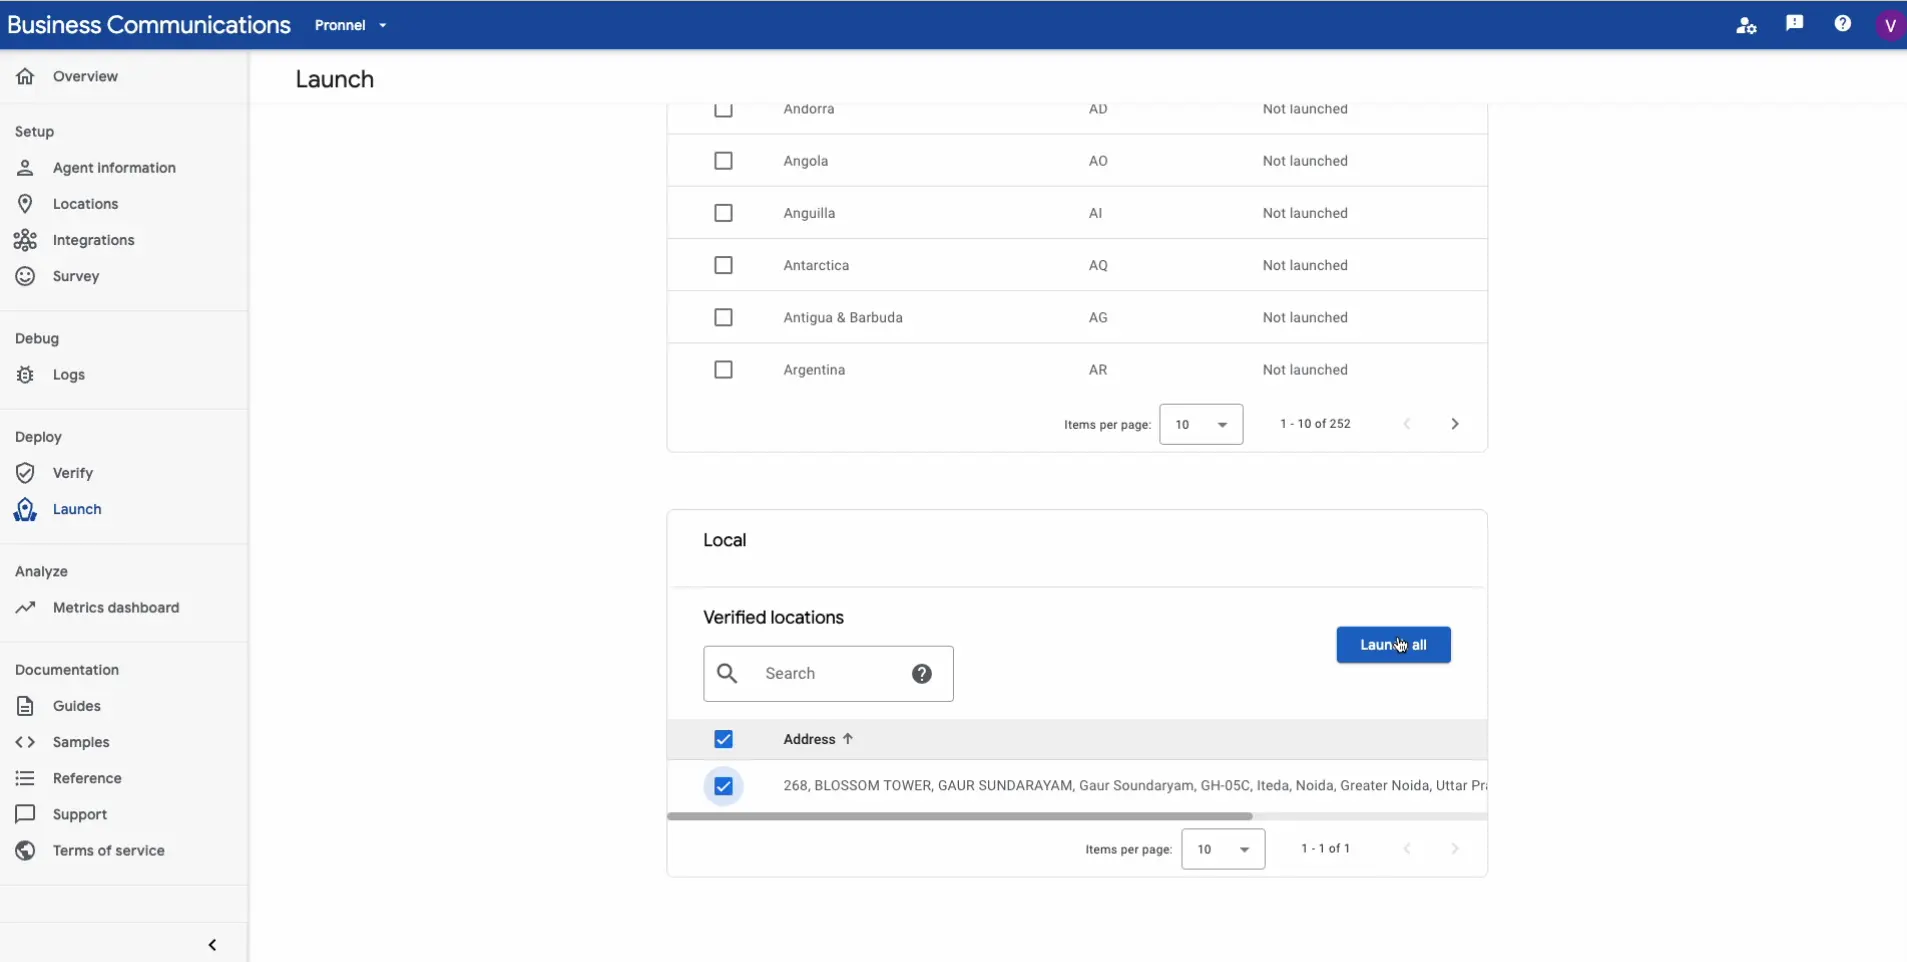
Sometimes, it takes a couple of days to reflect the chat option on your Google business page.
Testing the Integration
Test the integration by sending a message through your Google business chat. This should now be accessible and manageable from Pronnel.
Conclusion
Congratulations on successfully integrating Google My Business Chat with Pronnel! This setup will streamline customer interactions, making them more effective and efficient. To connect your Google Business Chat with your website, remember to check out our tutorial on how to set up Google Business Chat on your website.
Frequently Asked Questions About Google My Business Chat Integration with Pronnel
Why integrate Google My Business Chat with Pronnel?
To streamline customer conversations from your Google listing directly into Pronnel for faster, centralized handling.
How do I access the Google Business Communication Developer Console?
Open the console in your browser and sign in to begin configuration.
Is a Partner Account required?
Yes. It is the foundation for managing Business Messages configuration and access.
What details are needed for the Partner Account?
Your name, company name, partner website URL, and geographic region.
How do I configure Agents?
Create an Agent, set branding (logo, name), contact details, privacy policy, primary interactions, and availability.
Why verify business location?
To accurately link your verified business so customers see the correct listing. Verification is immediate if matched.
What details are required to connect Pronnel?
Agent ID, Brand ID, Client Email, and Token (private key) from a Service Account.
Is a Service Account necessary?
Yes. Create it under Partner Settings to obtain the Token and Client Email.
How do I launch the Agent?
After Google verification, launch the Agent so chat appears on your listing (may take a couple of days).
Where do I set webhooks?
Add Webhook URL and Client token in Partner Account Settings and the Agent Integrations page using details from Pronnel.
Why should I integrate Google My Business Chat with Pronnel?
Integrating Google My Business Chat with Pronnel streamlines customer interactions directly from your Google My Business listing, enhancing efficiency.
How do I access the Google Business Communication Developer Console?
To access the Developer Console, open your web browser and navigate to the Google Business Communication Developer Console.
Is creating a Partner Account necessary for Google My Business Chat integration?
Yes, creating a Partner Account is a crucial step in the integration process. It serves as the foundation for managing Google business communication.
What details do I need to fill in when creating a Partner Account?
You'll need to provide your name, company's name, partner's website URL, and select your geographical region from the dropdown menu.
How can I configure Agents in the Business Communication Developer Console?
Agents can be configured by creating them in the console, filling in details such as Partner Account, Brand, Agent Name, and additional optional information for branding purposes.
What is the significance of verifying business location during integration?
Verifying business location ensures the accurate association of your business with Google, providing immediate confirmation if your business is verified.
What are the key details I need to gather before setting up Pronnel integration?
Key details include Agent ID, Token number, Brand ID, and Client Email, which are essential for configuring the communication channel with Pronnel.
Is a Service Account required to obtain Token number and Client Email for Pronnel integration?
Yes, creating a Service Account in the console under 'Partner Settings' is necessary to obtain the Token number and Client Email for Pronnel integration.
How can I launch my Agent on Google My Business after verification?
After verification from the Google side, you can launch your Agent, making the chat option available when customers search for your business on Google Maps.
What should I do if the chat option does not immediately reflect on my Google business page after launching the Agent?
Sometimes, it takes a couple of days for the chat option to reflect on your Google business page after launching the Agent. Be patient, and it should become accessible over time.