Build and Integrate Custom Tools with Pronnel Apps
Introduction:
Pronnel Apps enable you to connect external tools and services—like calling platforms, Git repositories, or CRMs—directly into your Pronnel workspace. You can create an app, define OAuth authentication, show custom UI, set automation triggers/actions, and configure permissions to build flexible integrations.
Accessing the Pronnel App Builder
-
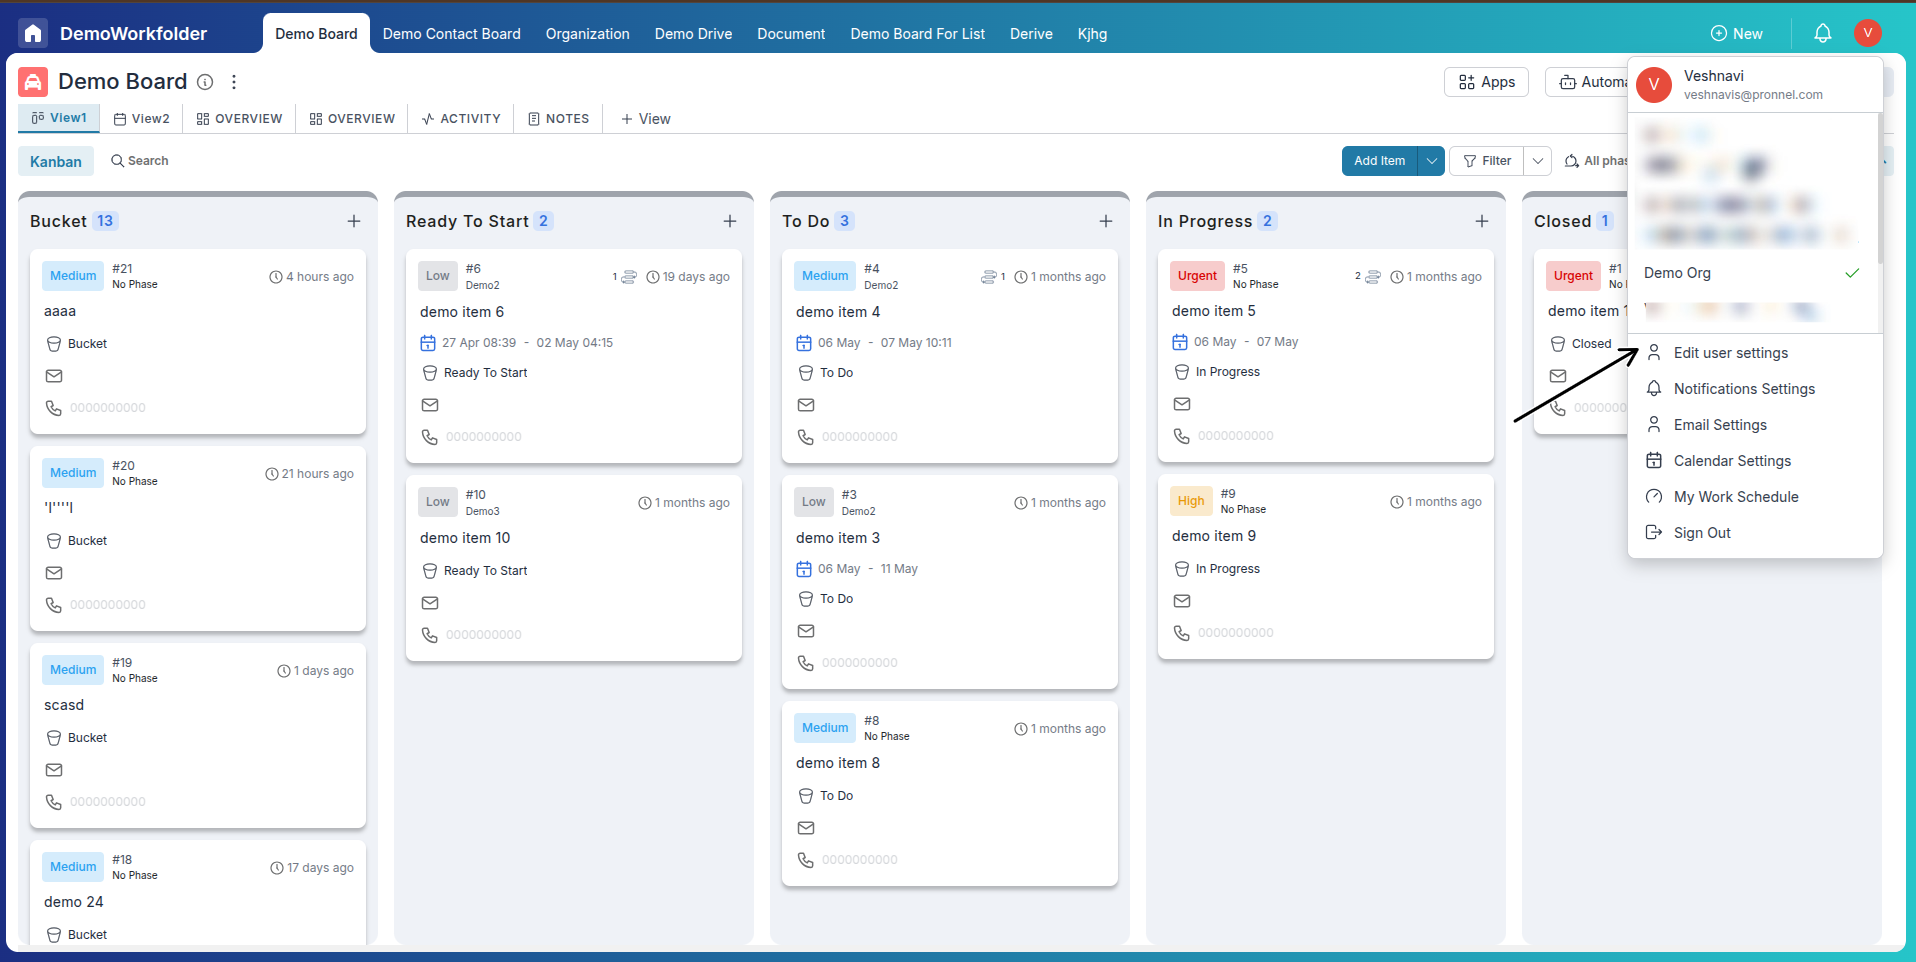
Go to your profile dropdown and open User Settings.
-
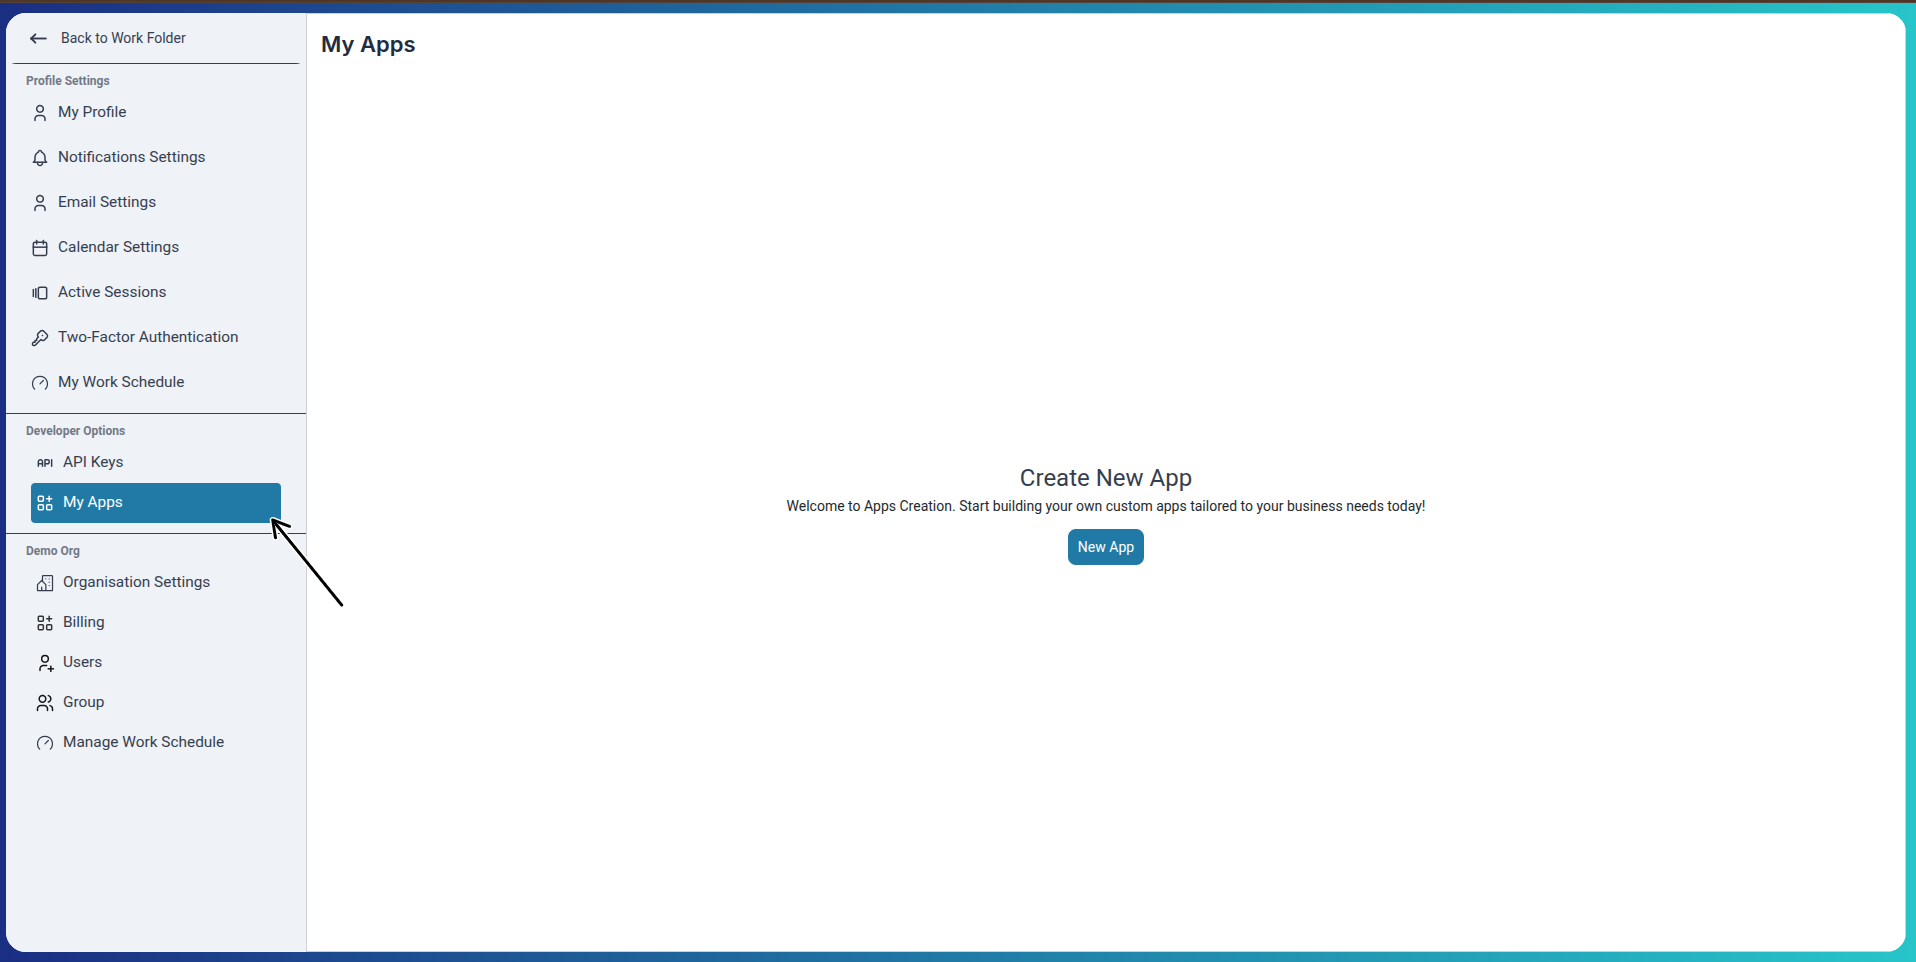
Click on the My Apps section from the sidebar.
-
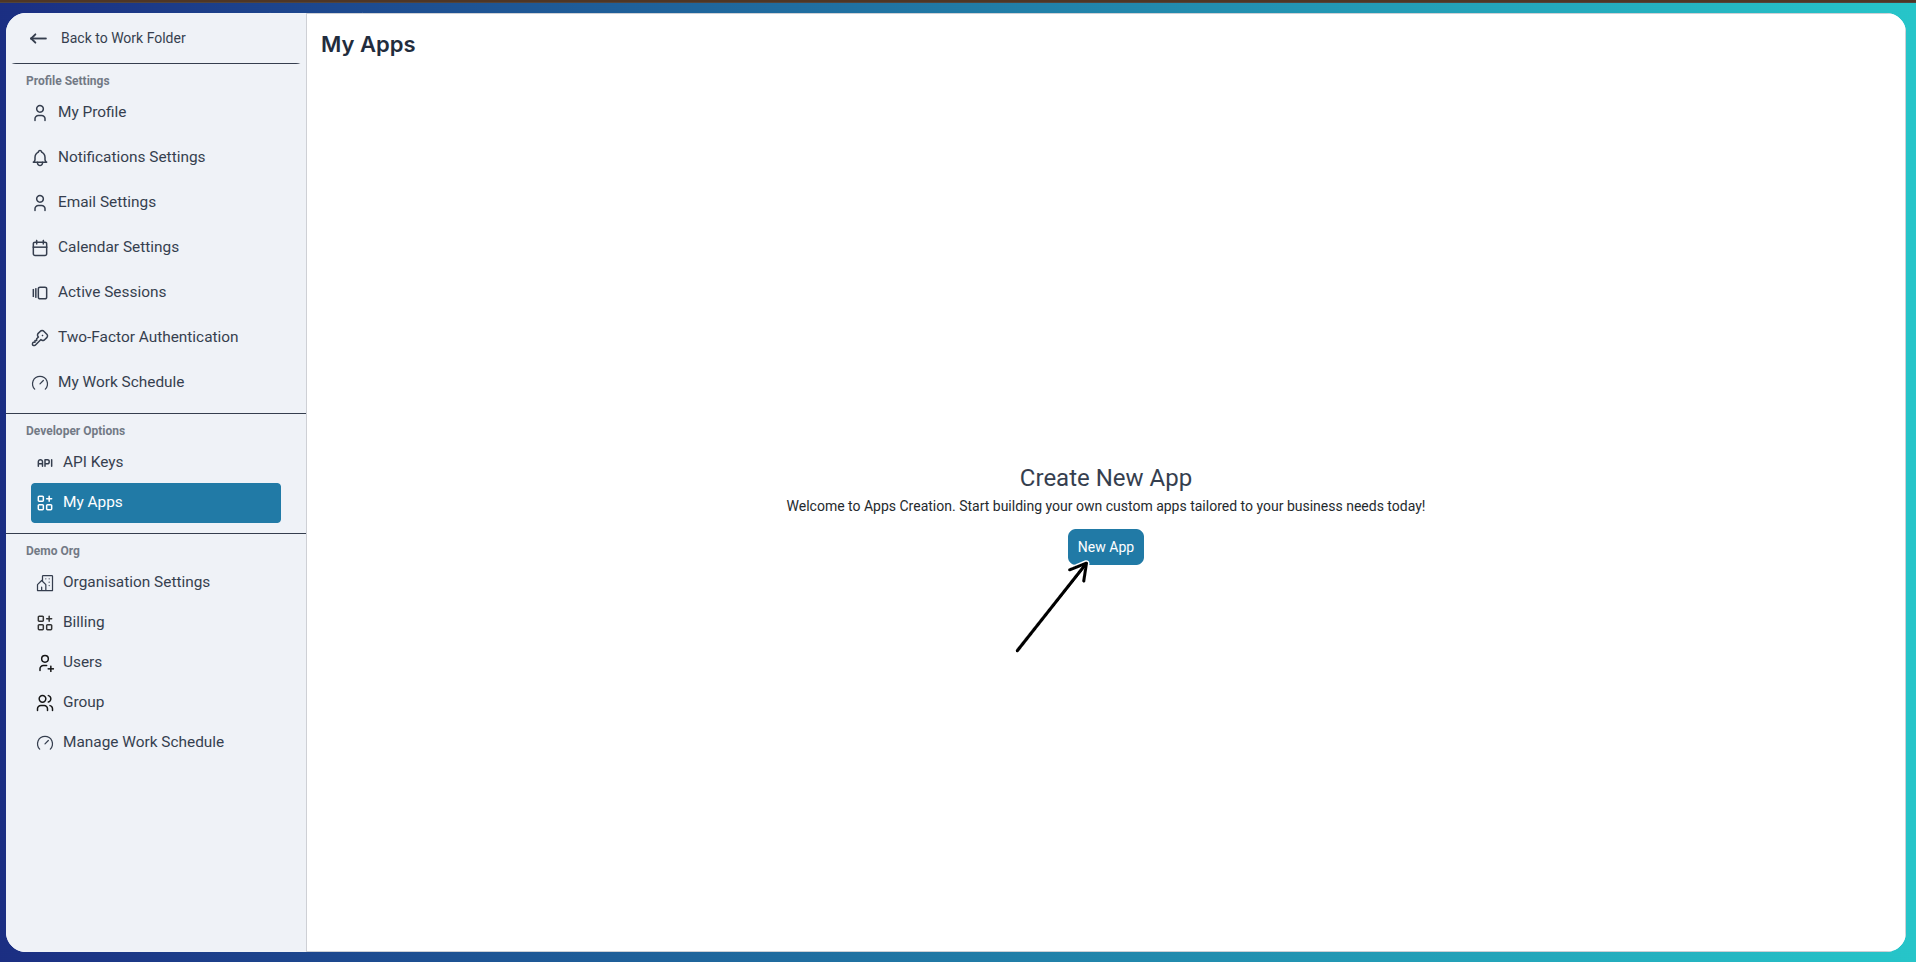
Click New App to begin building your custom integration.
Filling App Details
-
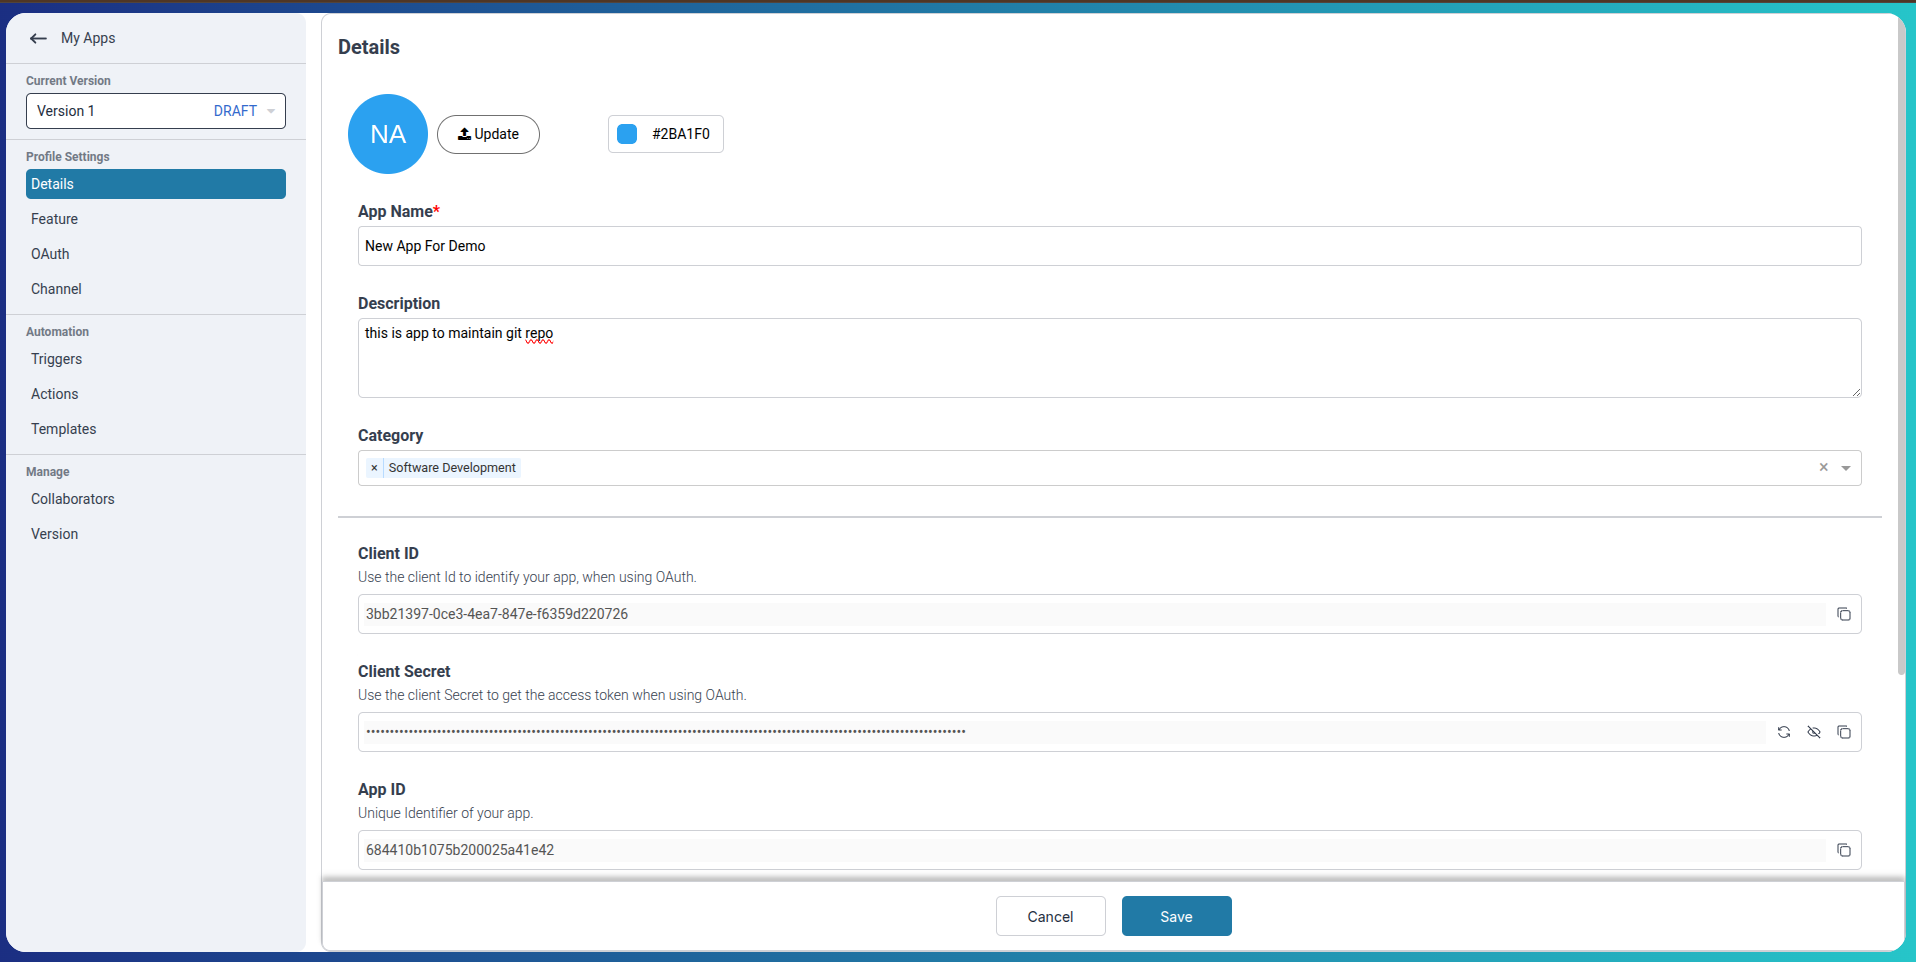
Set the App Name, Logo, Description, and select a Category (e.g., Calling App, GitApp).
-
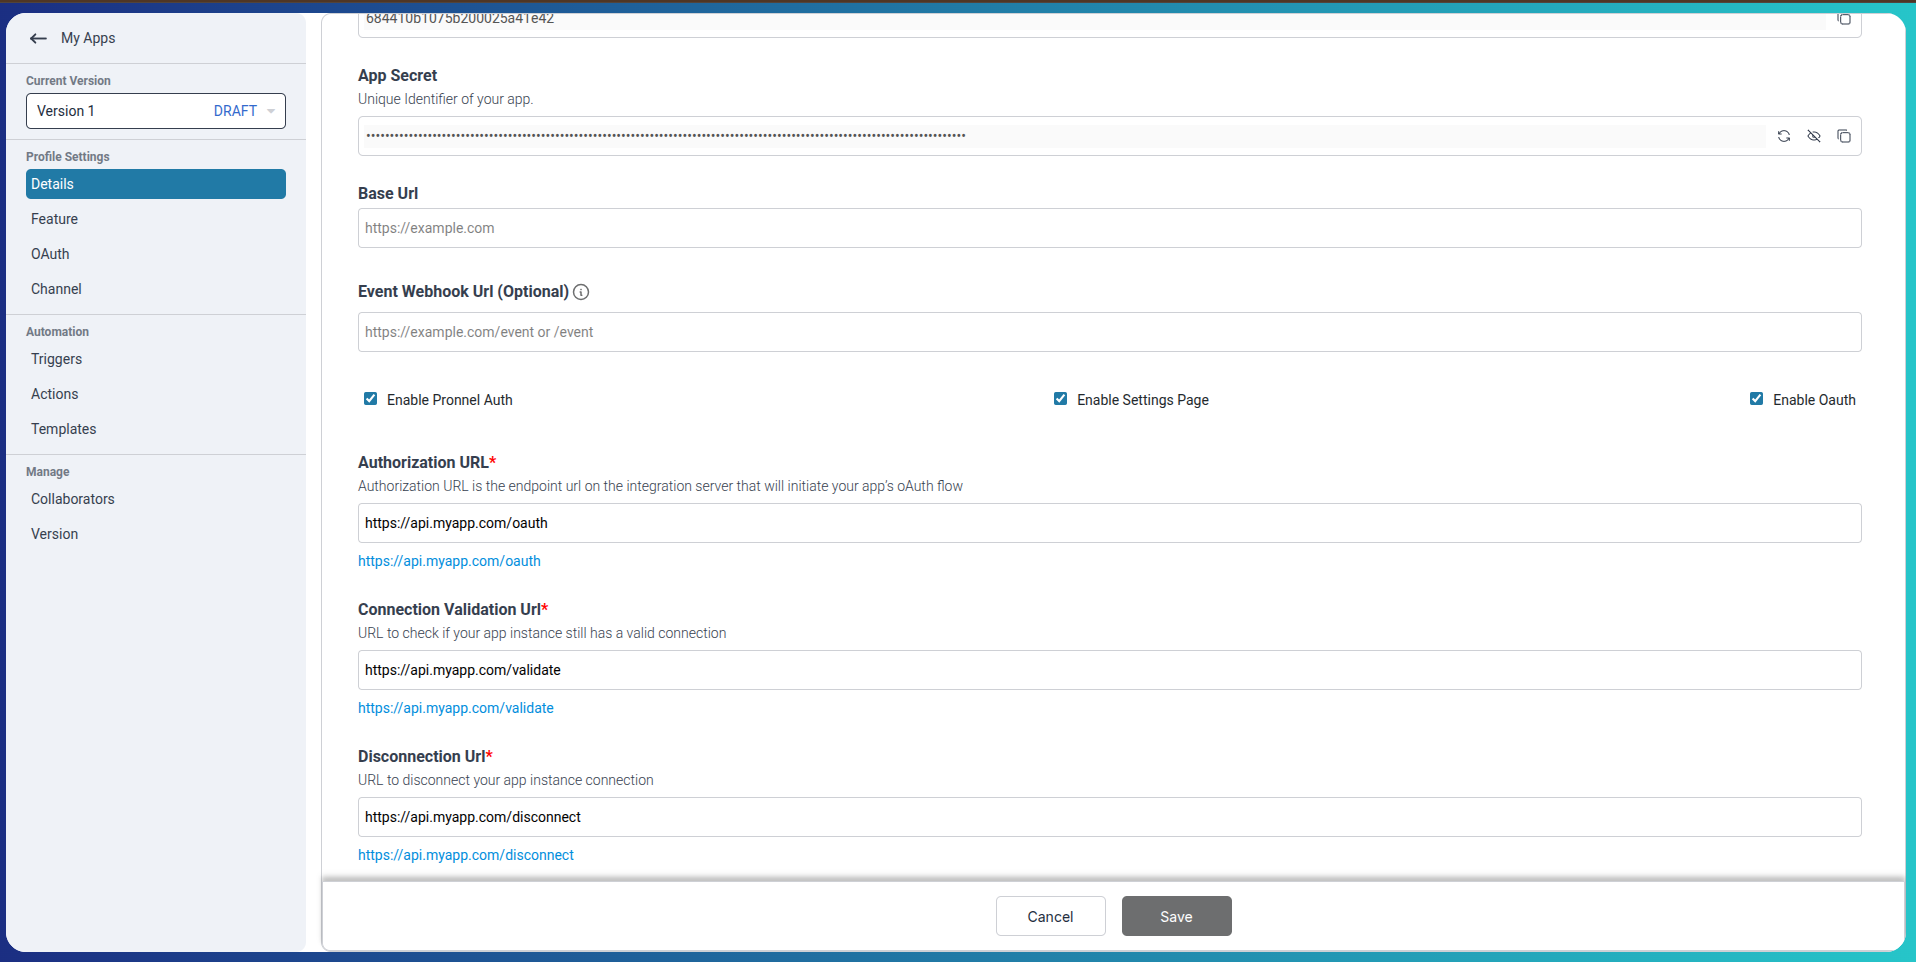
Enter the Base URL — this is your app’s root endpoint that handles all API communications like authentication, data syncing, or webhook callbacks.
Example: If your backend is hosted at
https://api.myapp.com, this will be your Base URL. Pronnel uses this as the root path to reach your app’s endpoints such as/oauth,/validate, etc.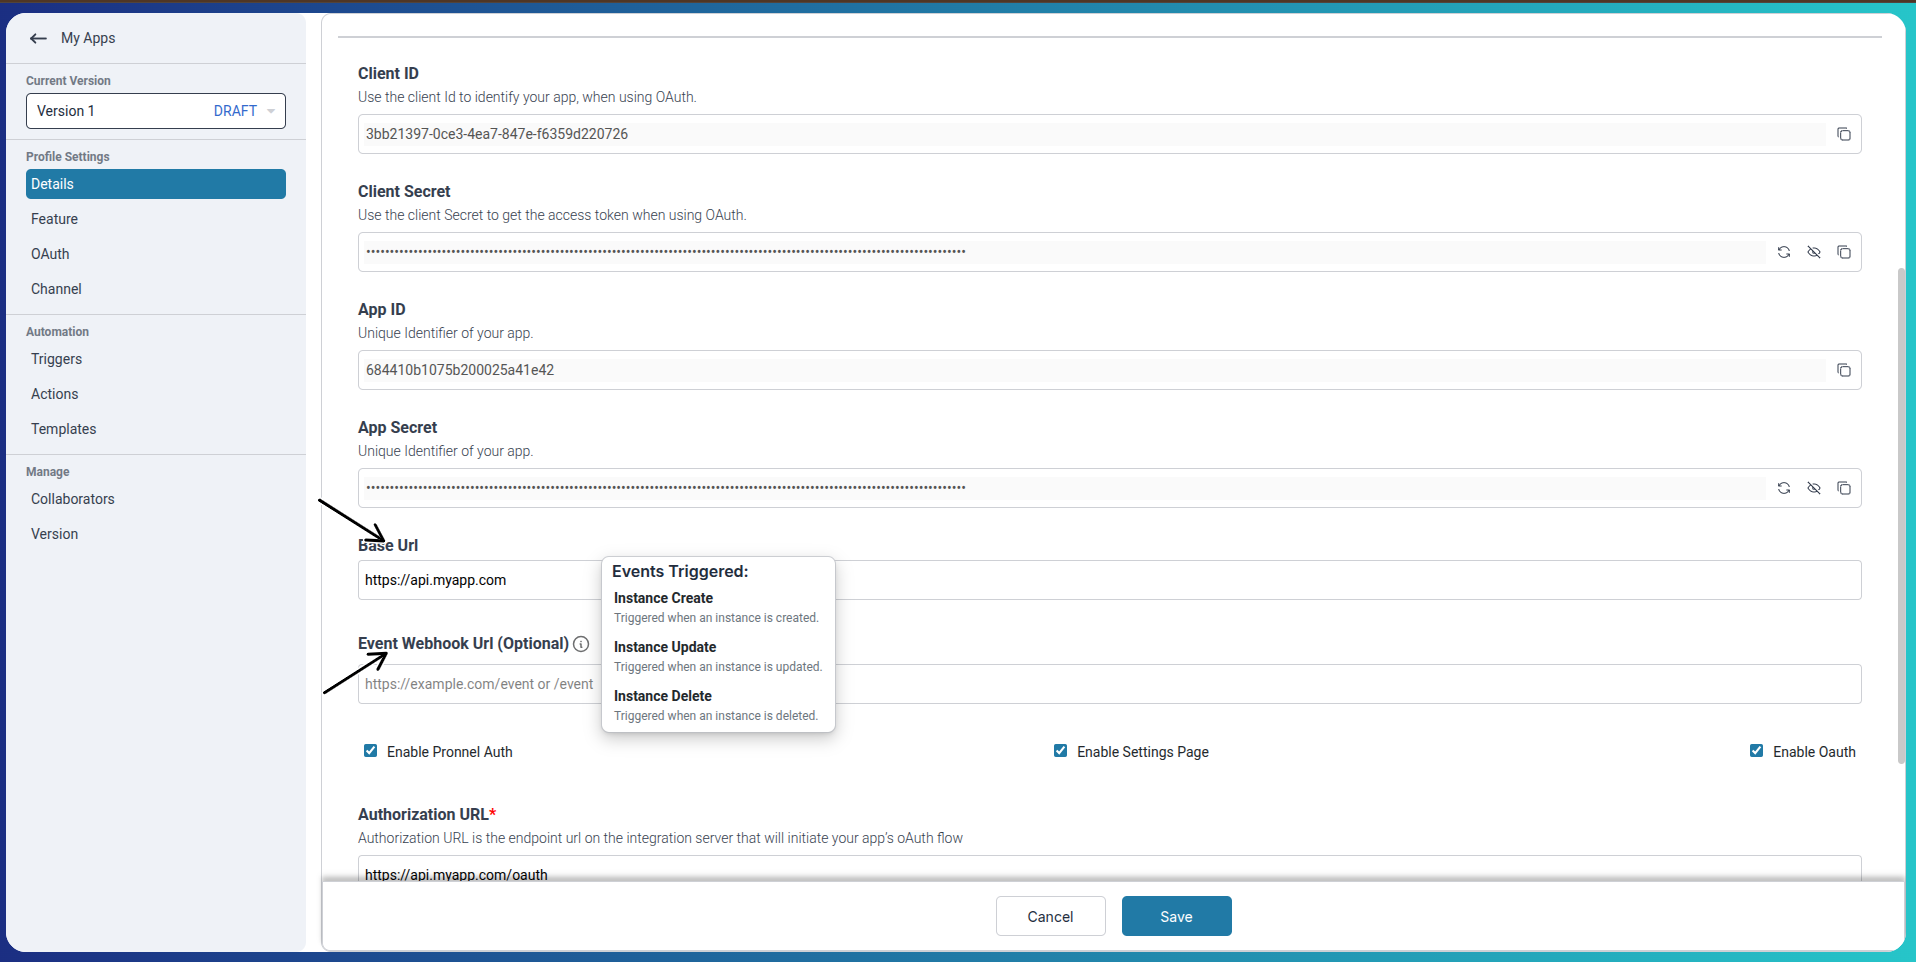
-
Toggle Enable Pronnel Auth if your app requires the user to log in through an external platform using OAuth. This enables secure access to protected data in your app.
Once enabled, additional fields for setting up OAuth will appear.
-
Toggle Enable Settings Page if your app includes a custom settings interface that users can configure inside Pronnel. For example, setting tokens, filter rules, or preferences related to the app.
You will later upload a build that defines the UI shown in this settings tab.
-
Toggle Enable Item Widget if you want your app to display custom information or interactions inside the Pronnel item side panel. This is useful for integrations like ticket status, issue logs, or recent activities.
-
If Enable Pronnel Auth is turned ON, you will need to provide the following OAuth-related URLs:
-
Authorization URL: This is the endpoint on your server that starts the OAuth login and authorization process. When a user connects your app, Pronnel will redirect them to this URL.
Example:https://api.myapp.com/oauth -
Connection Validation URL: This URL is used by Pronnel to check if the OAuth token is still valid. It ensures that your app is still connected for the user.
Example:https://api.myapp.com/validate -
Disconnection URL: When a user disconnects the app from Pronnel, this endpoint is triggered. It should remove any tokens or sessions related to the app.
Example:https://api.myapp.com/disconnect
-
Authorization URL: This is the endpoint on your server that starts the OAuth login and authorization process. When a user connects your app, Pronnel will redirect them to this URL.
Setting Up OAuth
After enabling OAuth, you’ll be asked to fill the following fields:
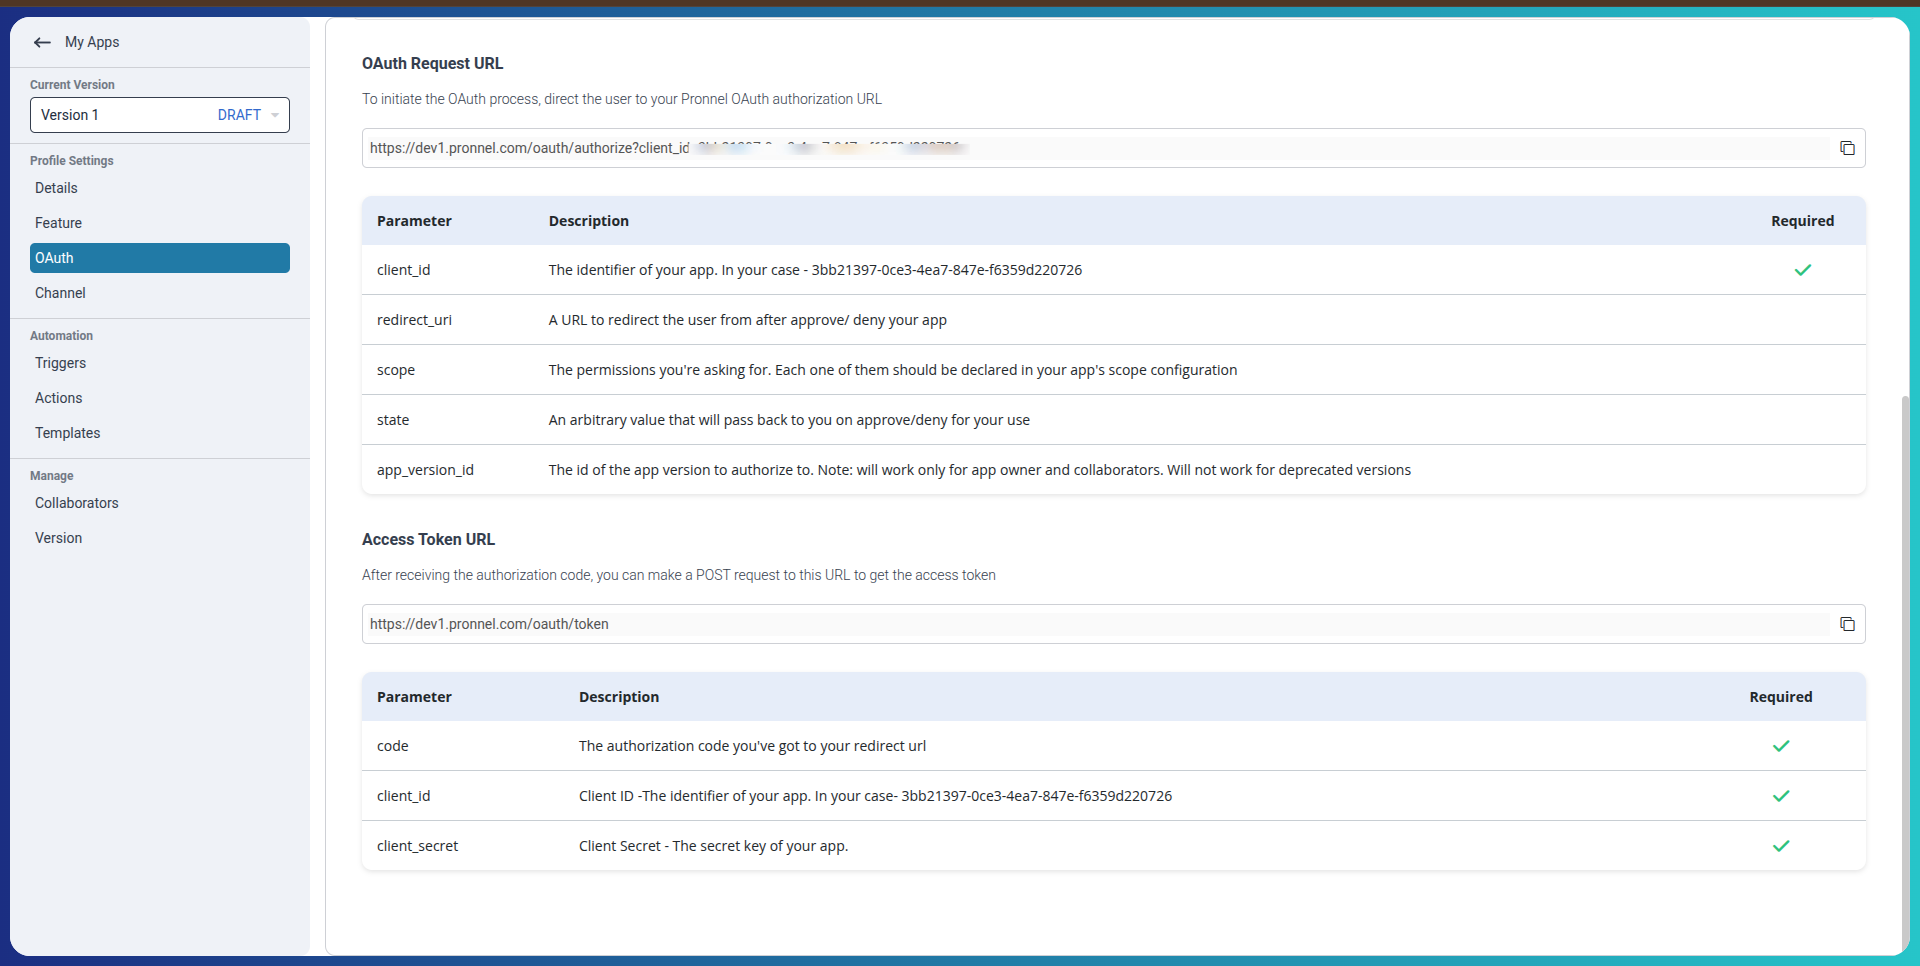
- Authorization URL: Endpoint to initiate the OAuth login.
- Redirect URI: Callback URL for Pronnel to return the user after login.
- Connection Validation URL: Checks if the app’s token is still valid.
- Disconnection URL: Used to revoke or disconnect the user’s session.
- Permissions: List of access scopes your app needs.
Enabling UI and Setting Panel
-
Toggle Enable Setting Page to display a custom settings UI.
-
Toggle Enable Item Widget to show a widget in the item view panel.
-
Upload your static build (HTML/JS/CSS) in the provided section.
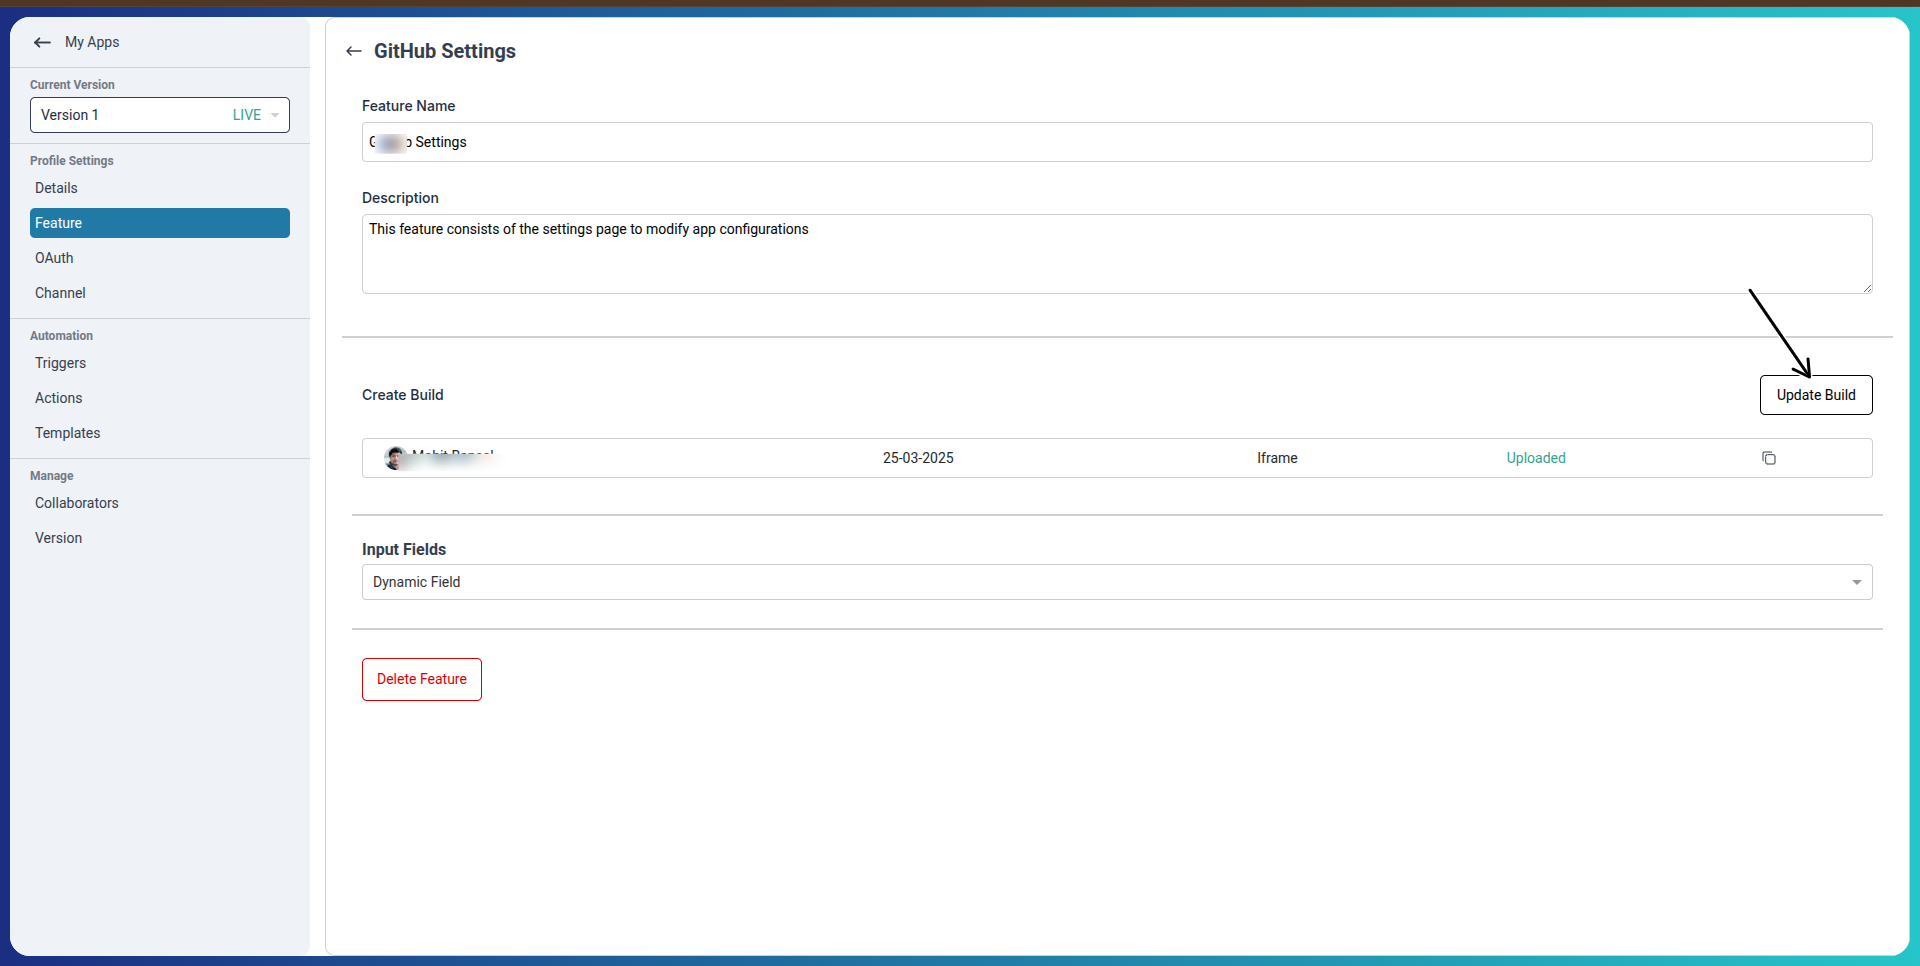
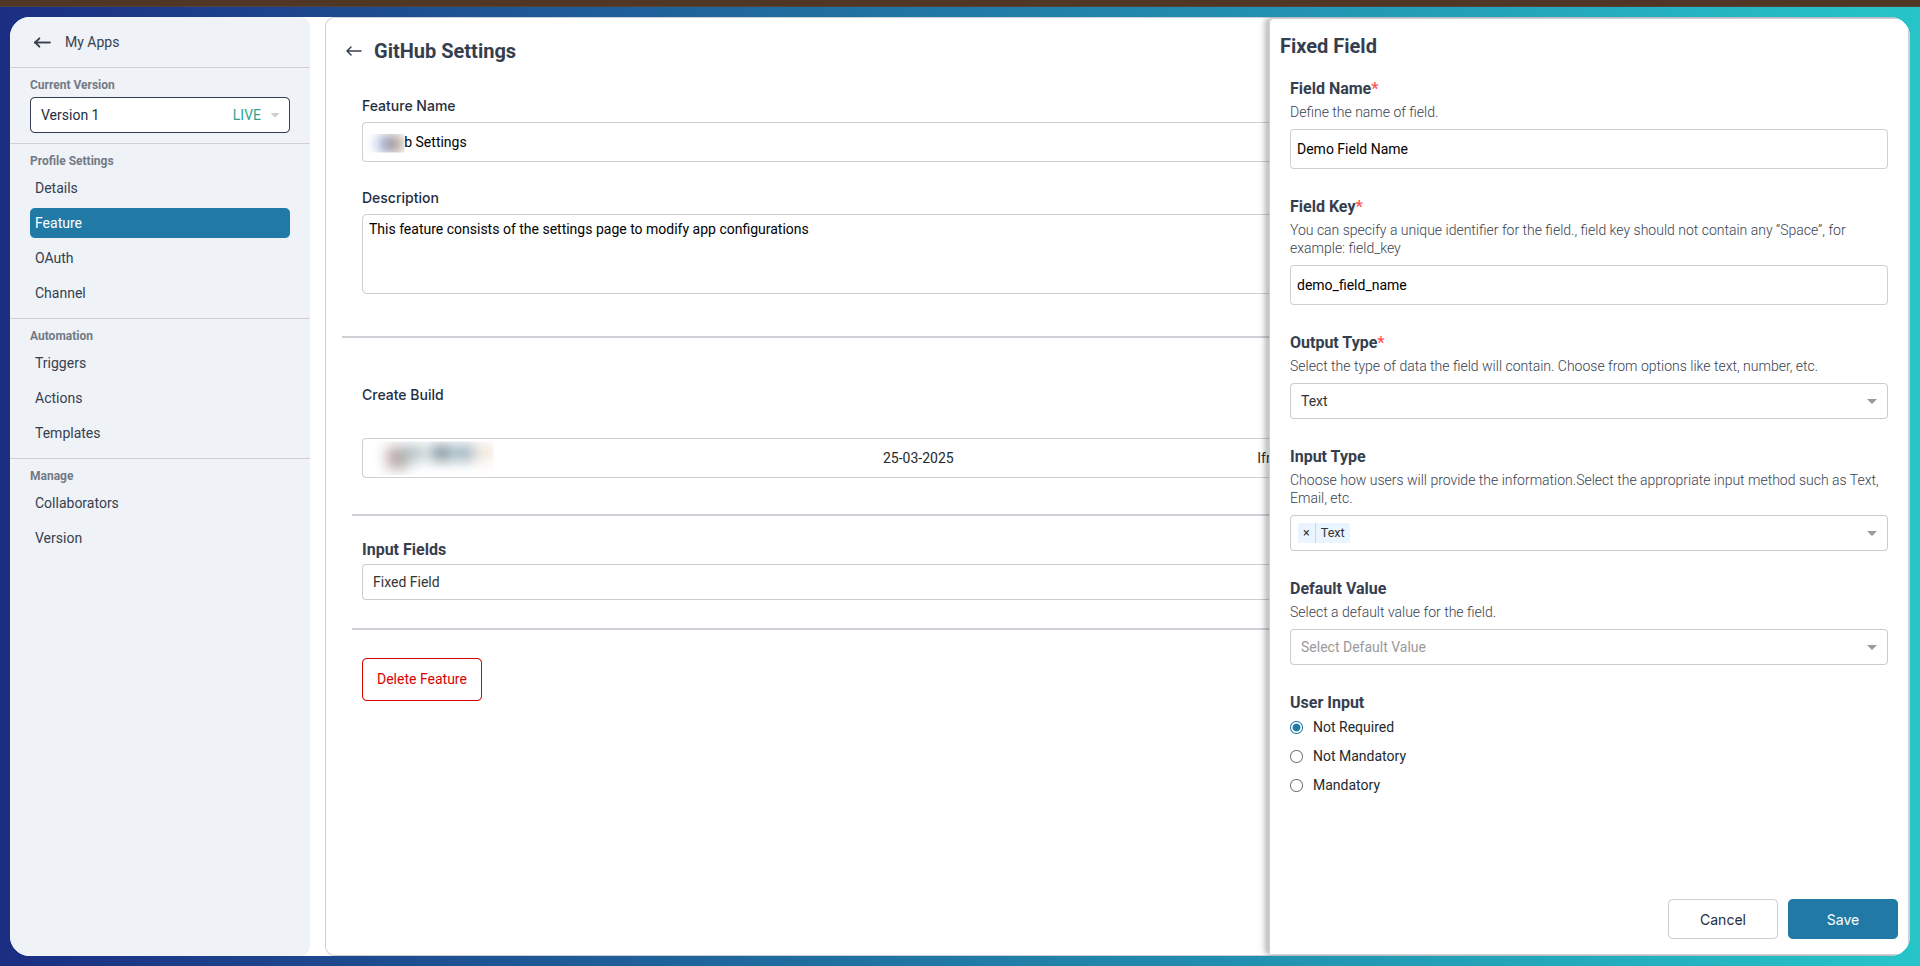
Defining Fields
Use the Fields section to collect configuration data:
- Fixed Fields: Values set by you, not editable by the user.
- Dynamic Fields: Entered by the user during app configuration (e.g., API Key, Username).
Adding Channels and Collaboration
-
Add a Channel to let your app interact as a communication source in Pronnel.
-
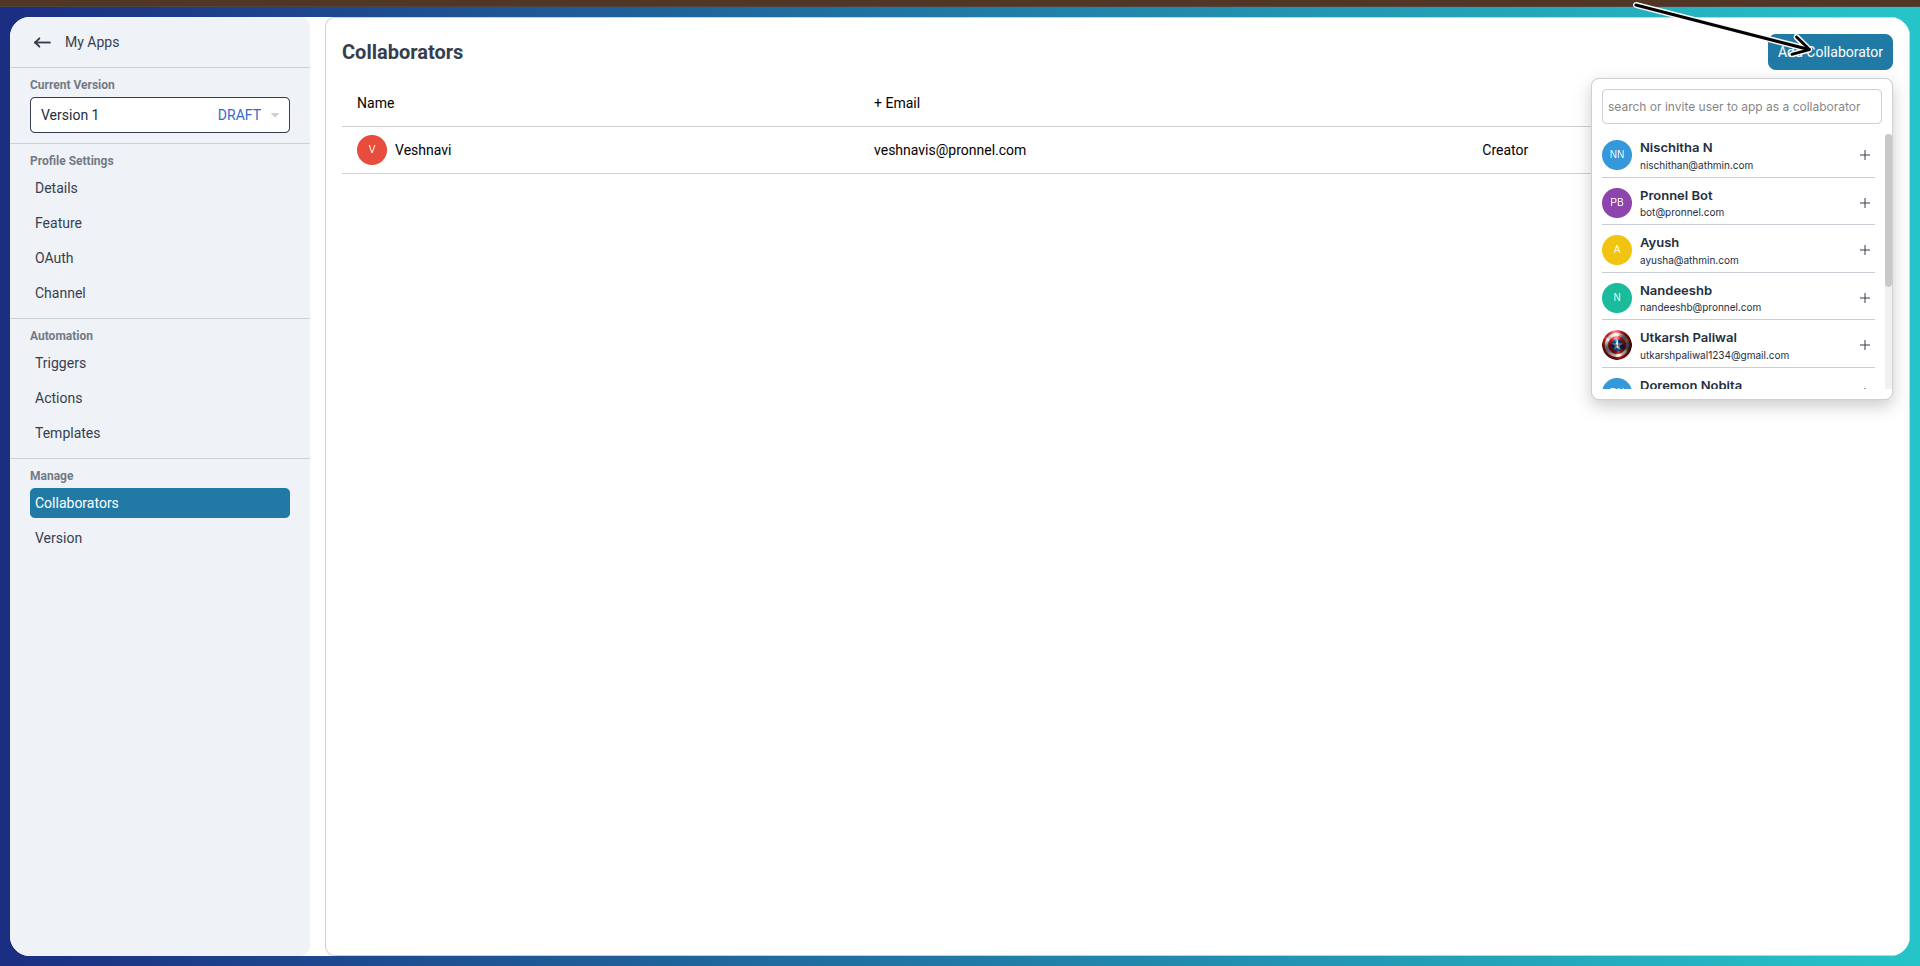
Invite Collaborators to manage and test the app with you.
-
Use Version Control to manage updates and deploy stable releases.
Setting Up Automation Triggers and Actions
Automation allows your app to perform tasks or respond to events within user workflows. In the App Editor, you can define Triggers (events that start an automation) and Actions (tasks that your app performs).
Step 1: Add a Trigger
-
Click + Add Trigger.
-
Set a name like "Customer Tag Updated".
-
Choose a input filed like fixed or dynamic
-
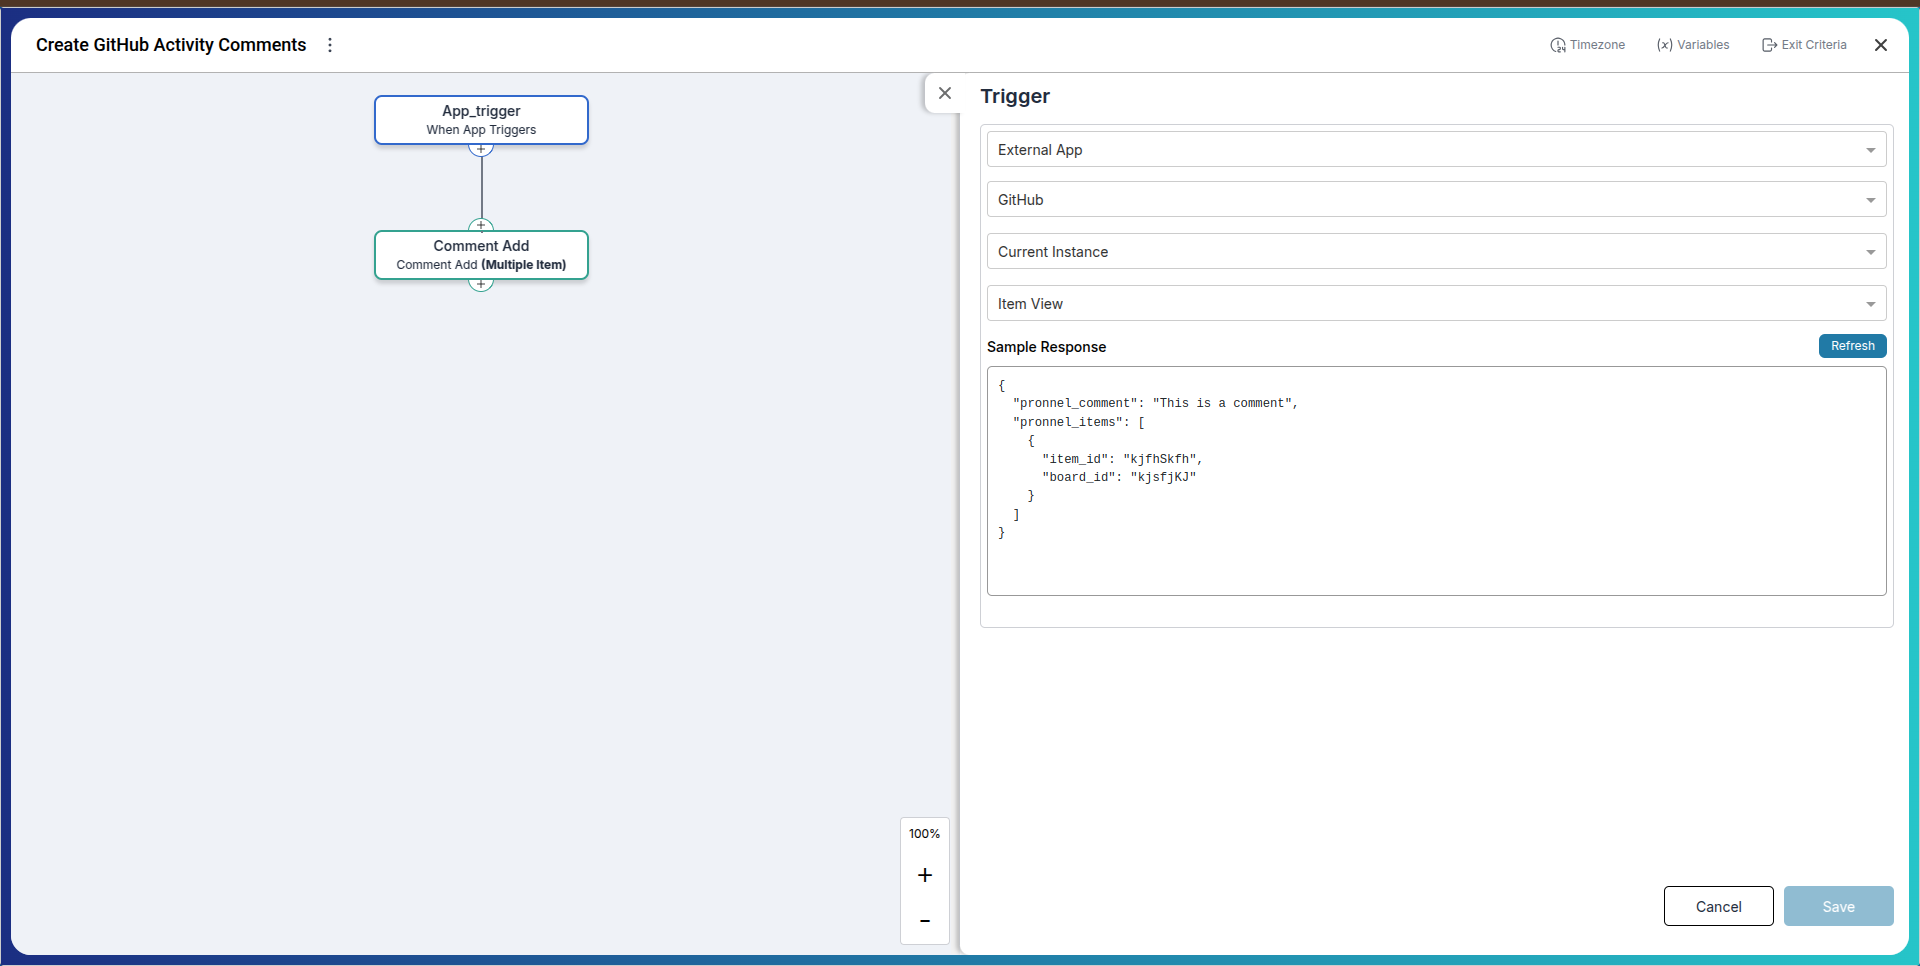
Sample Response URL
This URL is called when the automation setup form is loaded and all required fields are filled by the user. It should return a static or mock JSON object that shows the sample output structure of your trigger.
Use this to help users understand what data your trigger will emit. -
Subscribe URL
This endpoint is called when the trigger is activated in a board (after user installs the app and automation). Pronnel will pass dynamic values based on the user’s configuration. Your server should then subscribe to events (e.g., item created, tag added, etc.) and respond with a success acknowledgment. -
Unsubscribe URL
When a user deletes or disables the trigger, this URL is called to clean up any webhook or event listeners on your end. Use it to remove any server-side subscriptions or tracking tied to that automation.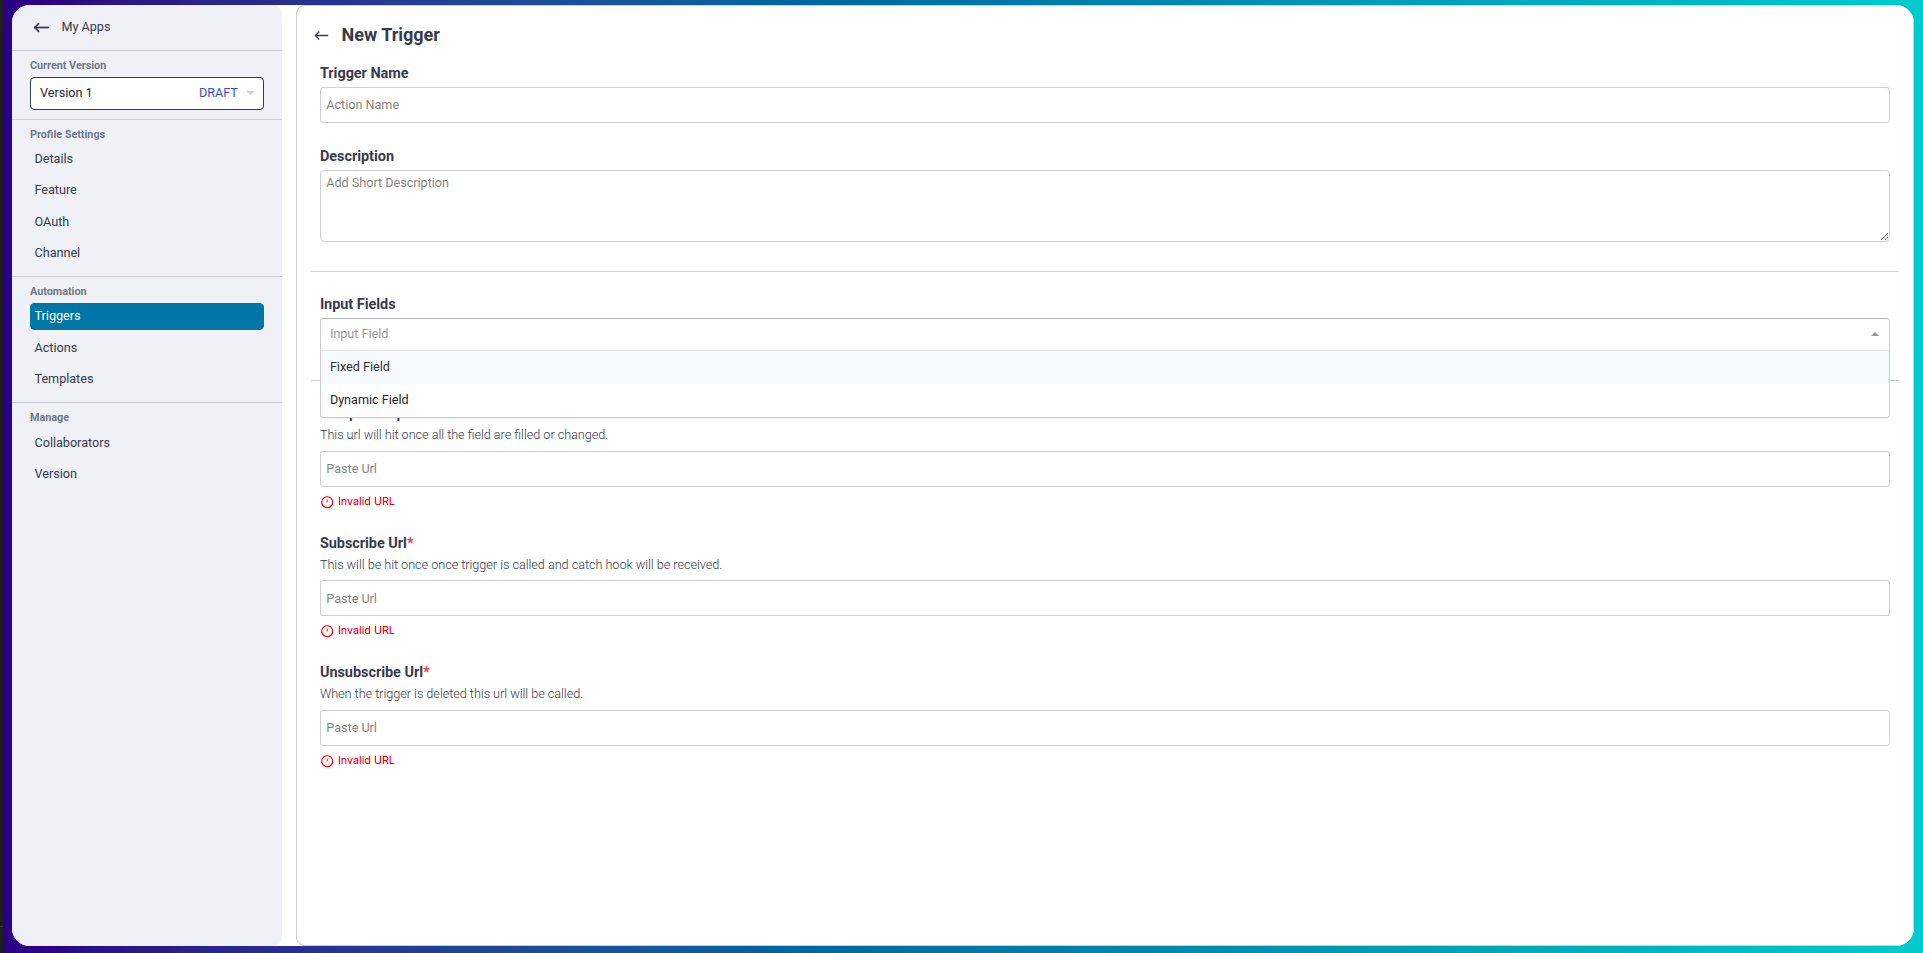
- Each URL must return a valid JSON response.
- Use HTTPS endpoints only — HTTP is not accepted.
- All three URLs are required to complete trigger setup.
- Test your URLs using tools like Postman or webhook.site before submitting.
Understanding Trigger URLs
When setting up a Trigger in your app's automation, you must provide three important URLs. These define how Pronnel interacts with your backend when the trigger is configured, used, or deleted.
Important Notes:
Step 2: Add an Action
-
Click + Add Action.
-
Name it something like "Send Offer Message".
-
Set up input fields the user will fill, like Message Content or Customer ID.
-
Fill execution path where
The Execution Path is the live URL your app exposes to receive automation calls from Pronnel.
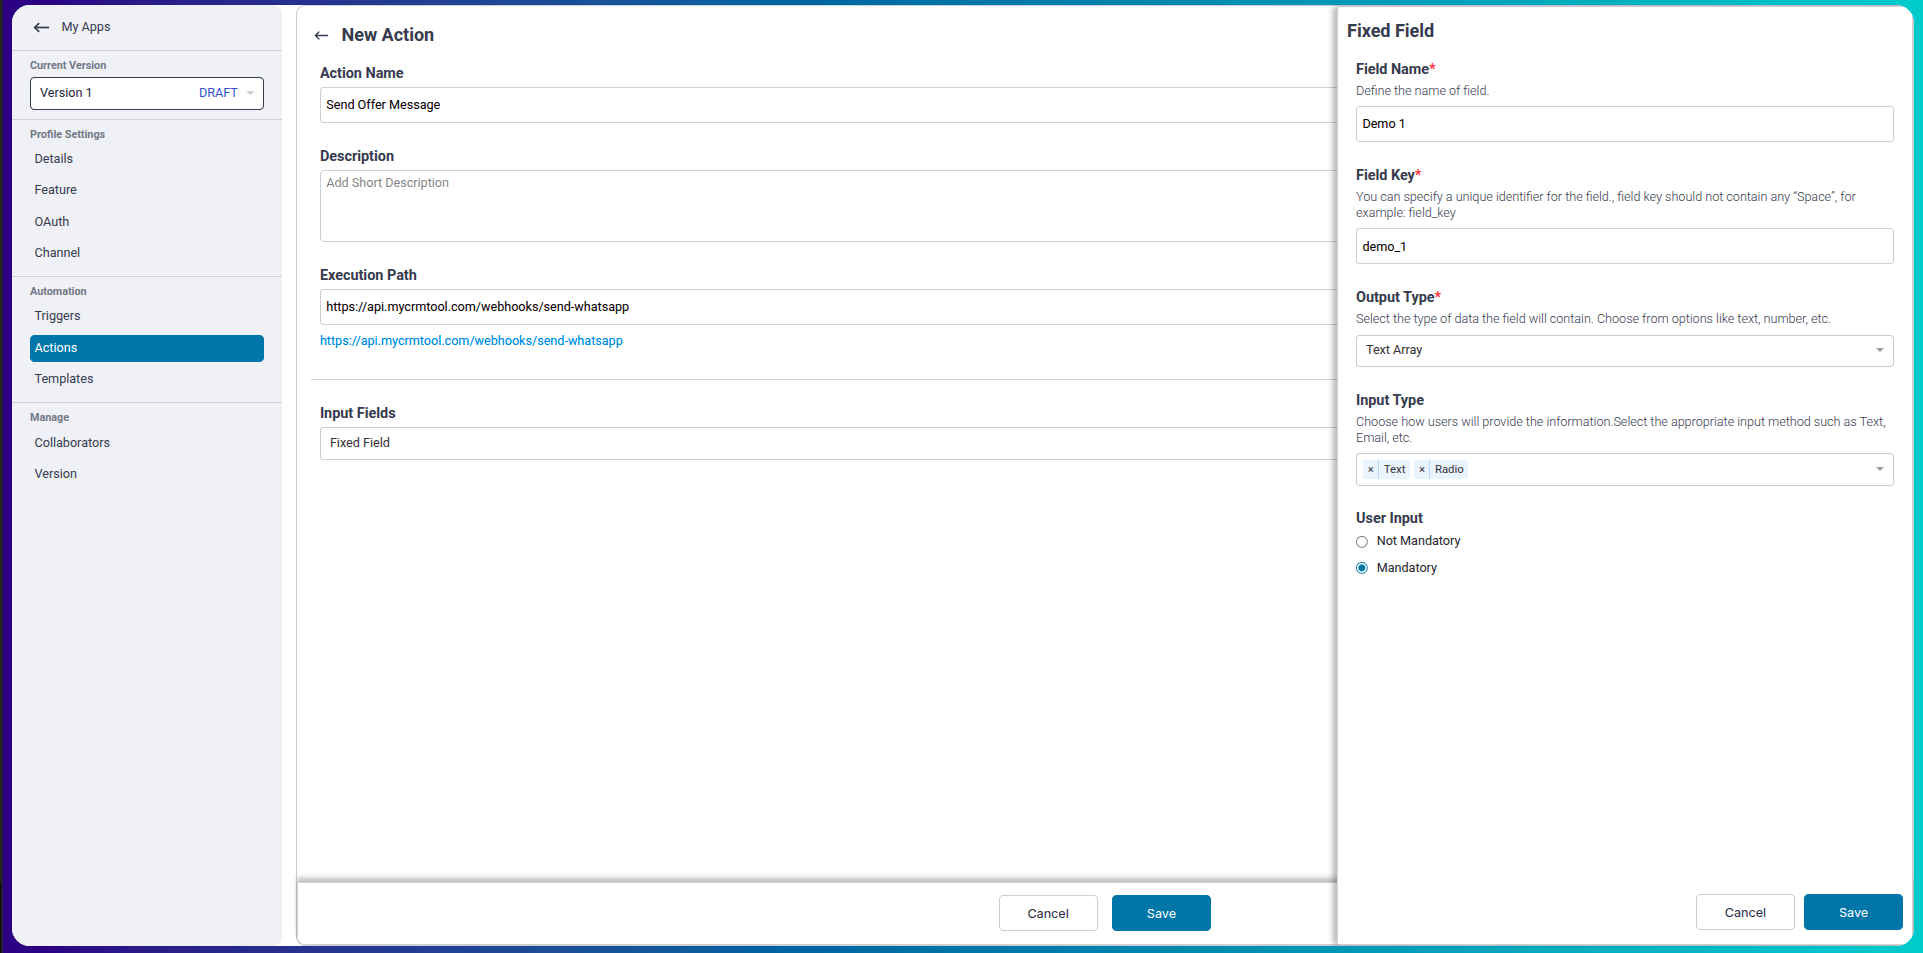
Example Use Case
Trigger: Lead is tagged as “Interested”
Action: App sends a WhatsApp message offering a discount
This can be part of a larger automated sales flow initiated by your app.
Setting Up Automation Templates
-
Go to the Automation section in the app editor.
-
Add Triggers (what causes an automation to run) and Actions (what your app should do).
-
Once saved, these appear in the Pronnel Automation Builder for users who install your app.
Conclusion:
Pronnel Apps empower teams to bring third-party tools into their workflow, streamline authentication, show contextual UI, and automate tasks. From Git integrations to calling platforms, you can fully customize how your external service interacts with Pronnel.
Frequently Asked Questions About Connecting External Services with Pronnel Apps
What is the Base URL used for?
It serves as the root endpoint for all API calls and OAuth interactions between Pronnel and your app.
What does enabling Pronnel Auth do?
It activates OAuth fields so your app can securely authenticate users via Pronnel.
Can I host my app’s UI inside Pronnel?
Yes. Enable the settings page or item widget and upload your static build to render your UI inside Pronnel.
What is the Redirect URI for?
It’s the callback route Pronnel uses to return the user after OAuth authorization.
How can I test my app before launch?
Invite collaborators and use versioning for private testing before publishing to all users.
What automations can I define?
Add Triggers (events) and Actions (responses) that users can install in the Automation Builder.
How do channels enable messaging?
By setting up channels, your app can send/receive messages like chatbots or notifications.
Will disconnecting OAuth stop automations?
Yes. If OAuth expires or is revoked, automations/UI calls may fail until reconnected.