Speed Up Task Creation with Item Templates in Pronnel
Introduction
Item Templates in Pronnel help you quickly create new items with pre-filled attributes like title, assignee, due date, tags, and more. Instead of recreating the same structure for repeated workflows, item templates allow teams to save time, stay consistent, and reduce manual errors.
Accessing Item Templates
-
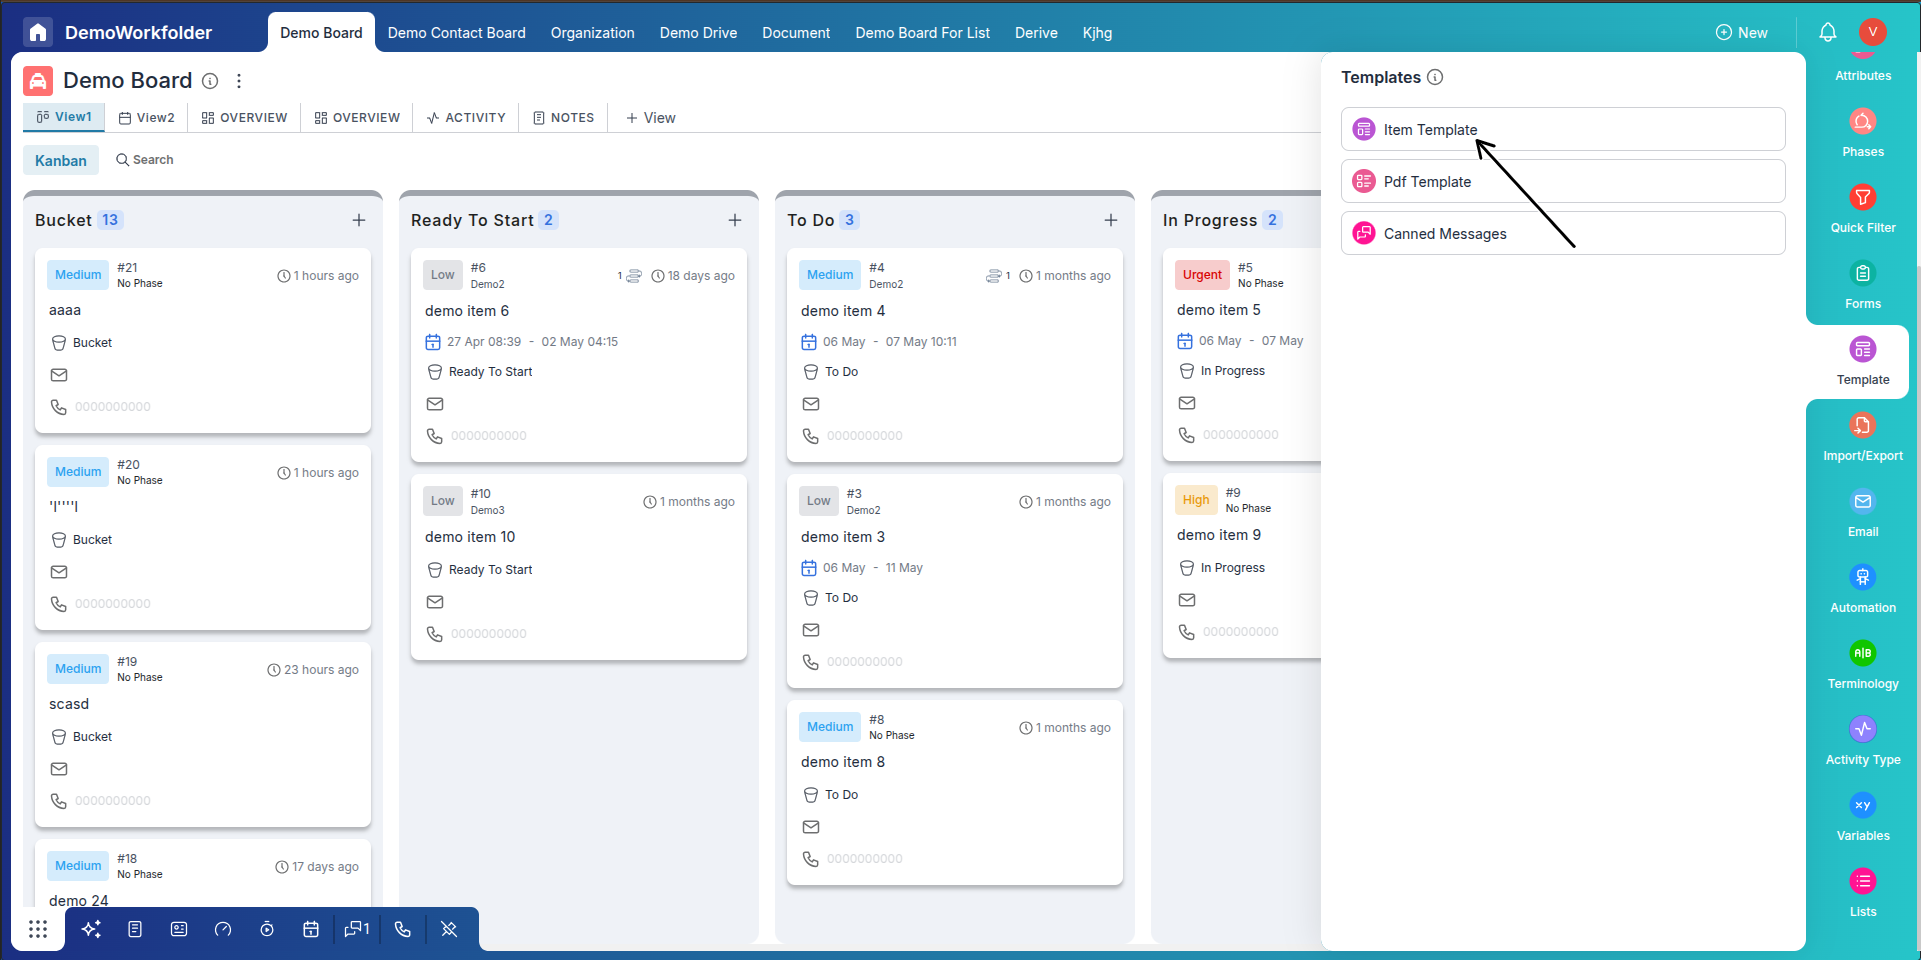
Go to your board and click on the Settings icon to open the board settings panel.Pronnel gives an default template with the name of Template Summary
-
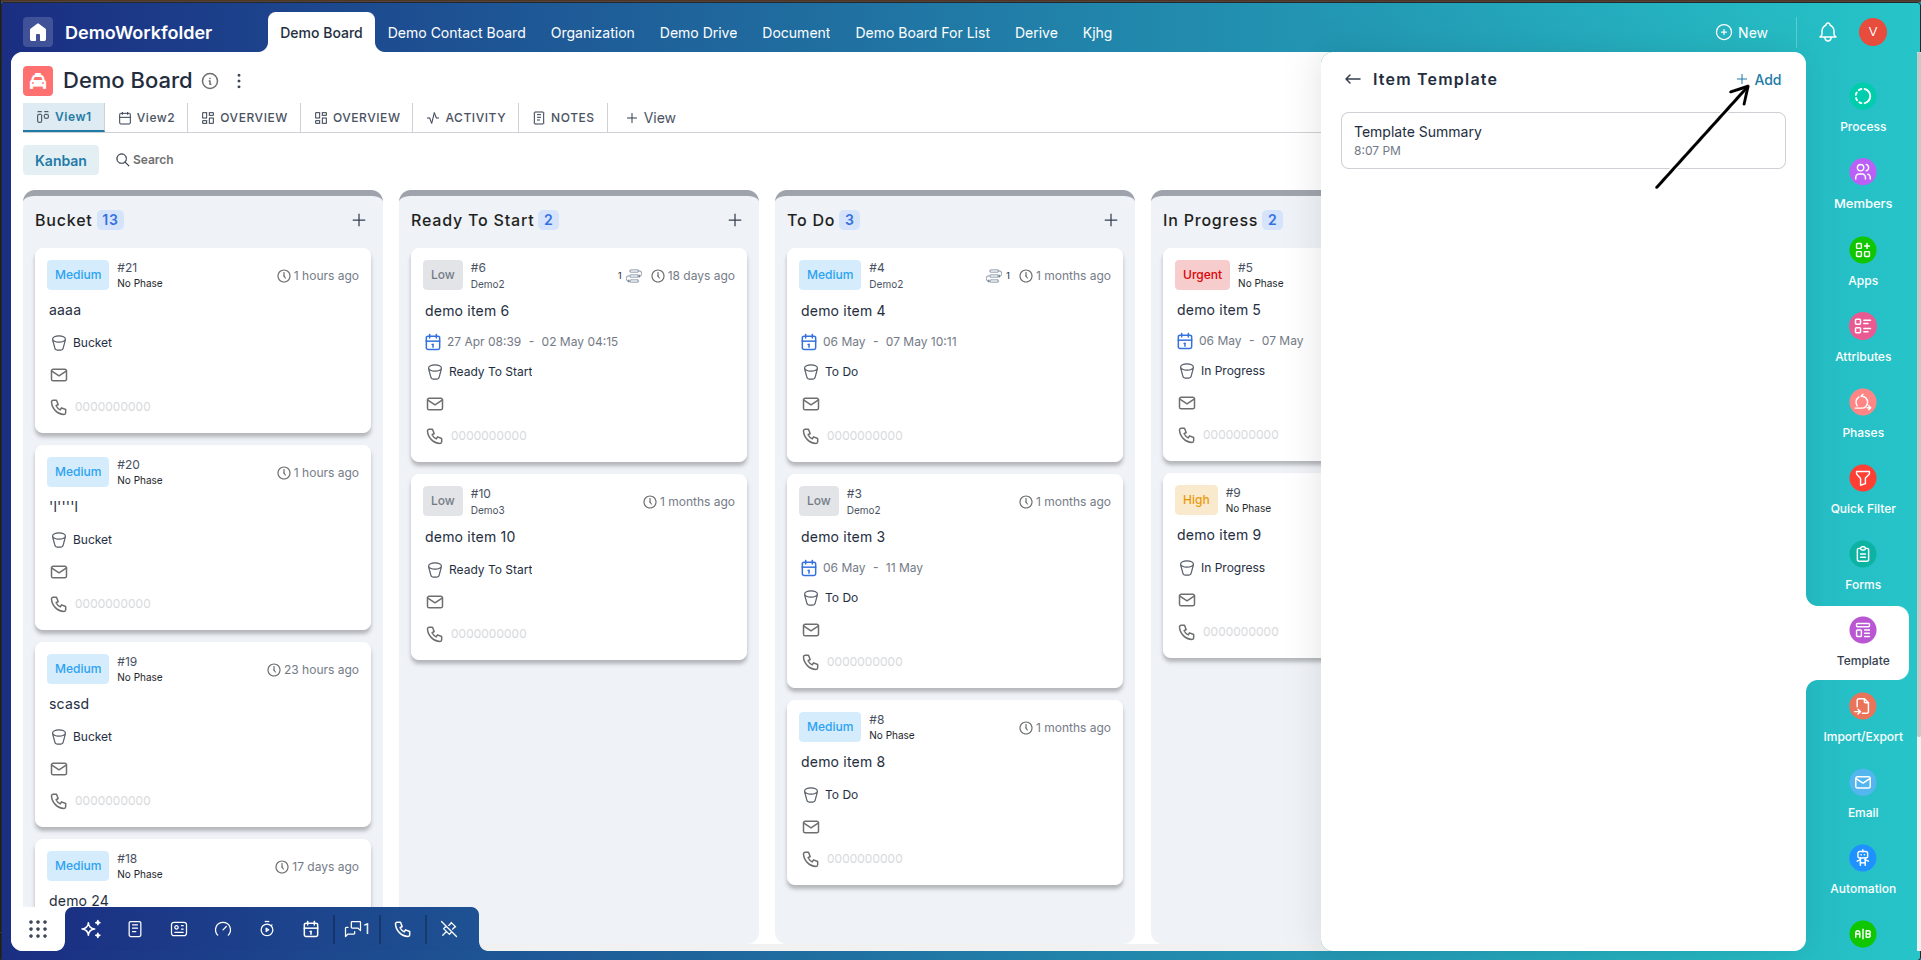
Inside the settings panel, scroll to the Item Templates section and click + Add to create a new template.
-
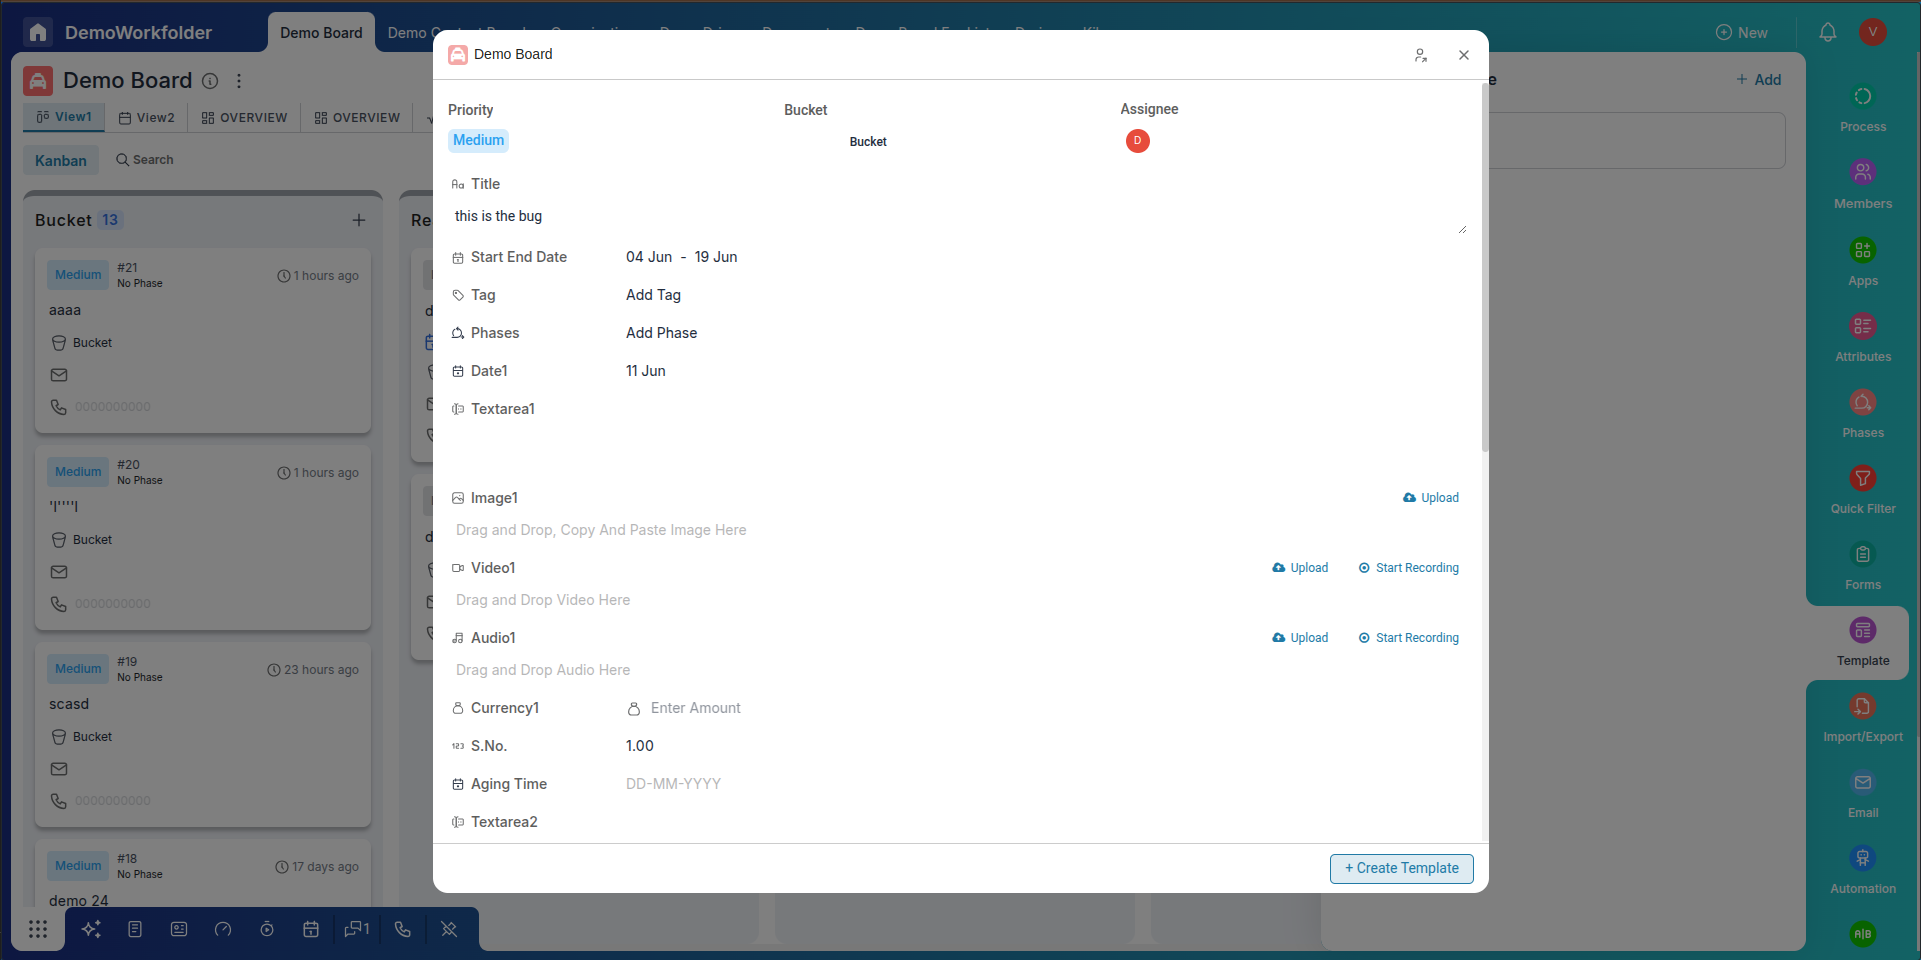
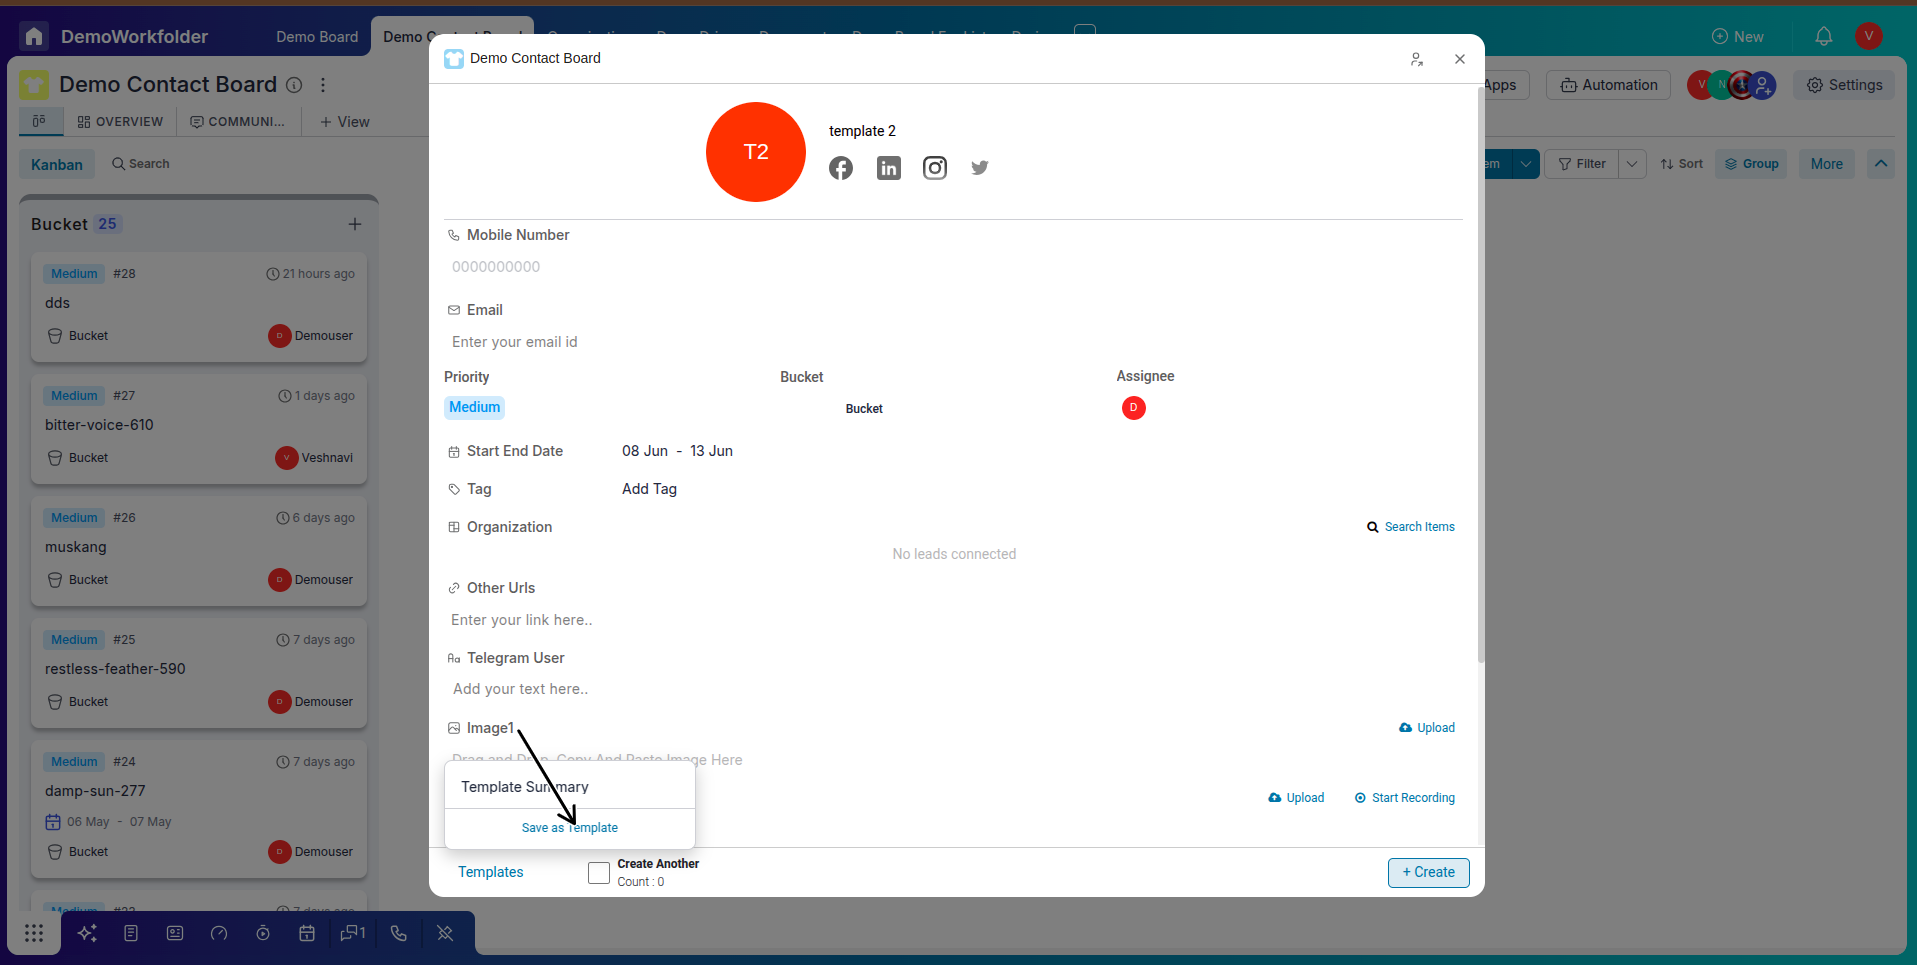
A pop-up will appear where you can fill out all the necessary details — such as the item title, default assignee, due date, tags, checklist items, and more.
-
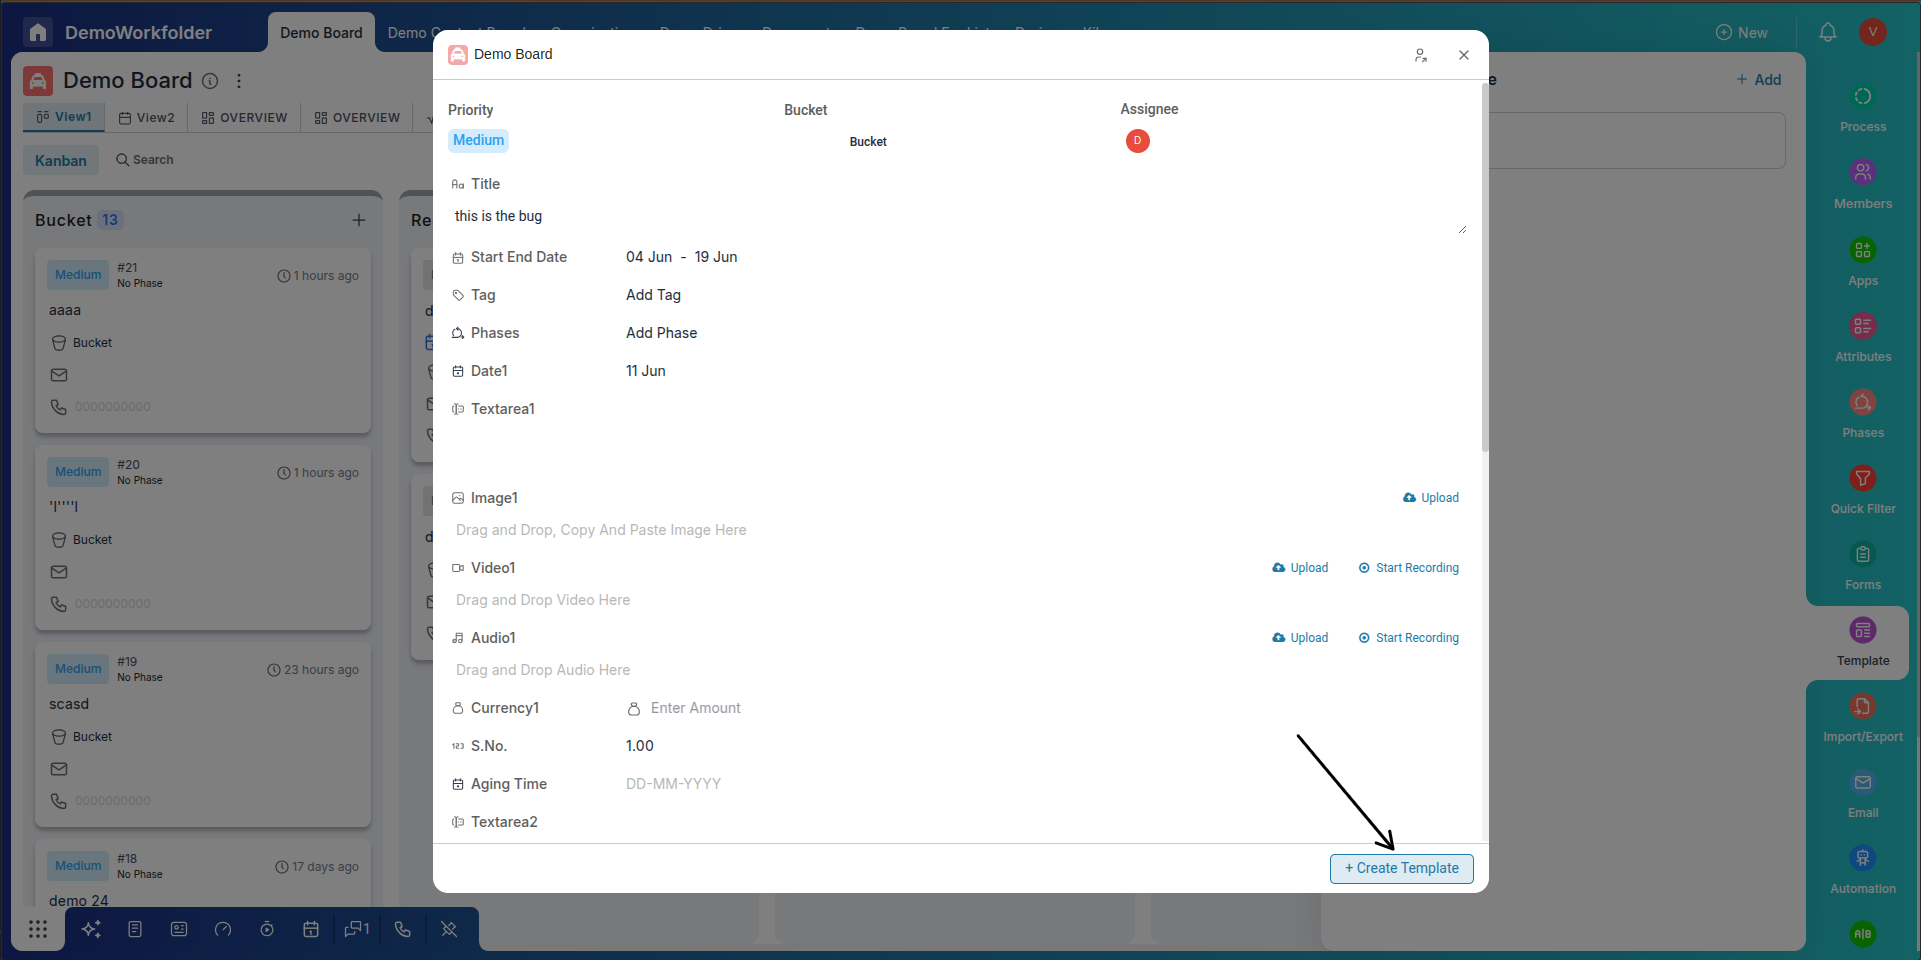
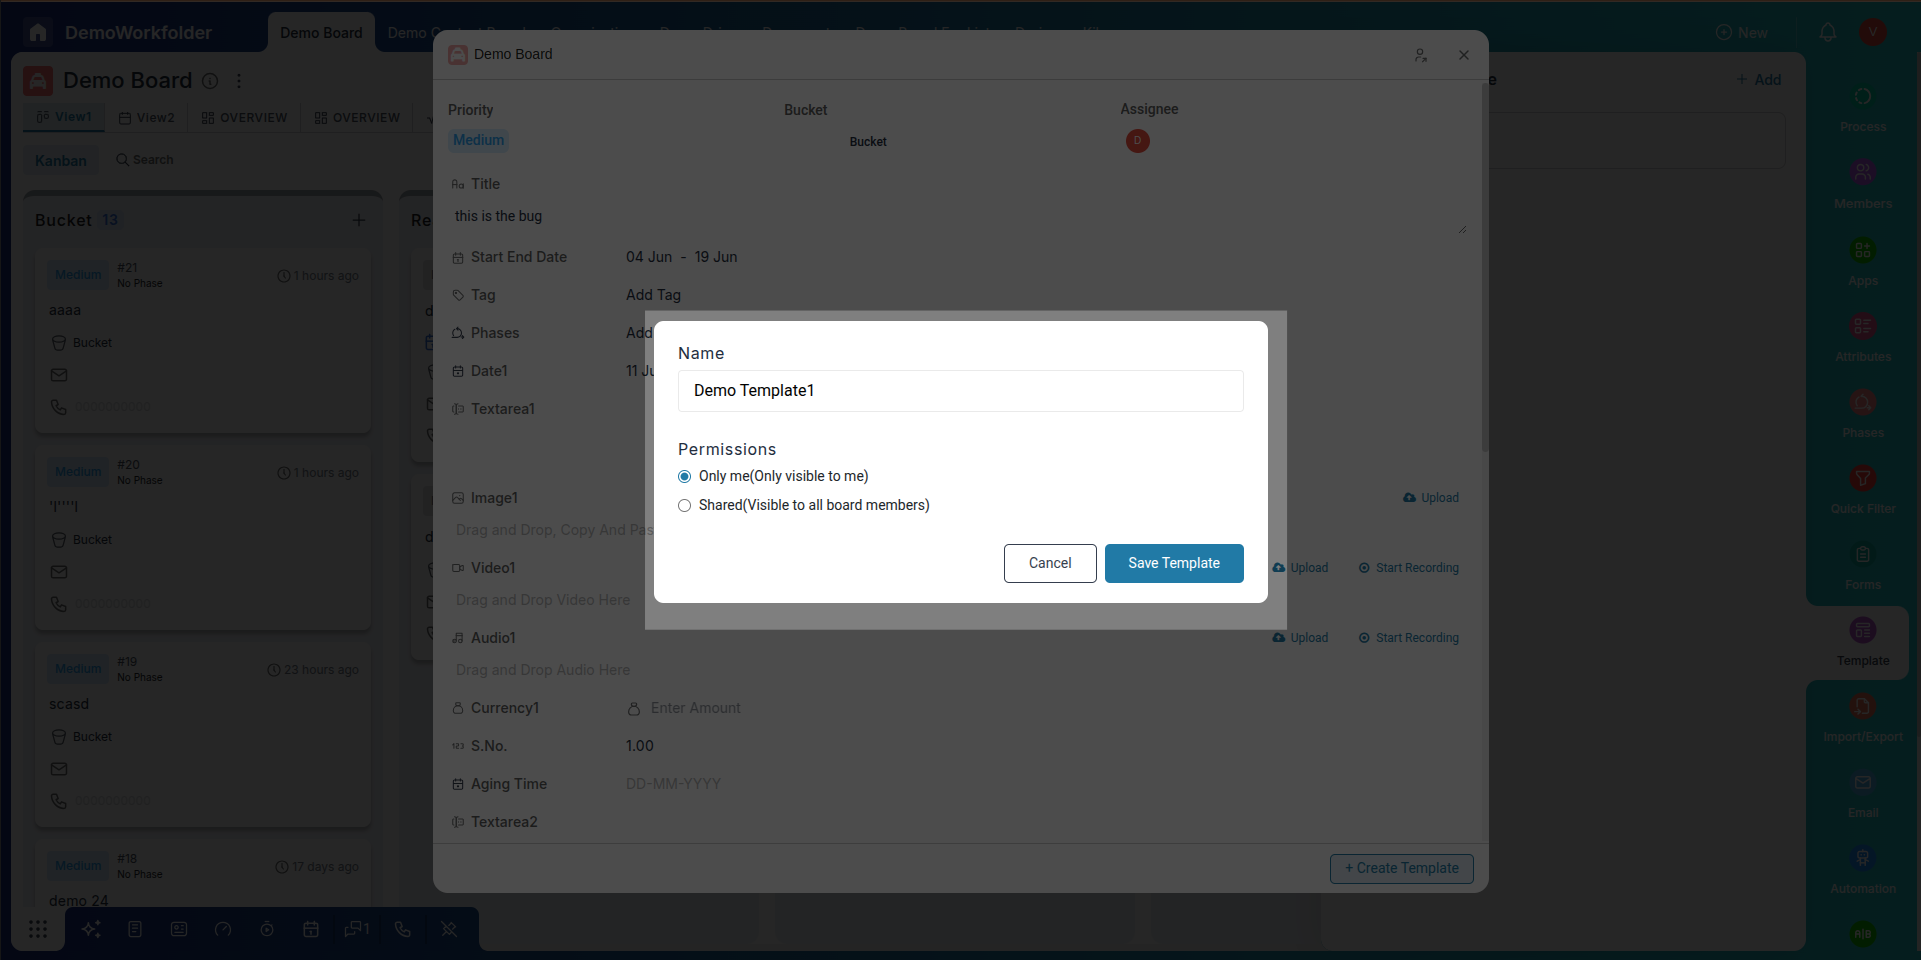
Click Create Template once the details are filled. A final screen will ask you to name the template and set sharing permissions.
-
While working with a template, you can create a new template directly from it. If you select the "Create Another" option, the template window will remain open after creation, allowing you to quickly create multiple items.
-
After this, a pop-up will appear asking you to provide a name for the template and set its visibility — either keep it private to yourself or share it with other board users.
-
Click Save Template to finish. Your new template will now appear in the Item Templates list.
Managing Item Templates
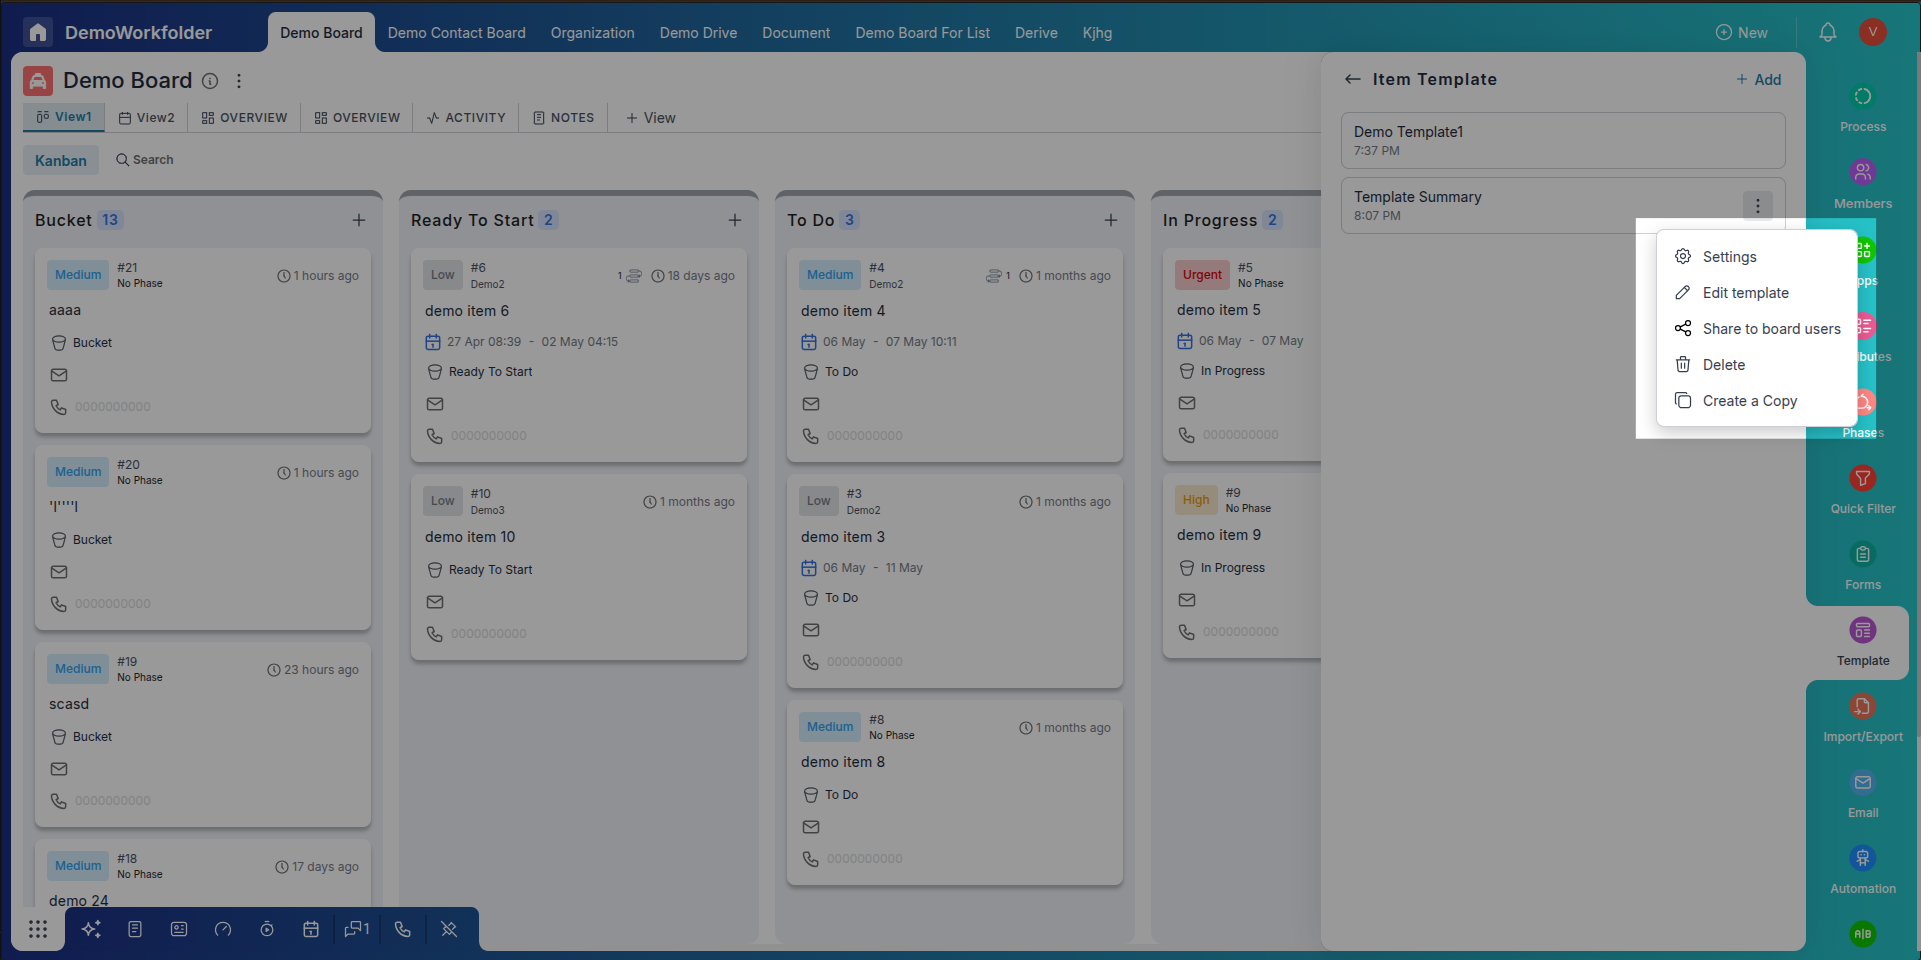
Once created, your templates can be easily managed through the three-dot (⋮) menu next to each template name. Available actions include:
- Rename – Update the template name.
- Edit – Modify fields like title, checklist, or assignee.
- Duplicate – Create a similar version of an existing template.
- Share – Manage visibility for teammates.
- Delete – Remove templates you no longer need.
Using Item Templates to Create an Item
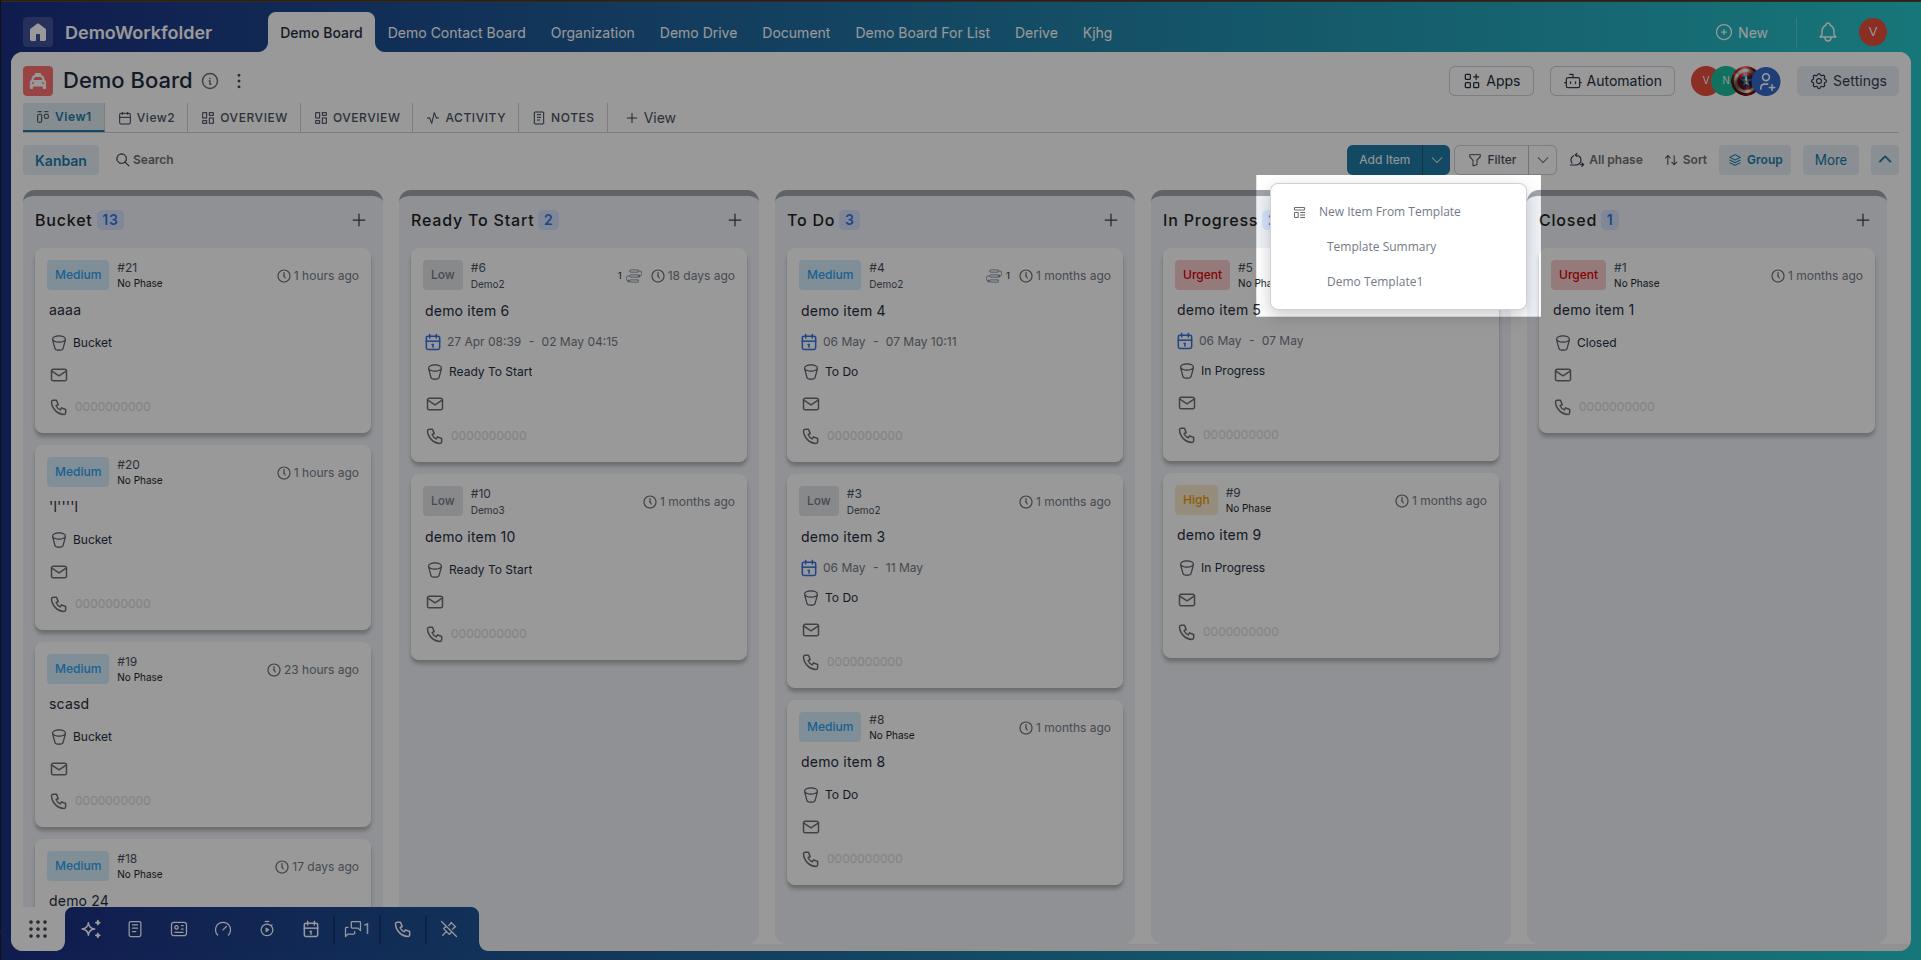
- Go to your board and click the dropdown arrow next to the Add Item button.
- Select the desired template from the list shown.
- The item creation popup will appear with pre-filled values from the template.
- You can modify any value before creating the item — such as changing the due date or updating the description.
- After modifying you can als0 create the template from bottom left button
- Click Create to add the item to your board instantly.
Conclusion
Item Templates in Pronnel let you standardize frequently used task formats, saving time and maintaining consistency across your teams. Whether you're managing projects, onboarding clients, or tracking bugs, item templates offer a flexible way to accelerate task creation and keep your workflow efficient.
Frequently Asked Questions About Item Templates in Pronnel
What is an Item Template in Pronnel?
A reusable setup with pre-filled fields like title, assignee, due date, tags, and checklist—used to quickly create consistent items.
Where do I create templates?
Open Board Settings → Item Templates → + Add. Fill details and save.
Can I pre-assign users?
Yes. Choose a default assignee while configuring the template.
Are templates board-specific?
Yes, unless boards are connected.
Can I edit a template later?
Yes. Use the template’s three-dot menu → Edit to update fields.
Does deleting a template affect existing items?
No. Items created from that template remain unchanged.
Can I duplicate a template?
Yes. Use Duplicate from the template menu to create a variation.
Who can access my templates?
Only users you share the template with can see and use it.
Can templates include checklists or subtasks?
Yes. Add checklist items and subtasks during setup.
How do I use a template to create an item?
Use the Add Item dropdown → select your template; modify prefilled values if needed, then Create.