Zoho Sign Integration with Pronnel - A Complete Guide
Connect Zoho Sign to Pronnel to keep agreements and execution aligned. This guide covers setup, adding Zoho Sign to views and items, and keeping status visible for your teams.
Steps To Follow
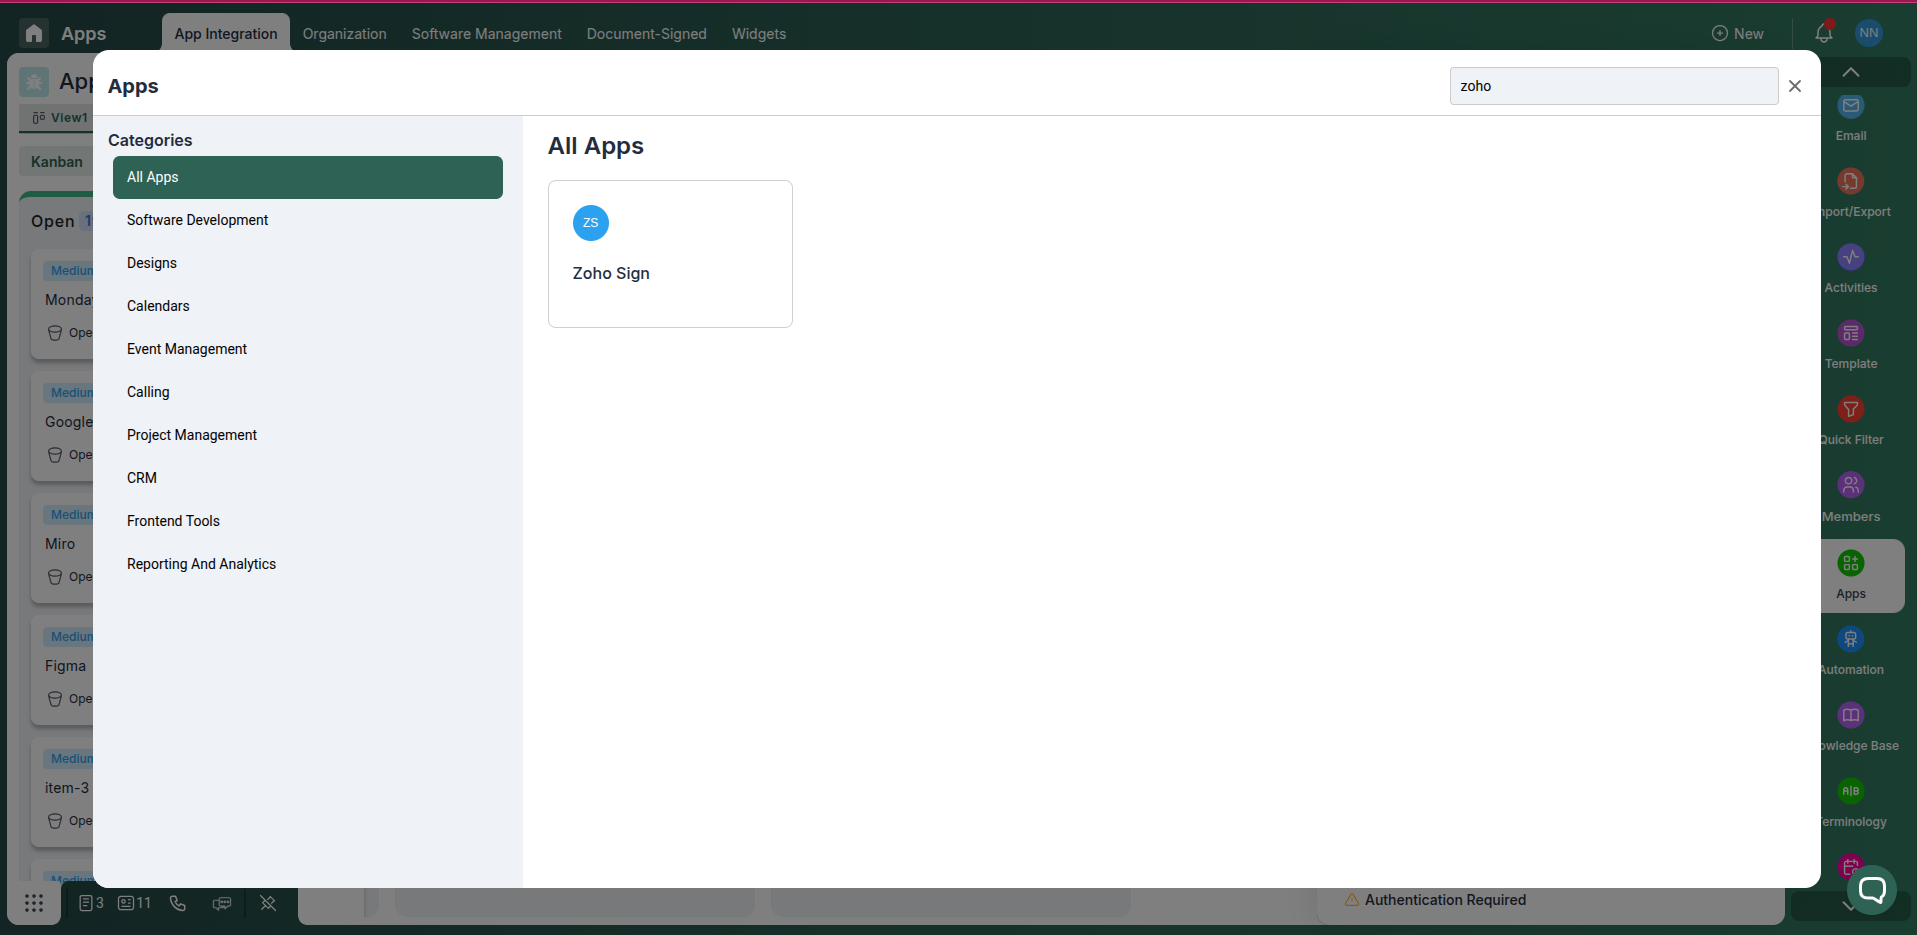
Step 1: Access App Integration in Pronnel
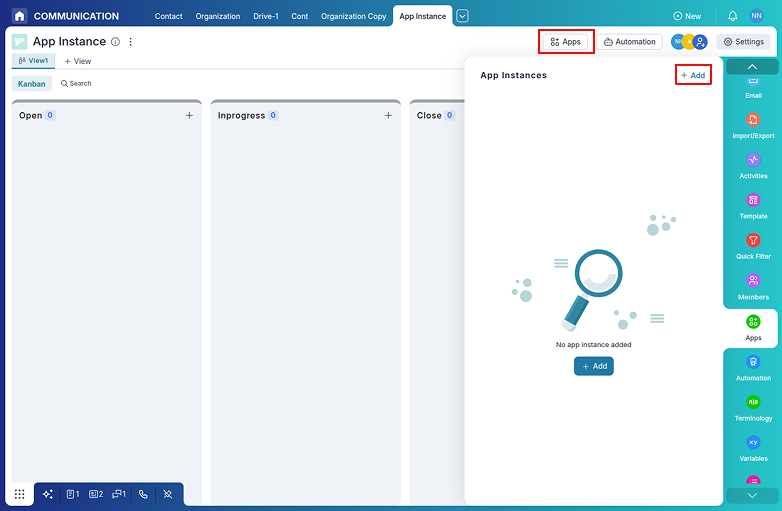
Open Pronnel and go to the Apps section. Find the Zoho Sign integration card to begin setup.
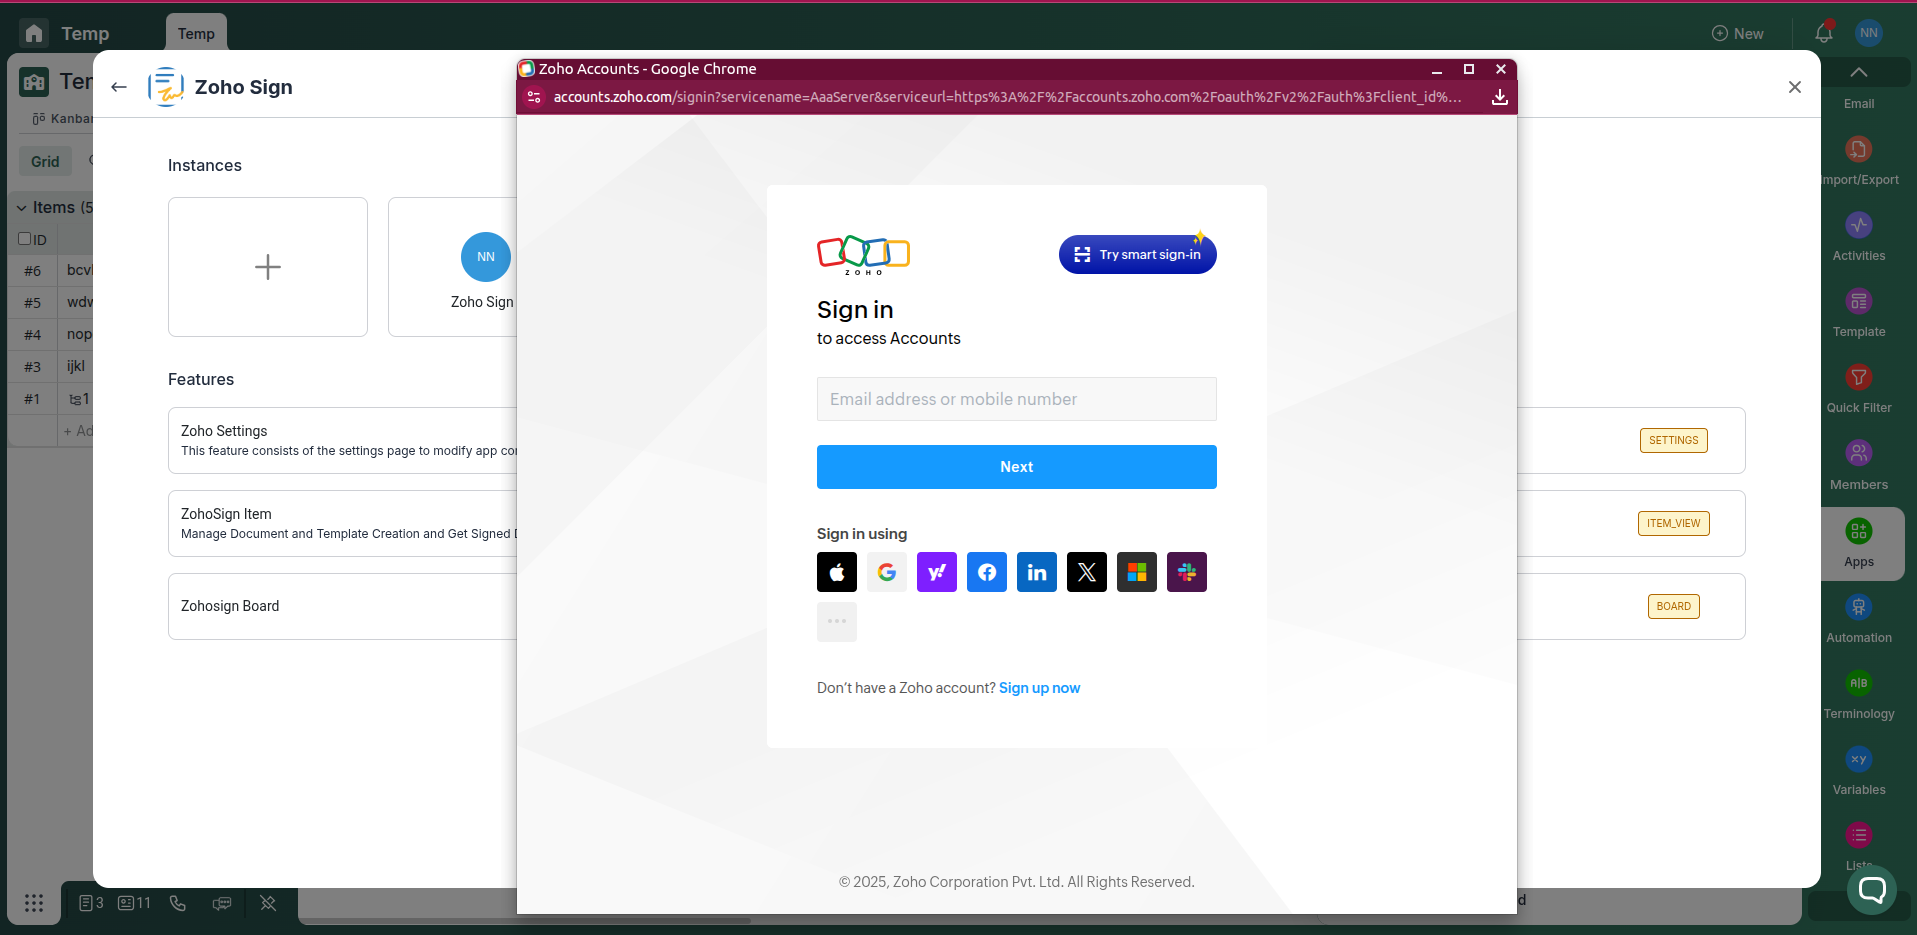
Step 2: Connect Your Zoho Sign Account
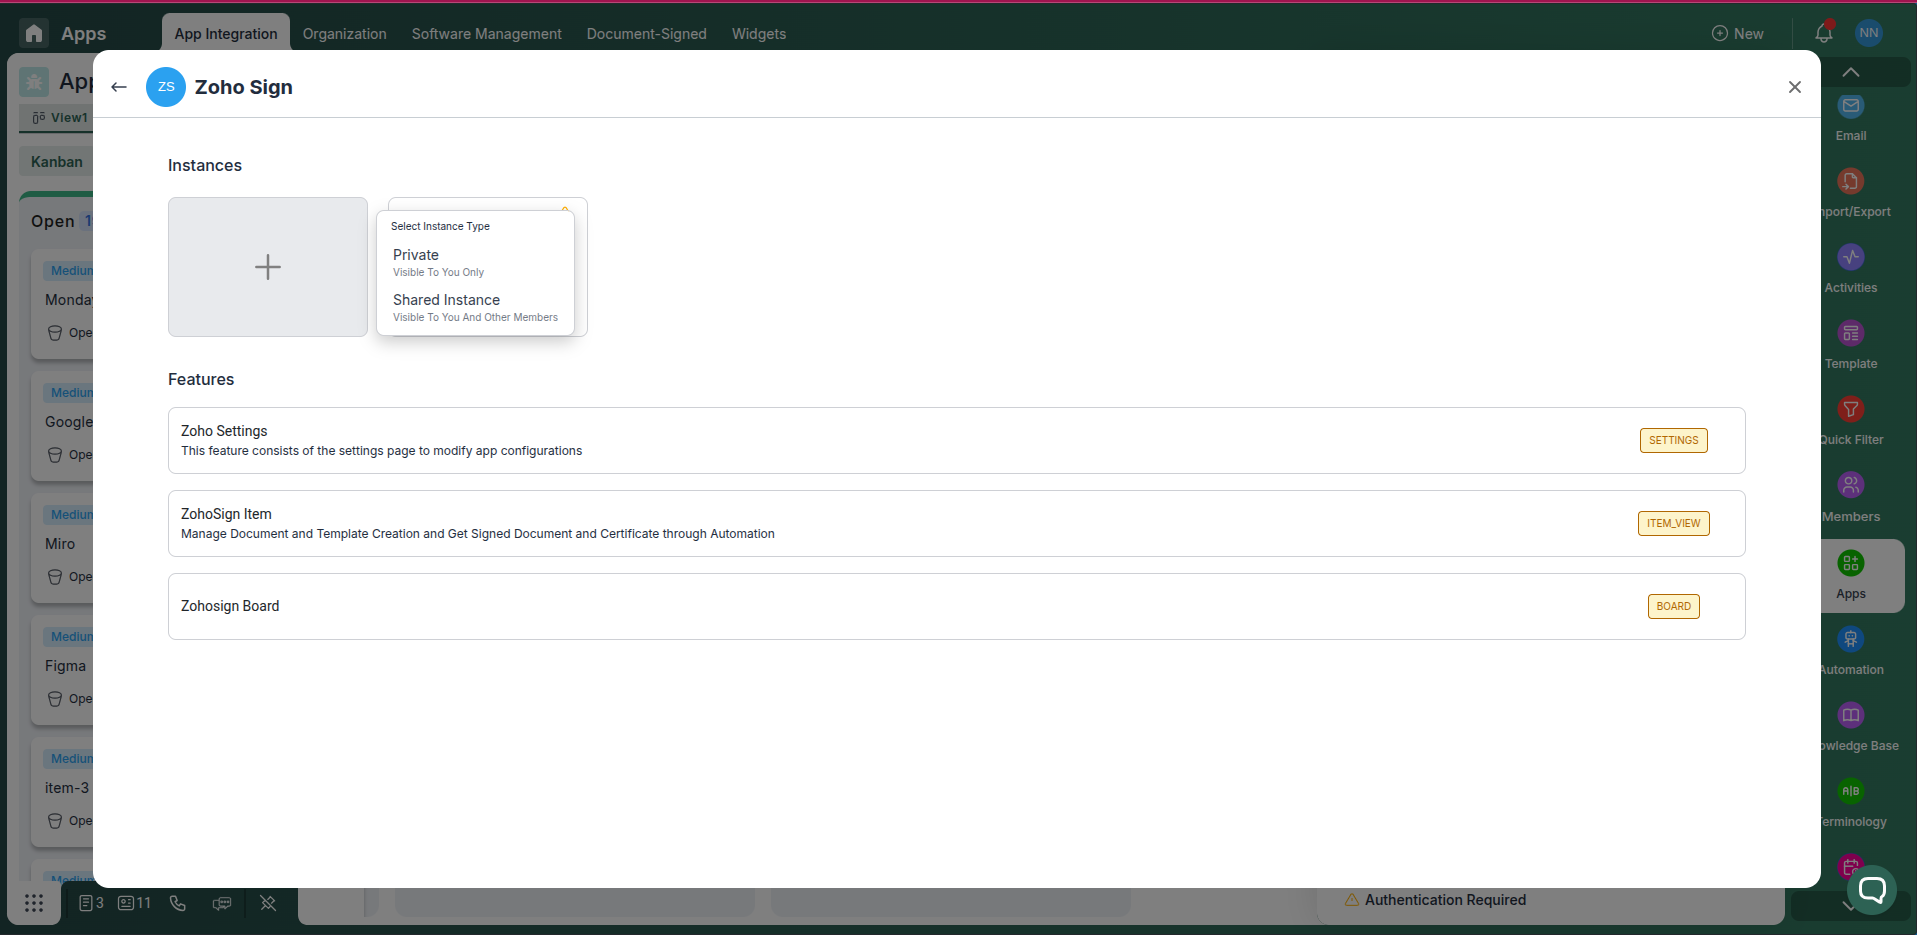
Choose a Private or Shared instance and authorize Pronnel to access your Zoho Sign workspace as needed.
Step 3: Access your SignWell account
Log in to your SignWell account.
Step 4: Open Developer Settings
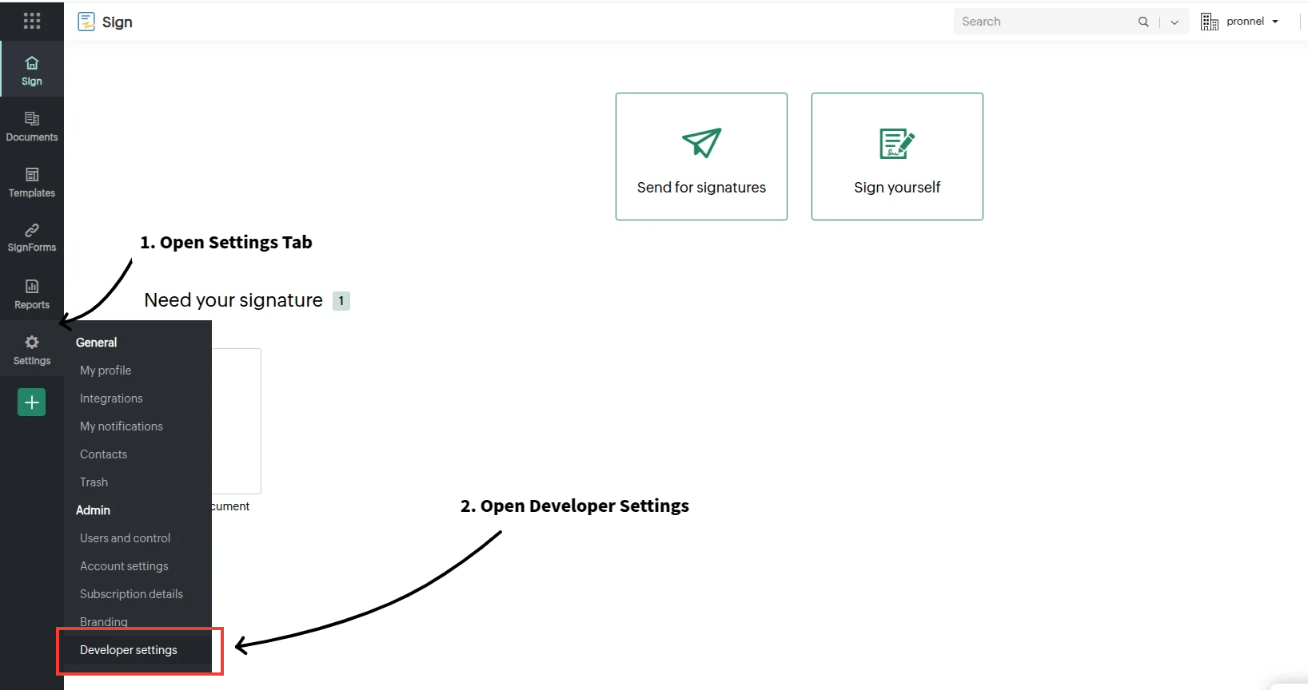
In Zoho Sign, go to the Settings tab and select Developer Settings.
Step 5: Create a Webhook
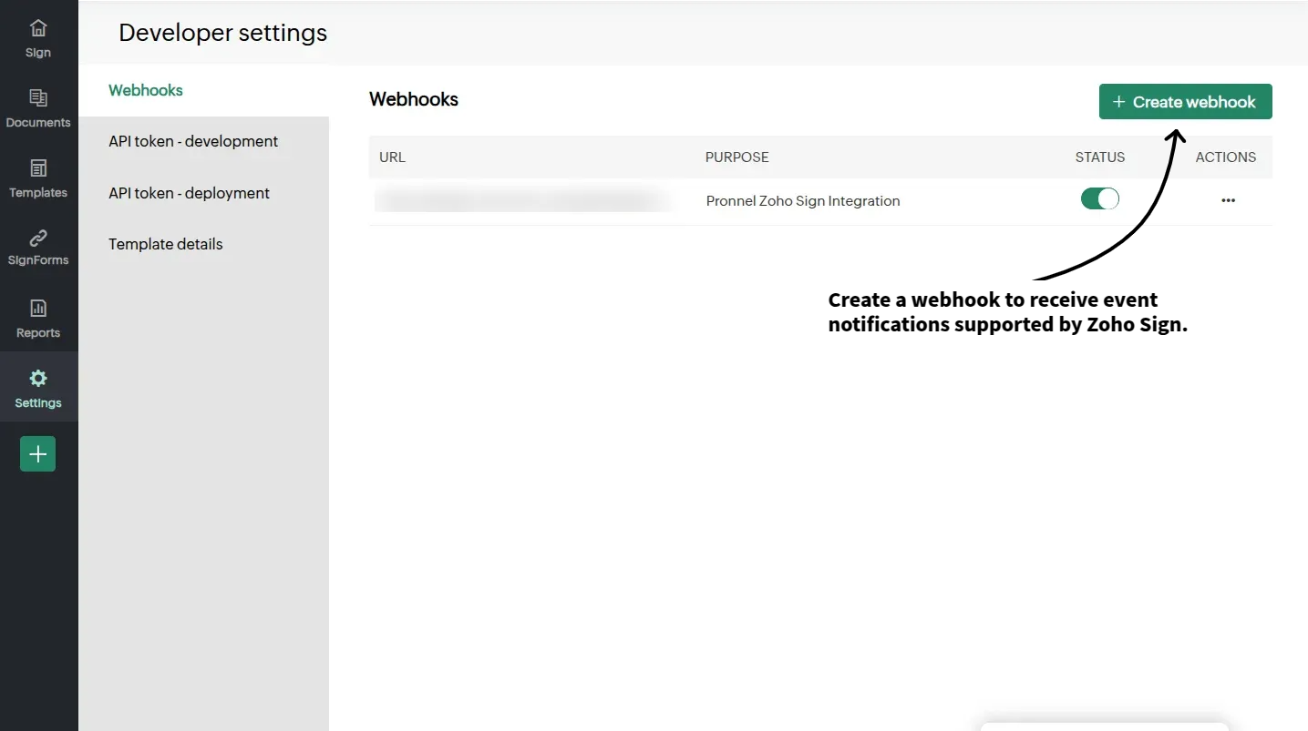
Create a new webhook in Zoho Sign to receive notifications about document signing activities.
Step 6: Configure Callback URL and Events
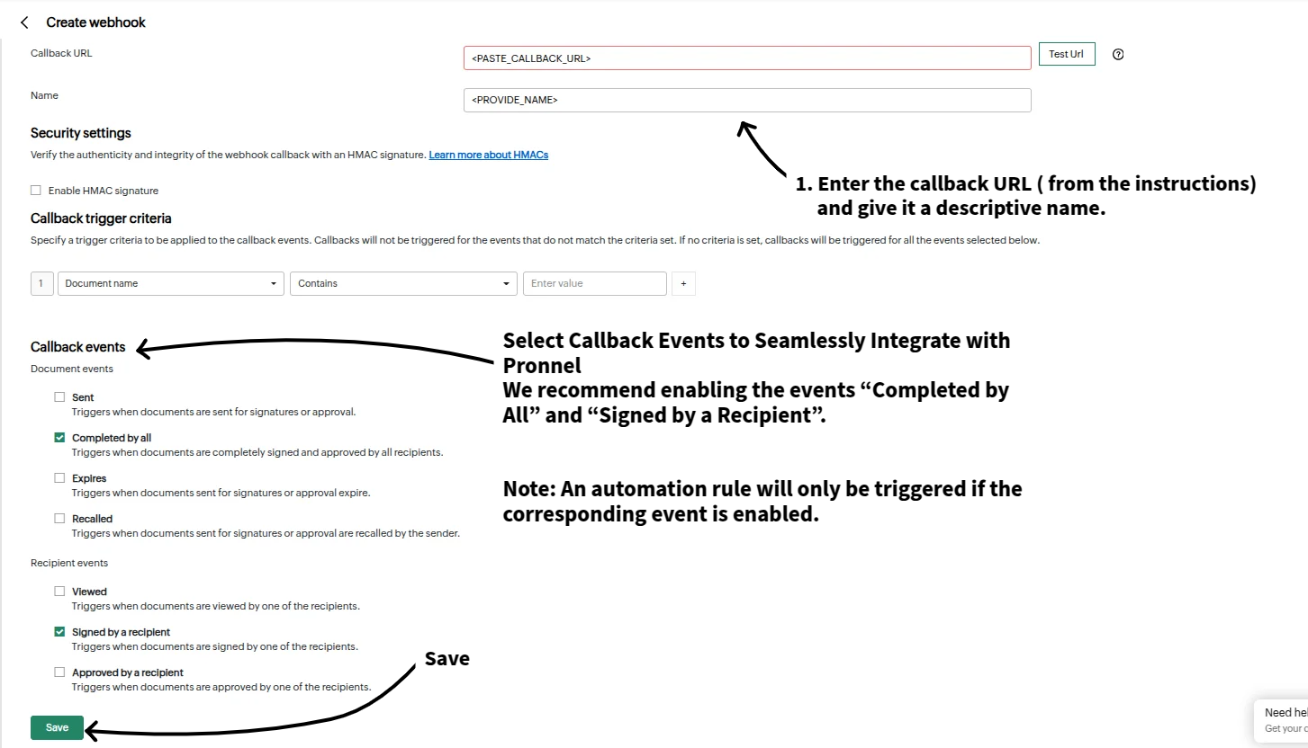
Add the callback URL below and select the events:
https://plugins.pronnel.com/app31/app/common/webhook
Events: Document events > Completed by all, Recipient events > Signed by a recipient
Click on Save.
Step 7: Create a instance in pronnel item and configure the SignWell URL


Once the instance is created, upload document want to sign with email
Step 8: Setup automation rules
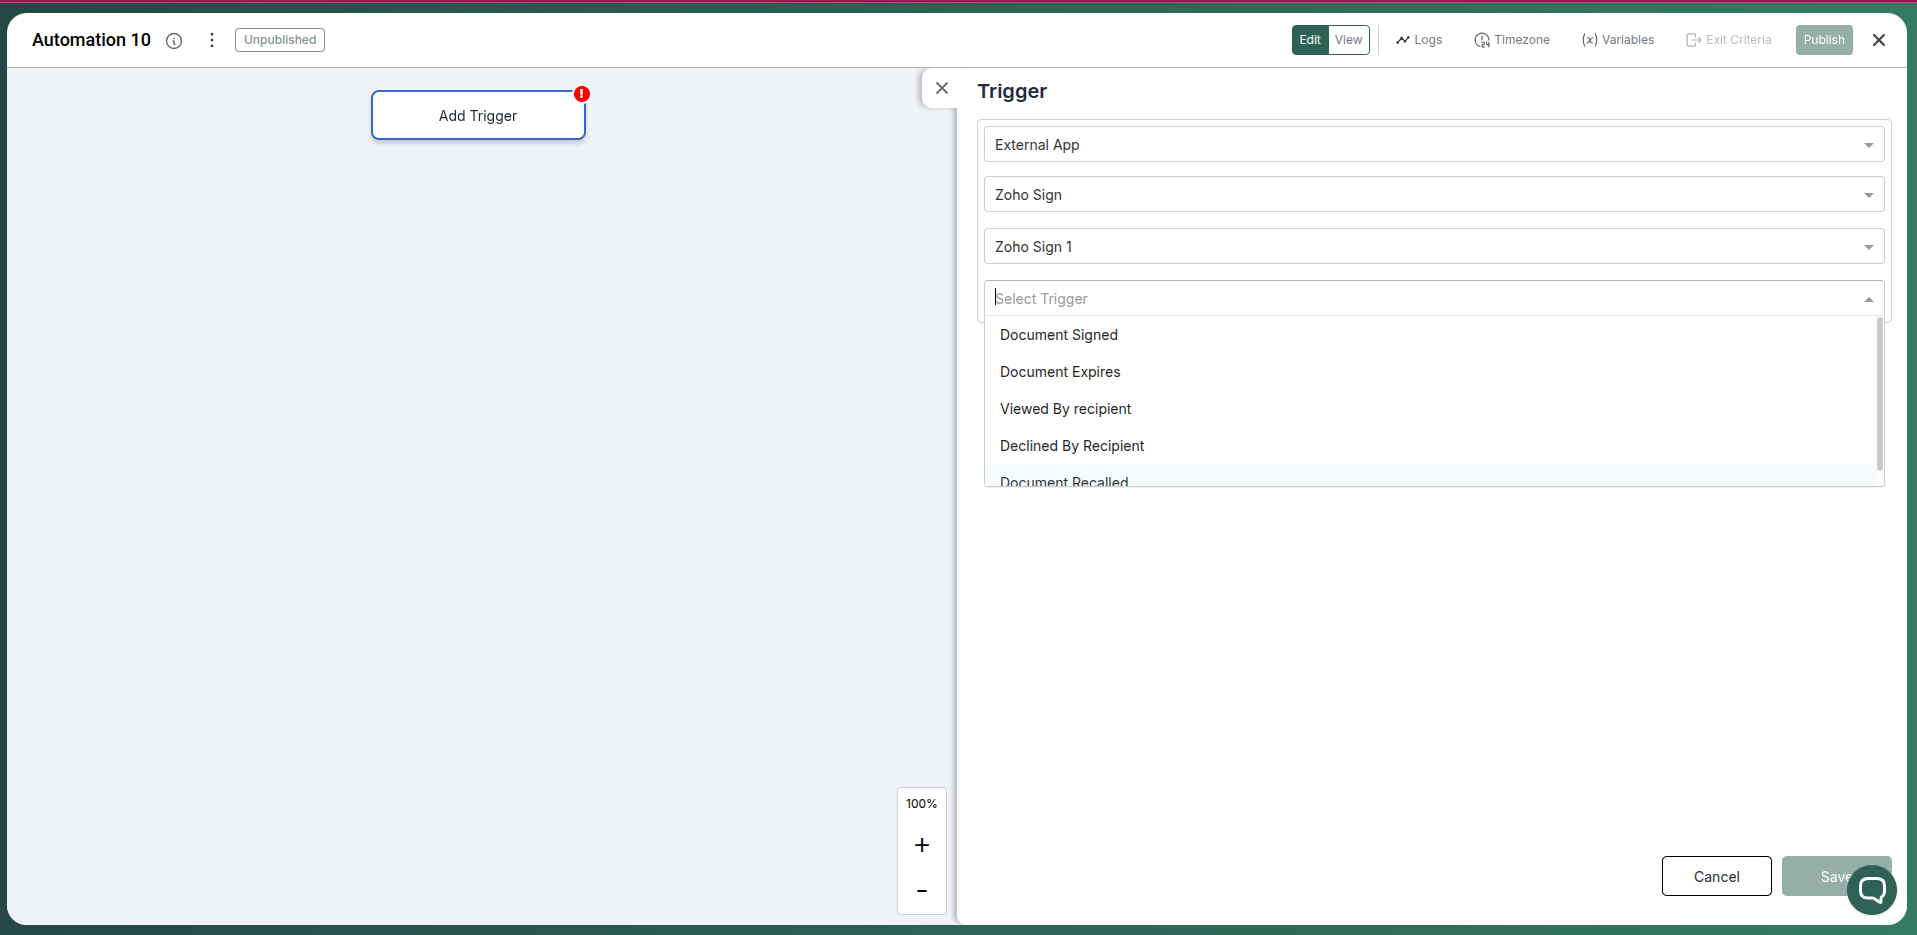

Setup automation rules to automate the document signing process. You can do this by creating a new automation rule and configuring the conditions and actions.
Conclusion
The Zoho Sign integration with Pronnel keeps agreements connected to delivery. Maintain visibility and ownership from draft to signed, and keep stakeholders aligned without tool switching.
Frequently Asked Questions About Zoho Sign Integration with Pronnel
Does the integration copy data to Pronnel?
No. Documents remain in Zoho Sign and are referenced in Pronnel for context.
Can I limit which documents are accessible?
Yes. Choose access during authorization and manage it in instance settings.
Are automations supported?
This integration is designed for visibility and collaboration, not workflow triggers.