Dinstar SIP Setup with Pronnel - A Complete Guide
Enhance your communication infrastructure by connecting your Dinstar SIP Gateway with Pronnel. This comprehensive guide will walk you through the step-by-step process of configuring SIP trunks, mapping port groups, and setting up two-way routing to bridge your telephony hardware with Pronnel's AI-driven channel management.
Steps To Follow
Step 1: Configure SIP Trunk in Dinstar
Once logged in, navigate to the Call Configuration menu and select SIP Trunk Configuration. This section defines the communication bridge between your hardware and the Pronnel server.
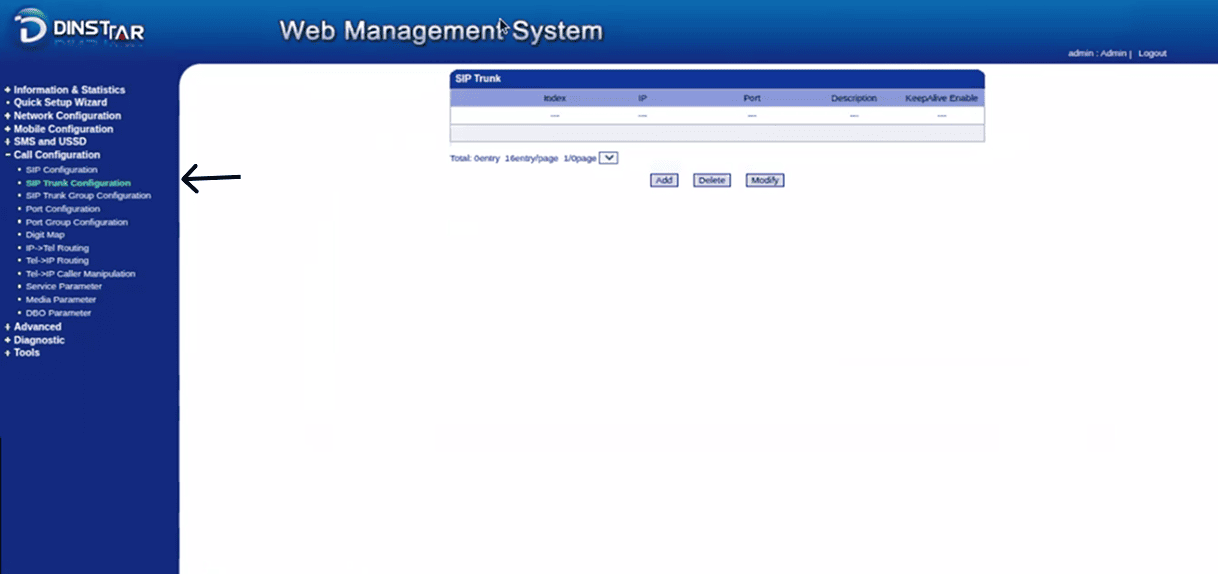
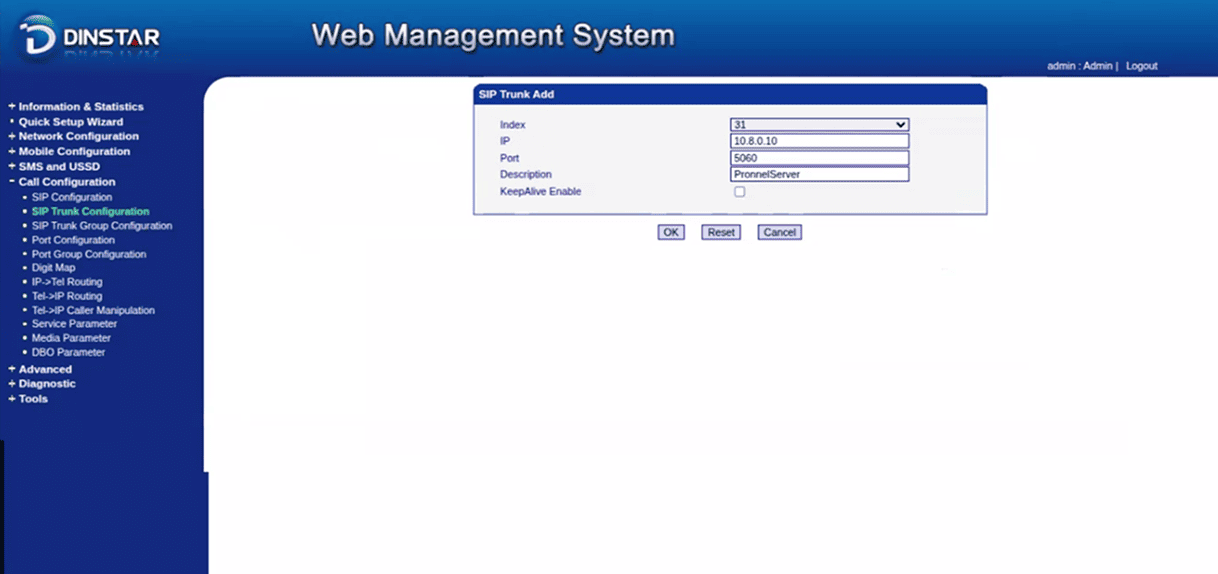
You can either modify an existing entry or click to add a new one. Enter the Server IP and Port (usually 5060 unless specified otherwise). Provide a clear description so you can identify this trunk later, then press OK to finalize the trunk addition.
Step 2: Create and Configure SIP Channel in Pronnel
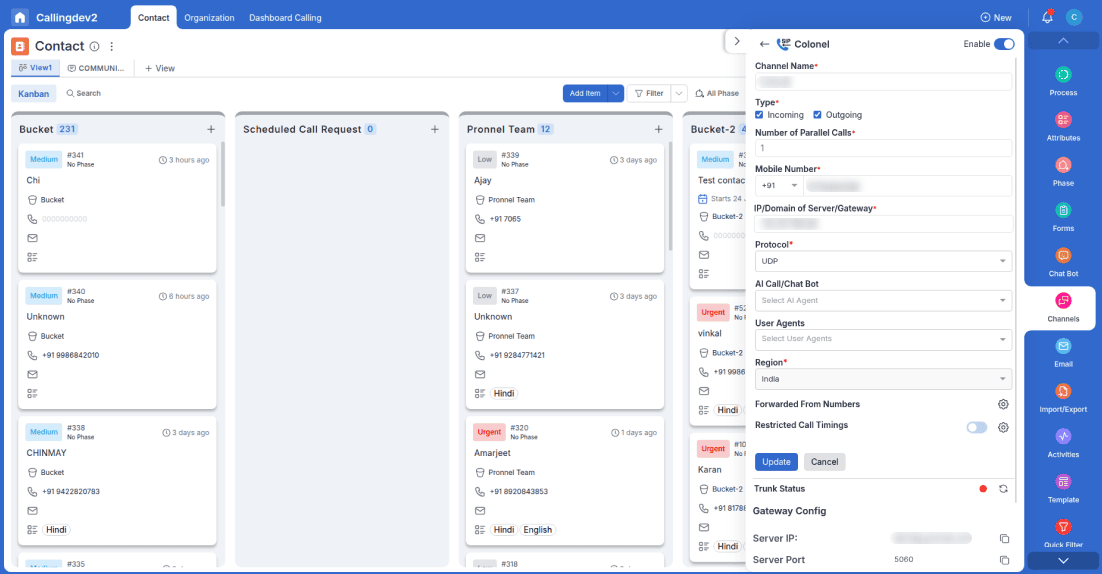
Switch to your Pronnel dashboard and navigate to Settings > Channel > Add SIP. Here, you will define how Pronnel interacts with your Dinstar gateway.
Fill in the following details:
- Channel Name: A unique name for your reference.
- Call Direction: Specify if this is for incoming or outgoing traffic.
- Parallel Calls: Define the capacity of simultaneous calls allowed.
- Gateway Info: Add your Mobile Number and the IP/Domain of your server.
After selecting your preferred chatbot, user agents, and region, click Create Channel. Crucially, reopen the channel immediately after creation to view the Gateway Config. You will need the SIP User ID, Authenticate ID, and Password for the next steps.
Step 3: Port Group and SIP Registration
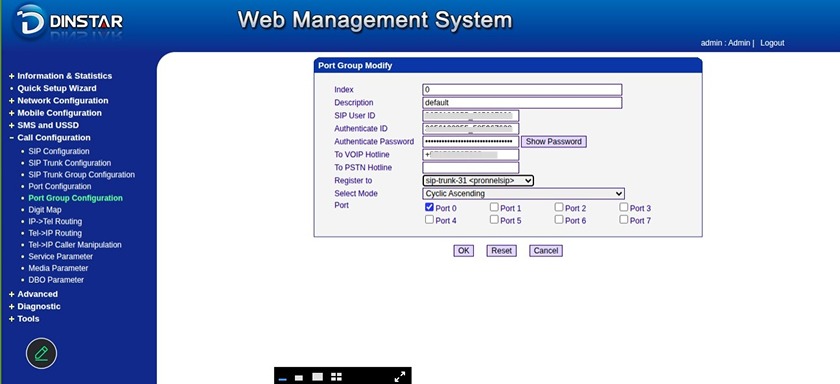
Return to the Dinstar management interface and go to Call Configuration > Port Group Configuration. This step maps your physical SIM ports to the digital SIP credentials you just generated in Pronnel.
Before modifying, you can check which ports are active by visiting Information and Statistics > Mobile Information. In the Port Group settings, enter the SIP User ID, Authenticate ID, and Password obtained from Pronnel. Set the "To VOIP Hotline(This will be your number)" to your SIP number and ensure Register to SIP Proxy is enabled. Set the Mode to Cyclic Ascending to ensure even usage of your SIM cards.
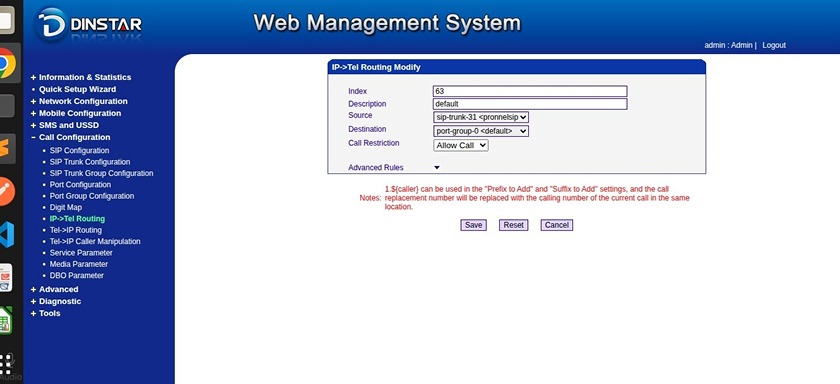
Step 4: Define IP to Tel Routing (Outgoing)
To enable outgoing calls from Pronnel through your gateway, navigate to Call Configuration > IP -- > Tel routing. This rule tells the device how to handle signals coming from the internet (IP) and sending them to the mobile network (Tel).
Click Add and set the Source as your SIP Server and the Destination as your Port Group. Ensure that Call Restrictions are set to "Allow Call" and save your settings.
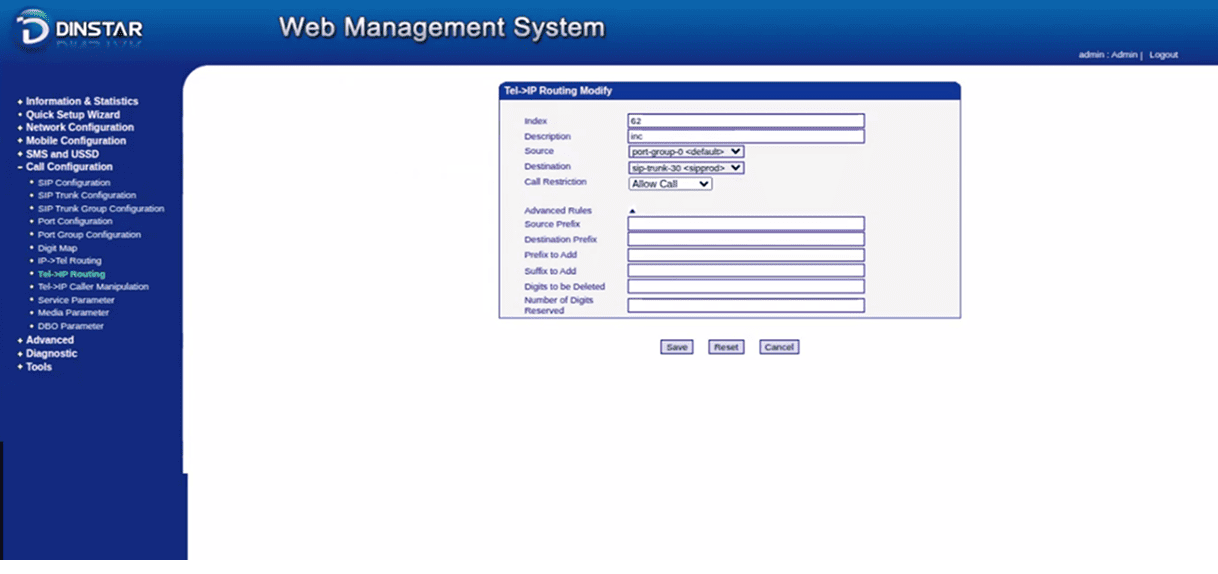
Step 5: Define Tel to IP Routing (Incoming)
To ensure Pronnel receives calls made to your SIM cards, navigate to Call Configuration > Tel -- > IP routing. This creates the reverse path for incoming signals.
Add a new routing rule where the Source is the Port Group and the Destination is the SIP Server. Just like the previous step, set the restrictions to Allow Call and save the configuration.
Step 6: Verify and Refresh Pronnel
With both Dinstar and Pronnel configured, go back to the Pronnel SIP Channel settings. Refresh the channel status to confirm the registration is successful.
Your Dinstar SIP setup is now complete. You can now start managing calls, assigning AI chatbots, and tracking communication logs directly within the Pronnel platform.
Conclusion
Dinstar SIP integration with Pronnel creates a powerful bridge between your physical telephony hardware and your digital project management workflow. By following this guide, you can seamlessly connect your GSM/VoIP gateway to enable AI-powered calling, automate customer interactions, and maintain a unified communication log.
The integration allows you to maintain full visibility into your calling activity directly from your Pronnel boards, ensuring that sales teams and support agents stay aligned. With the power of SIP channels, you can reduce hardware silos and focus on scaling your business communication effectively.
Remember to regularly monitor your port status and update your routing rules as your business needs evolve. For additional support, visit Pronnel Support or check out our YouTube channel for more hardware integration tutorials.
Frequently Asked Questions About Dinstar SIP Setup with Pronnel
What should I do if my Dinstar IP is not the default 192.168.11.1?
If you cannot access the gateway at the default IP, check your local DHCP client list or use a network scanner to find the device's assigned IP. Ensure your computer is on the same subnet as the gateway.
Where can I find my SIP credentials in Pronnel?
Once you create a SIP channel in Pronnel Settings, you must open or edit that specific channel. The Gateway Configuration section will then display your unique SIP User ID, Authenticate ID, and Password.
How many parallel calls can I handle with this setup?
This depends on the number of SIM ports available on your Dinstar device and the "Parallel Calls" limit you set within the Pronnel SIP channel configuration.
Why is my SIP trunk showing as "Unregistered"?
Check that the Register to SIP Proxy option is enabled in Dinstar and that the credentials match exactly what is provided in Pronnel. Also, ensure your firewall allows traffic on port 5060.
Can I use this for both incoming and outgoing calls?
Yes. By setting up both IP-to-Tel (Outgoing) and Tel-to-IP (Incoming) routing rules in the Dinstar configuration, you enable full two-way communication.
Does this setup support AI chatbots for voice calls?
Yes, when configuring the SIP channel in Pronnel, you can select specific chatbots and user agents to handle calls routed through your Dinstar gateway.